Struggling to capture accurate proportions in your artwork? You’re not alone, and there’s a proven solution waiting for you.
Grid drawing offers a systematic technique that artists have trusted for centuries to achieve precise, realistic results.
This method breaks complex images into manageable sections, making it easier to translate reference photos onto paper with confidence and accuracy.
Whether you’re sketching portraits, landscapes, or still life compositions, mastering this technique will upgrade your artistic abilities and boost your confidence.
Let’s look at everything you need to know about grid drawing, from essential tools to advanced techniques used daily by professionals.
What is Grid Drawing?
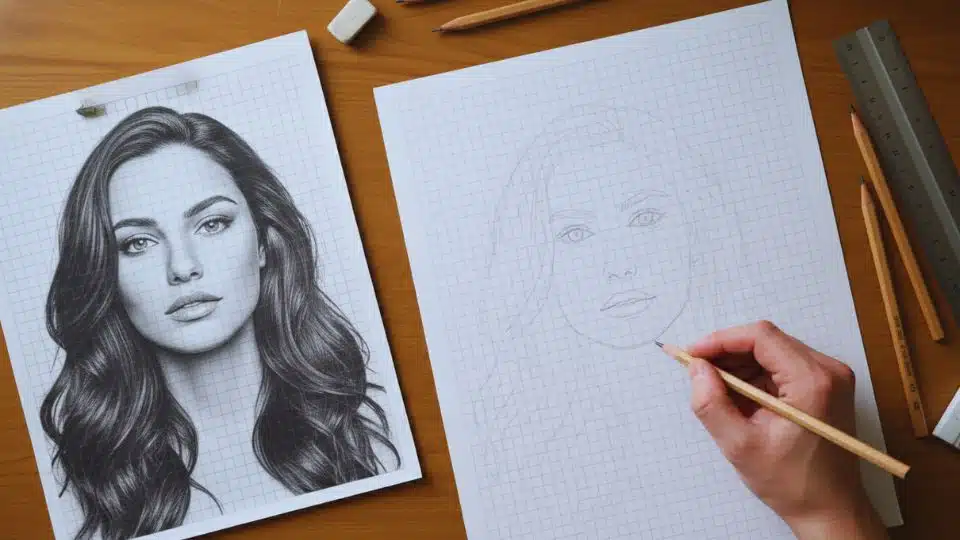
Grid drawing involves overlaying equally spaced horizontal and vertical lines over both your reference image and your drawing surface.
You then transfer visual information from each square of the reference to the corresponding square on your canvas or paper.
This method ensures accurate proportions by breaking down overwhelming visual data into small, manageable sections that feel less intimidating to tackle.
The technique works by isolating portions of the image, allowing you to focus on shapes, lines, and values within individual squares.
Renaissance masters like Leonardo da Vinci employed this method to create their masterpieces with remarkable precision and consistent proportional accuracy.
Preparing for Your Grid Drawing
Now that you know the meaning and significance, it’s time to gather your materials and set up for a successful grid drawing session.
Proper preparation lays the foundation for successful grid drawing and ensures a smooth, frustration-free execution throughout your artistic process.
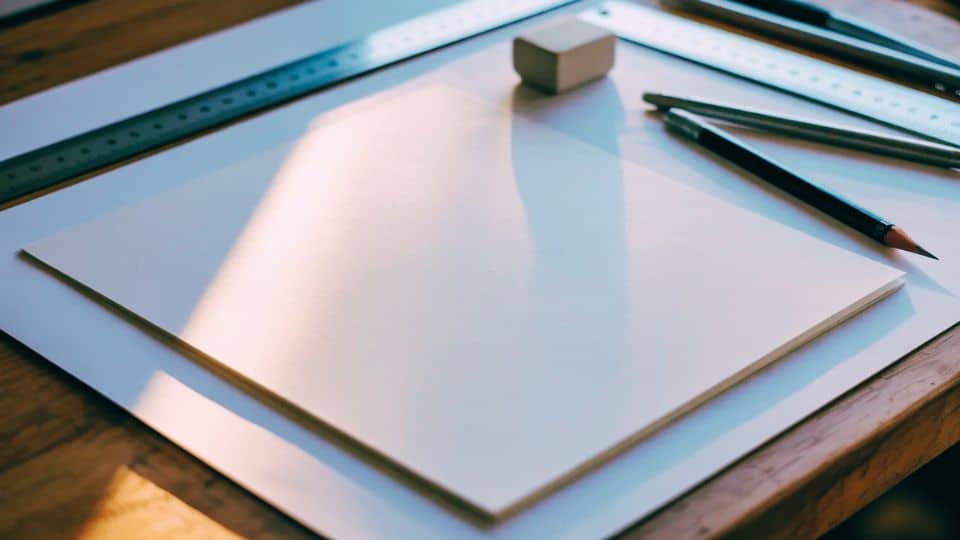
Essential Tools and Materials You’ll Need
Having the right tools makes your grid drawing experience smoother and more enjoyable from the very first square you draw.
Here’s a comprehensive breakdown of what you’ll need to get started with grid drawing today:
| Tool | Recommendation |
|---|---|
| Ruler or Straight Edge | 12-inch clear ruler for visibility |
| Pencils | 2H for grids, HB/2B for drawing |
| Eraser | Kneaded or vinyl eraser for gentleness |
| Reference Photo | High-resolution printed or digital image |
| Drawing Paper | Smooth Bristol or drawing paper |
| Lightbox (Optional) | LED lightbox for even illumination |
| Digital Tools (Alternative) | Procreate, Photoshop, or Grid Maker apps |
Quality materials enhance your accuracy and make the entire process more enjoyable, leading to better results and faster skill development.
Choosing the Right Reference Photo
Selecting the right reference image sets the foundation for a successful grid drawing experience, especially when you’re just starting out today.
- Select high-resolution images with clear details and good contrast to ensure you can see all the important shapes and values clearly.
- Simple compositions with distinct shapes work best for beginners who are learning to navigate the square-by-square transfer process effectively and accurately.
Starting with photographs of single objects or simple portraits helps build confidence before you tackle more elaborate, challenging compositions.
Step-by-Step Guide to Grid Drawing
With your tools ready and reference photo selected, let’s walk through the complete process of creating your first grid drawing masterpiece.
Following a systematic approach ensures accuracy and reduces frustration throughout your grid drawing project, from initial setup to final completion.
Step 1: Prepare Your Reference Image
Start by obtaining a clear reference image of the subject you want to draw, whether in digital or print format.
For beginners, printing out the image is highly recommended because it’s easier to work with and mark up during the drawing process.
Consider converting your reference image to grayscale if you plan to draw in pencil, as this simplifies value matching significantly.
Having a printed reference allows you to draw grid lines directly on it without worrying about damaging your screen or device.
With your reference ready, it’s time to prepare the surface where your masterpiece will come to life beautifully.
Step 2: Set Up Your Drawing Surface
Choose a high-quality drawing surface, such as Bristol board, which offers a smooth texture ideal for detailed pencil work and precise shading.
A high-quality paper makes a noticeable difference in how your pencil glides across the surface and how well it holds graphite.
Ensure your drawing surface is large enough to accommodate your desired final image size while maintaining comfortable working space around the edges.
Position your paper on a flat, stable surface with good lighting to prevent shadows from obscuring your view.
Now that both surfaces are ready, let’s create the grid system that makes accurate drawing possible for everyone.
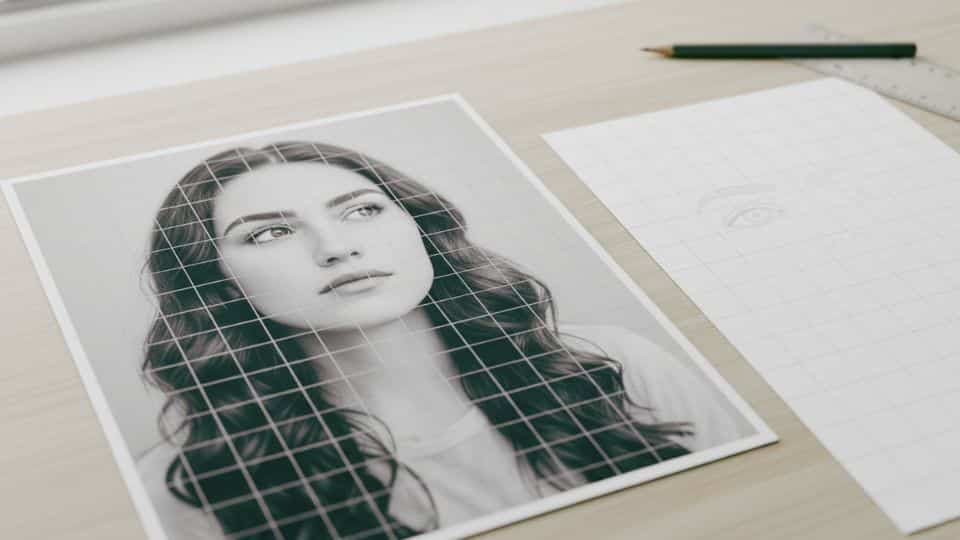
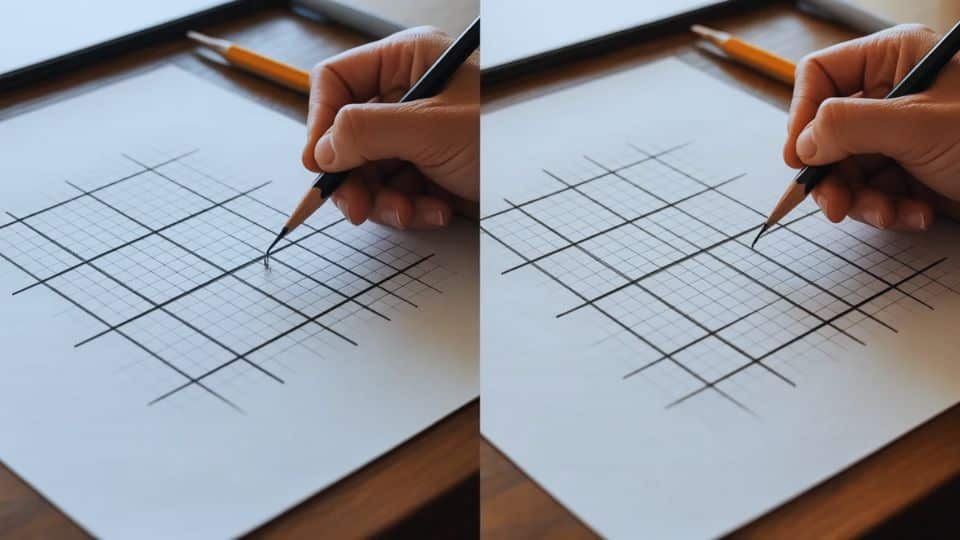
Step 3: Apply the Grid Method
Use a ruler to draw a light grid on your reference image, creating evenly spaced horizontal and vertical lines that divide it.
Replicate the exact same grid proportionally onto your drawing surface, ensuring the number of squares matches perfectly between both surfaces for accuracy.
Use a harder pencil, like 2H, for your grid lines so they remain light and easy to erase later without leaving marks.
Double-check that all squares are equal in size on both your reference and drawing surface before you begin the actual drawing.
With your grids in place, you’re ready to start transferring the image square by square onto your drawing surface.
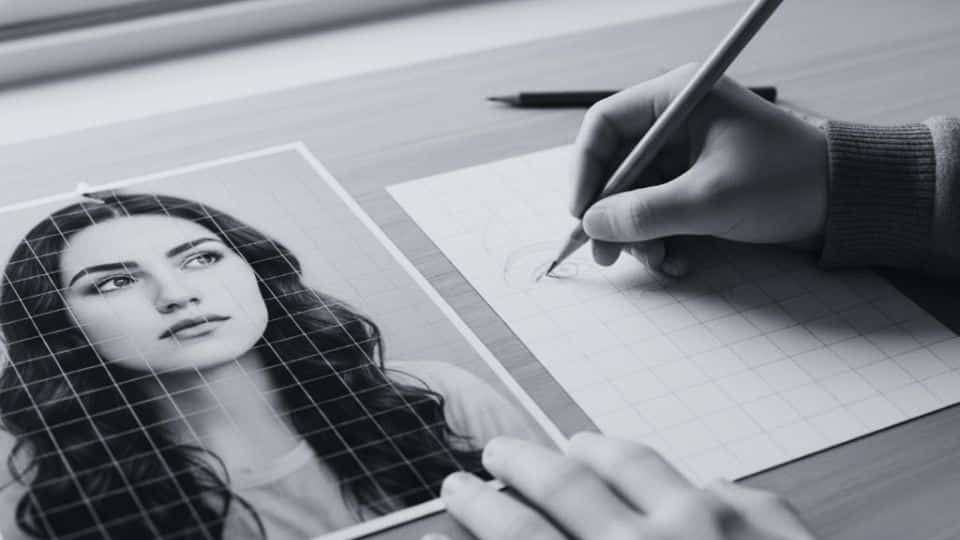
Step 4: Outline the Drawing Using the Grid

Begin outlining your drawing by focusing on one grid square at a time, carefully observing the shapes and lines within each section.
This methodical approach helps you stay accurate while sketching features like facial details, shadows, and complex shapes without feeling overwhelmed.
Find where lines intersect the grid boundaries, and replicate those exact intersection points on your corresponding drawing surface, square by square.
Work systematically across your drawing, completing one square before moving to the next to maintain consistency and avoid confusion throughout the process.
Once your outline is complete, it’s time to clean up the grid and add the finishing touches professionally.
Step 5: Erase Gridlines and Refine Outlines
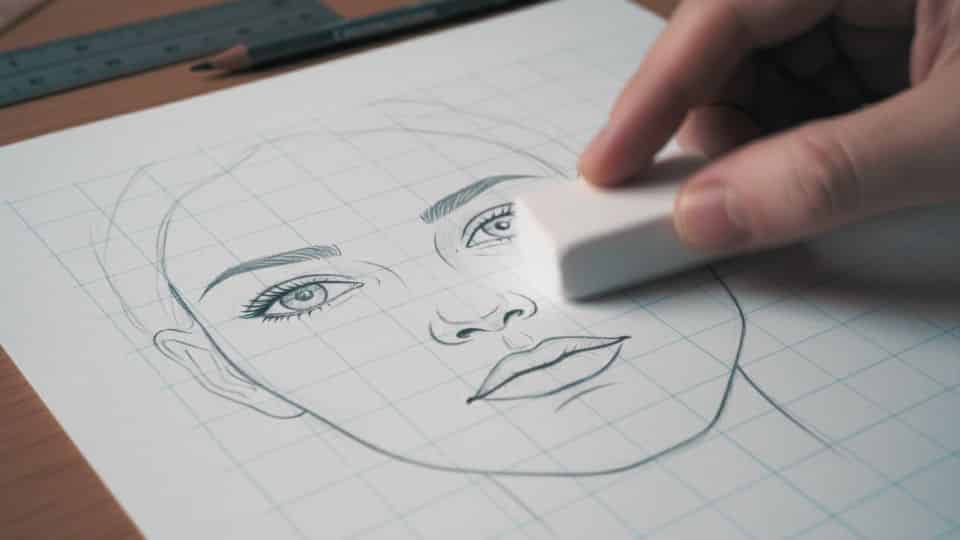
Once your outline is complete and you’re satisfied with the proportions, you can carefully erase the grid lines using a soft eraser.
However, many artists choose to leave the grid lines in place while adding pencil shading, as they typically get covered up naturally.
If you decide to erase immediately, use gentle strokes to avoid disturbing your carefully drawn outlines and damaging the paper surface underneath.
After removing the grid, refine your outlines by darkening important edges and softening areas that need smoother transitions.
Technical Skills in Grid Drawing
Beyond the basic steps, knowing these technical concepts will take your grid drawing accuracy to a professional level of precision.
Mastering the technical aspects of grid drawing significantly improves your accuracy and expands your ability to handle diverse, complex artistic projects.
1. Aspect Ratio and Scaling
Aspect ratio refers to the proportional relationship between width and height, ensuring your drawing maintains the same shape as the reference image.
Calculate scaling by dividing your drawing surface dimensions by your reference photo dimensions to prevent distorted or stretched results in your artwork.
2. Choosing the Right Grid Size for Your Drawing
Smaller grid squares provide more detail and accuracy but require significantly more time, while larger squares work faster for simple images.
Beginners should start with 1-inch squares or 4×4 grids, then progress to smaller half-inch divisions for highly detailed portraits and intricate subjects.
Overcoming Common Challenges in Grid Drawing
Even with perfect technique knowledge, you’ll likely encounter some obstacles, so let’s address how to overcome them effectively and efficiently.
Anticipating obstacles and learning proven solutions help artists navigate difficulties effectively and maintain steady progress throughout their grid-drawing journey.
Being aware of common pitfalls before you start can save you hours of frustration and help you produce more accurate artwork.
Common Mistakes to Avoid
Being aware of these common pitfalls will help you avoid frustration and produce more accurate results from your first attempt.
- Miscounting Squares: This frequent error causes entire sections to shift incorrectly on your canvas, throwing off proportions across the drawing.
- Rushing Through Squares: Working too quickly without careful observation leads to proportion problems that compound and create noticeable distortions throughout your artwork.
- Using Excessive Pressure: Pressing too hard when drawing grid lines makes them extremely difficult to erase later without damaging your paper surface.
- Skipping Complex References: Starting with overly detailed reference images discourages beginners before they develop confidence in the technique and fundamental grid skills.
Now that you know what to avoid, let’s look at proven strategies that will significantly improve your accuracy.
Pro Tips for Enhanced Accuracy
These expert techniques will help you work more efficiently and achieve professional-level accuracy on all your grid-drawing projects.
Label Your Grid Squares: Use alphanumeric coordinates such as A1, B2, and C3 on both your reference and drawing surfaces.
This simple system prevents confusion and helps you maintain proper orientation throughout the entire drawing process, especially when working on larger compositions.
Take Regular Breaks: Step away from your work every 20 to 30 minutes to refresh your eyes and reset your perspective.
When you return, you’ll notice proportion errors and inconsistencies that your brain filtered out during extended focused work sessions on the drawing.
Rotate Your Work Periodically: Turn both your reference and drawing upside down or sideways to spot proportion errors your brain overlooks.
This technique forces you to see shapes objectively rather than as recognizable objects, revealing inaccuracies that need correction before proceeding further.
Start Simple, Then Progress: Practice with basic line drawings and simple shapes before attempting complex photographs with subtle value transitions and intricate details.
Building confidence with easier subjects establishes solid foundational skills that transfer to more challenging projects as you gain experience and proficiency.
Alternative Methods and Digital Tools for Grid Drawing
While grid drawing is powerful, knowing alternative methods gives you more flexibility and helps you choose the best approach for each project.
Diversifying your techniques provides flexibility and helps you choose the most effective method for each unique artistic project and situation.
Other Methods for Transferring Images to Paper
Different techniques offer unique advantages depending on your skill level, project requirements, and personal preferences for creating accurate artwork today.
Here’s a comparison of popular alternative methods:
| Method | Description | Best For |
|---|---|---|
| Loomis Method | Uses constructed head proportions and anatomical guidelines | Portrait drawing and figure work |
| Freehand Drawing | Direct observation without aids or grids | Building observational skills naturally |
| Graphite Transfer Paper | Tracing technique for quick transfers | Simple outlines and quick projects |
| Sight-Size Method | Matching visual sizes from your viewpoint | Traditional realism and studio work |
Each approach offers unique benefits: grids excel at accuracy, while freehand drawing builds intuitive spatial awareness and independent observation skills.
Digital Tools for Grid Drawing
Modern technology offers convenient solutions that save time and provide precise control over your grid drawing process with minimal effort.
Here’s a breakdown of the best digital options available:
Procreate: Built-in grid overlay, easily toggle on/off
Grid Maker: Upload images, customizable square sizes, printable grids
Adobe Photoshop: Guides and pattern overlay for precise control
GridArt: Portable solutions for phones and tablets
Digital tools save time and offer flexibility for adjustments, though some artists prefer traditional methods for tactile engagement and connection.
Conclusion
Grid drawing empowers artists to achieve accurate proportions and realistic results through proven, systematic techniques that simplify even the most complex images.
This method serves beginners building foundational skills and experienced artists tackling challenging compositions with consistent confidence, precision, and professional-quality results.
By breaking images into manageable squares, you’ll train your eye to more accurately see relationships among shapes, values, and spatial elements.
Start with simple subjects and gradually progress to more intricate references as your skills develop naturally through regular practice and patience.
Ready to upgrade your artistic accuracy today? Grab your ruler and reference photo, create your first grid, and experience how this time-tested technique revolutionizes your drawing capabilities immediately!