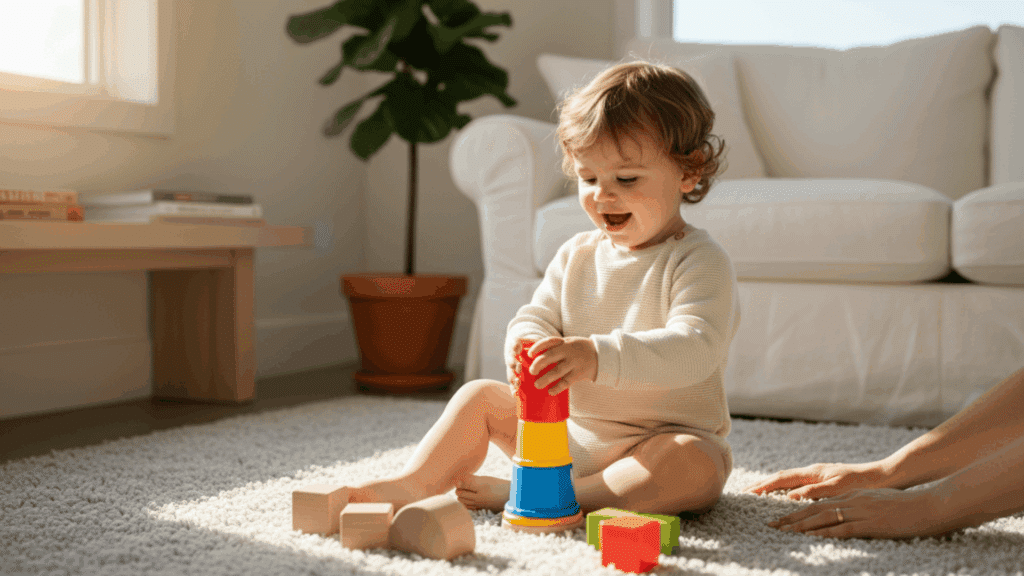
Are you tired of hearing kids say they’re bored? Many parents struggle to find activities that hold children’s attention while encouraging creativity.
Easy art projects for kids solve this problem by offering simple activities with big results.
These projects use materials you already have at home, so there’s no need for expensive supply runs. Children develop important skills like hand-eye coordination, color recognition, and problem-solving while making something beautiful.
The activities range from quiet individual work to messy group fun. Some take just five minutes while others can fill an entire afternoon.
Parents love these projects because setup is quick and cleanup is manageable. Kids love them because they get to express themselves and show off their finished creations.
51 Easy Art Projects for Kids
These easy art projects for kids cover painting, sculpting, collaging, and more. Each activity uses basic household items and works for different age groups and skill levels.
1. Watercolor Resist Art
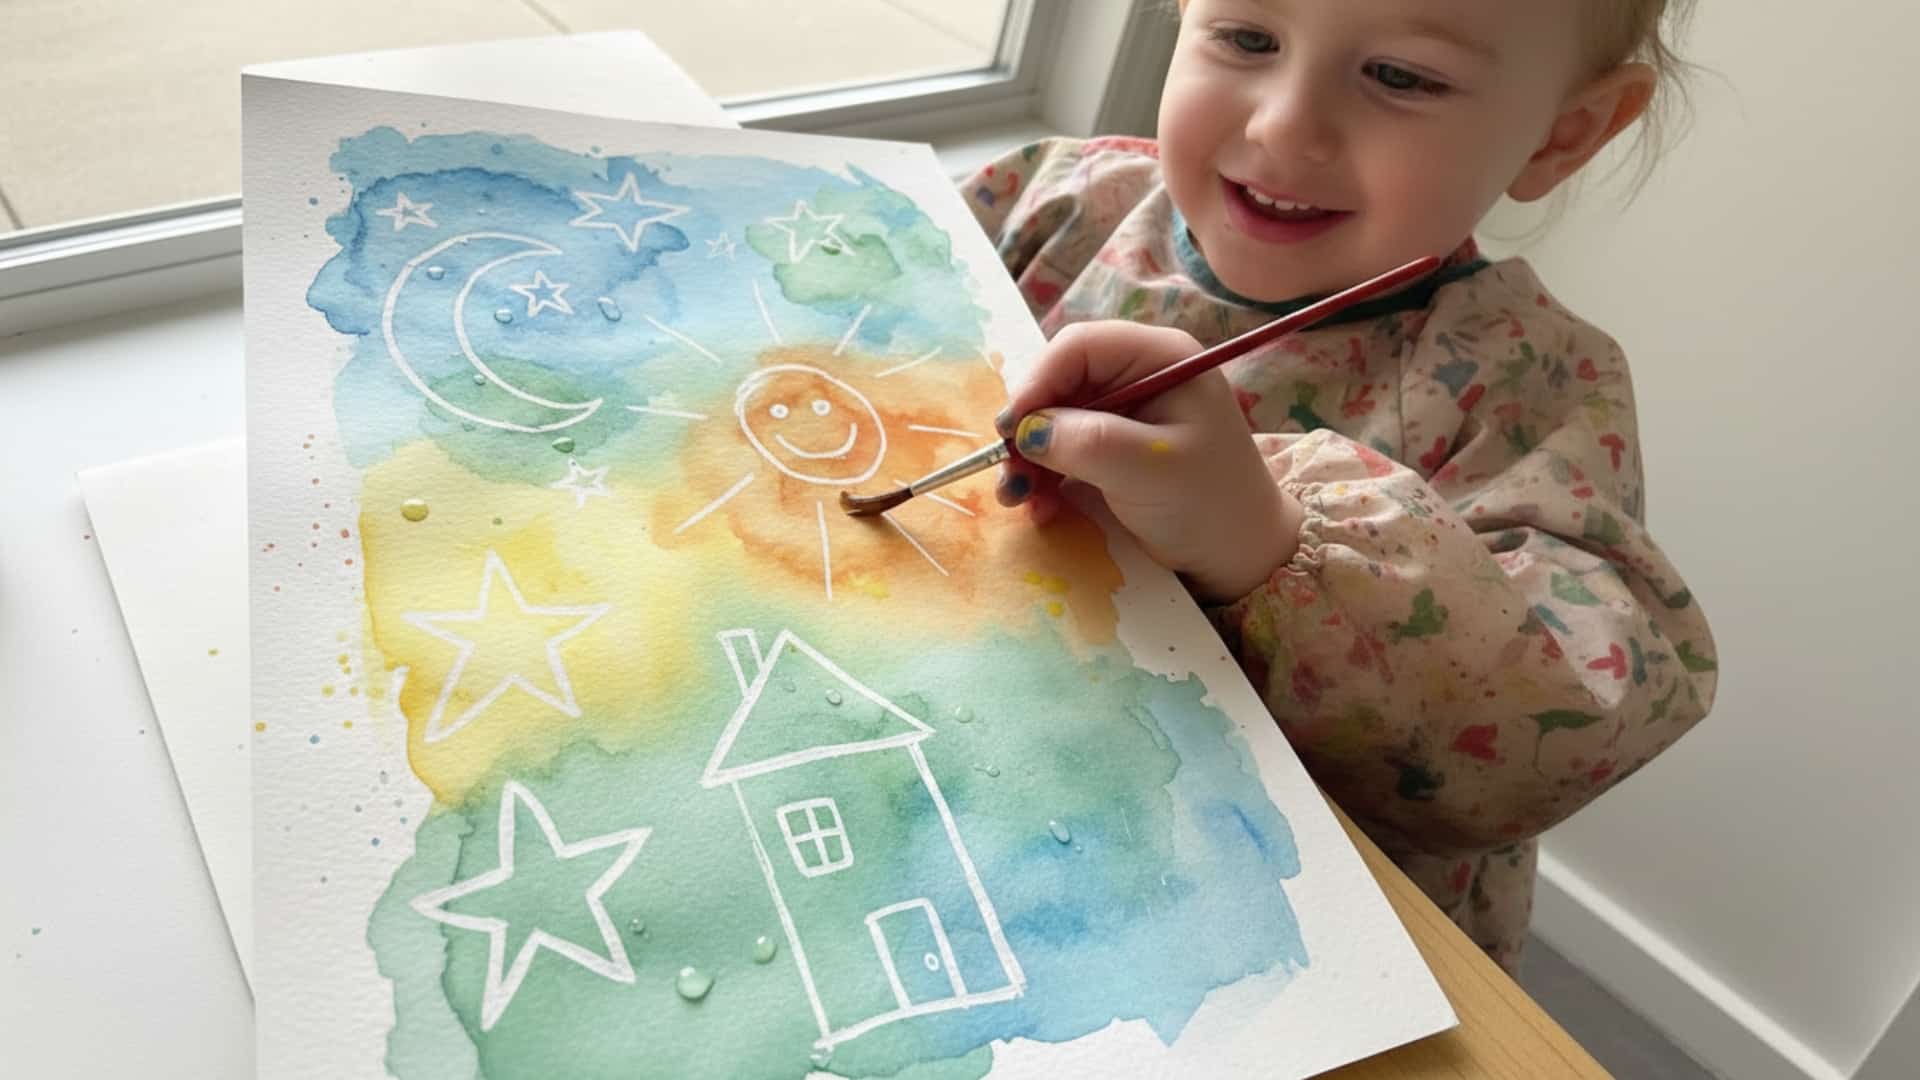
A simple painting activity that teaches kids how materials react differently to water. This project creates surprising results that feel magical to young artists.
Materials Required:
- Watercolors
- White crayon
- Watercolor paper
Simple Steps:
- Draw shapes or patterns with a white crayon on the paper. Press hard to make thick lines. The design will be invisible at first.
- Paint over the entire paper with watercolors. Use any colors you like. The crayon lines will resist the paint and appear through the color.
- Let the painting dry flat. The white crayon areas will stay bright against the colored background. Display your finished artwork proudly.
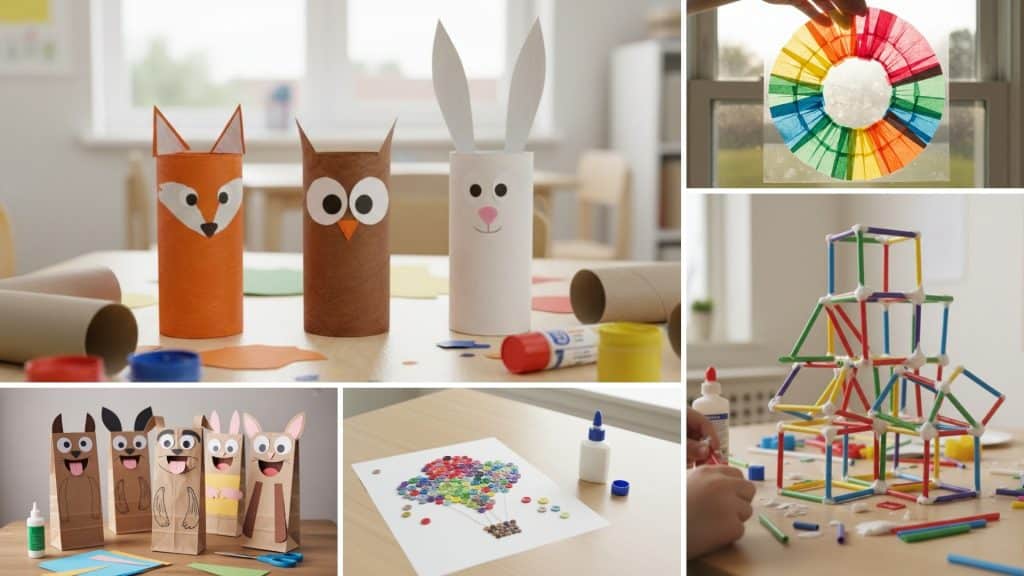
2. Paper Plate Animals
A classic art project that encourages creativity and animal recognition. Kids can make any animal they imagine using simple materials.
Materials Required:
- Paper plates
- Paint
- Construction paper
- Glue
Simple Steps:
- Paint the plate to look like an animal face. Choose colors that match your favorite animal. Let the paint dry completely.
- Cut ears, eyes, and other features from construction paper. Make them big, so they’re easy to see. Glue the pieces onto the plate.
- Add final touches like whiskers or spots. Use markers or more paper scraps. Your animal face is ready to display.
3. Coffee Filter Butterflies
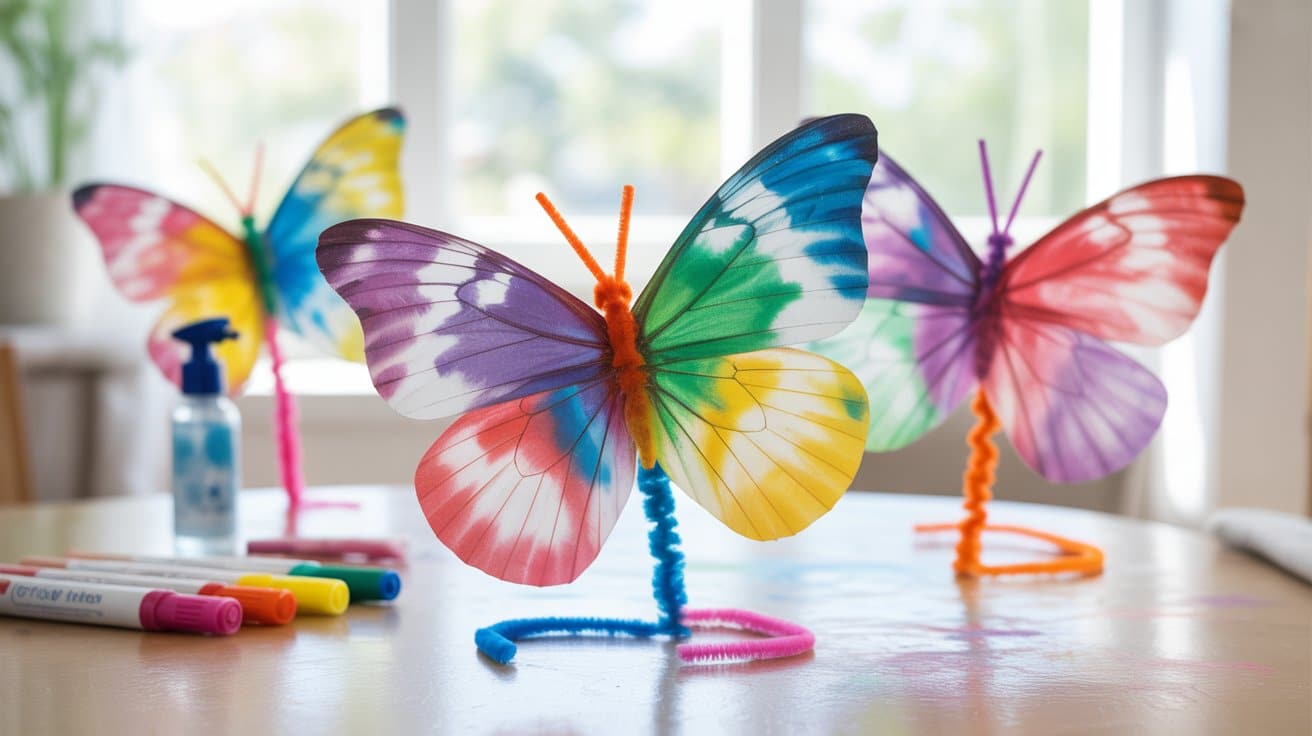
A colorful project that blends art with simple color mixing. The results are always bright and beautiful, no matter how kids color them.
Materials Required:
- Coffee filters
- Washable markers
- Water spray bottle
Simple Steps:
- Color the coffee filter with markers. Use lots of different colors. Cover most of the white surface with color.
- Spray the filter lightly with water. Watch the colors blend and spread together. The effect happens quickly and looks stunning.
- Let the filter dry completely. Pinch the center to form butterfly wings. Add a clothespin or pipe cleaner for the body.
4. Sponge Painting
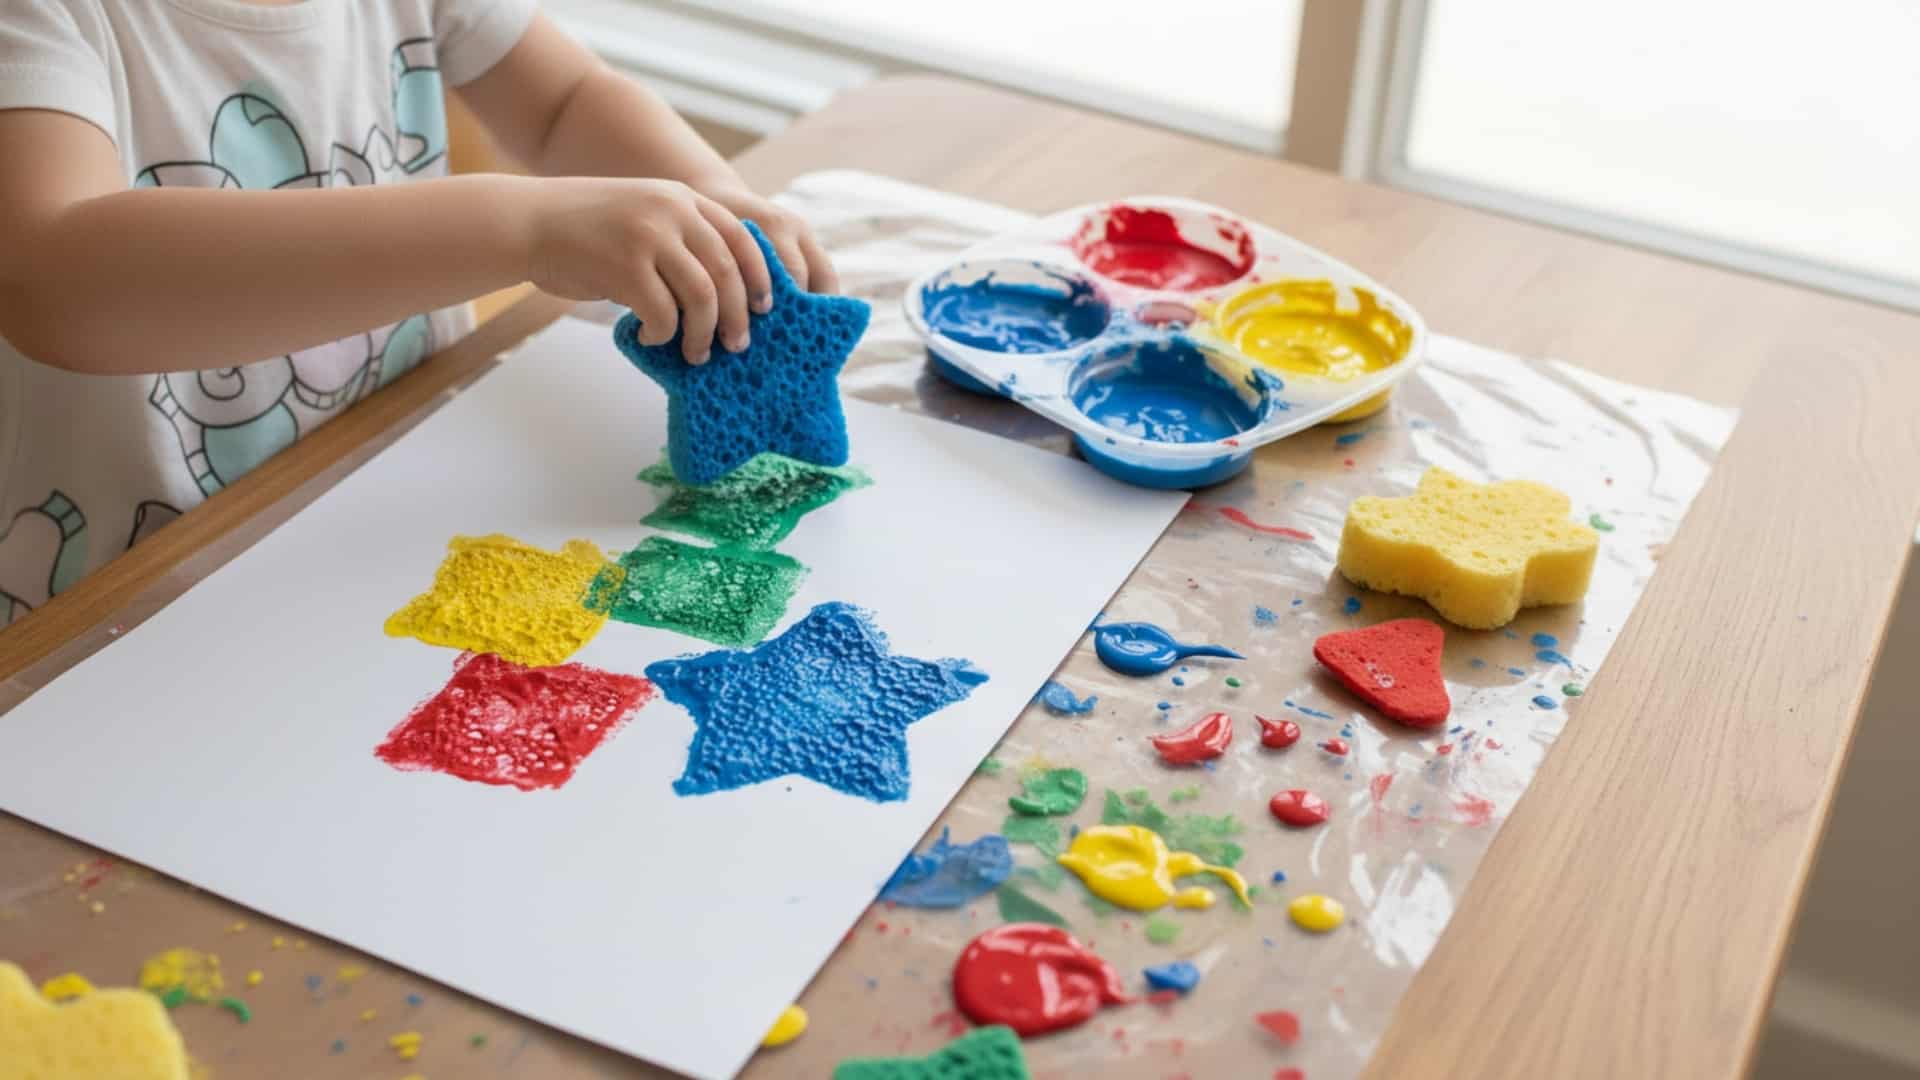
An easy sensory art activity that builds fine motor skills. Young children especially enjoy the stamping motion and texture of sponges.
Materials Required:
- Sponges
- Paint
- Paper
Simple Steps:
- Cut sponges into different shapes if desired. Squares and triangles work well. Leave some sponges whole for different effects.
- Dip sponges into paint. Don’t soak them completely. Just coat the bottom surface with color.
- Stamp patterns onto paper. Try overlapping colors and shapes. Create designs or just examine the textures freely.
5. Q-Tip Dot Painting
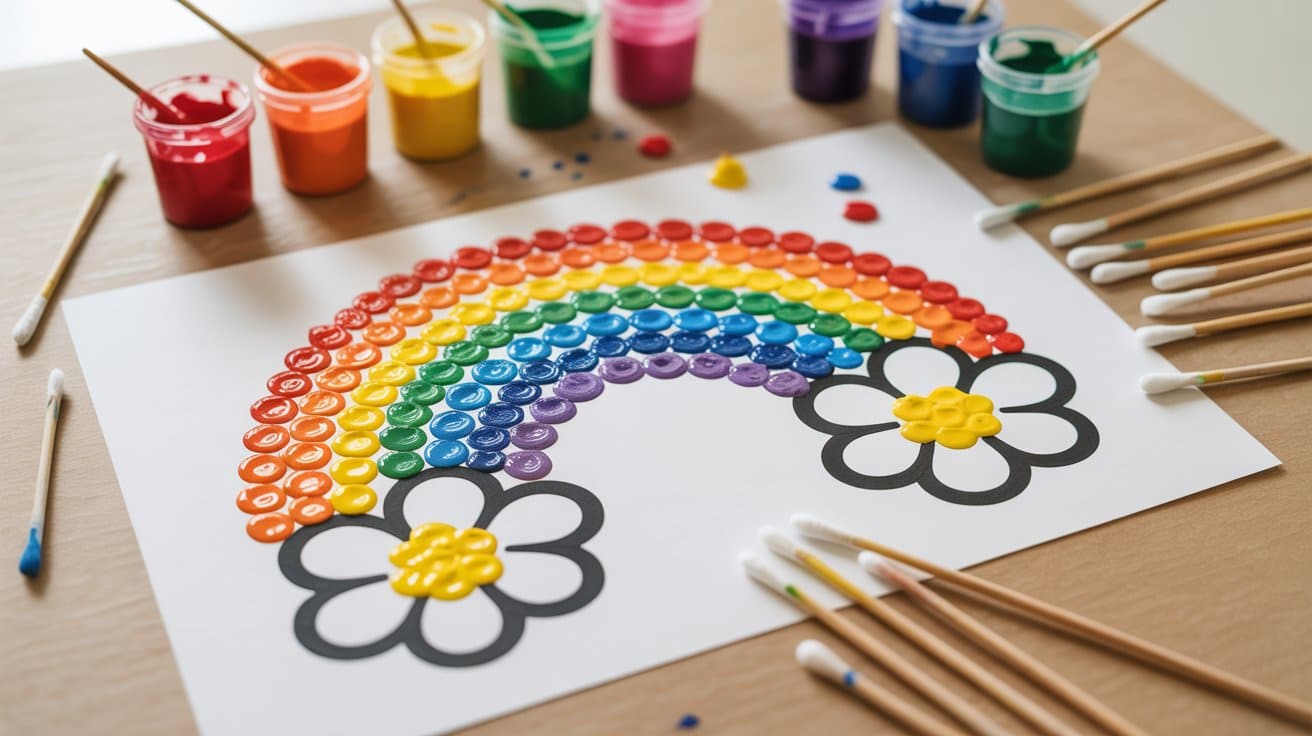
A simple pointillism-inspired project for younger kids. This technique helps children develop precision and patience while creating beautiful designs.
Materials Required:
- Q-tips
- Paint
- Paper
Simple Steps:
- Pour paint into small containers. Use several colors for variety. Place one Q-tip per color to avoid mixing.
- Dip the Q-tip into paint. Create dots on paper by pressing gently. Make pictures, patterns, or abstract designs using only dots.
- Let each color dry before adding nearby dots if you want crisp edges. Otherwise, let the colors blend for a watercolor effect.
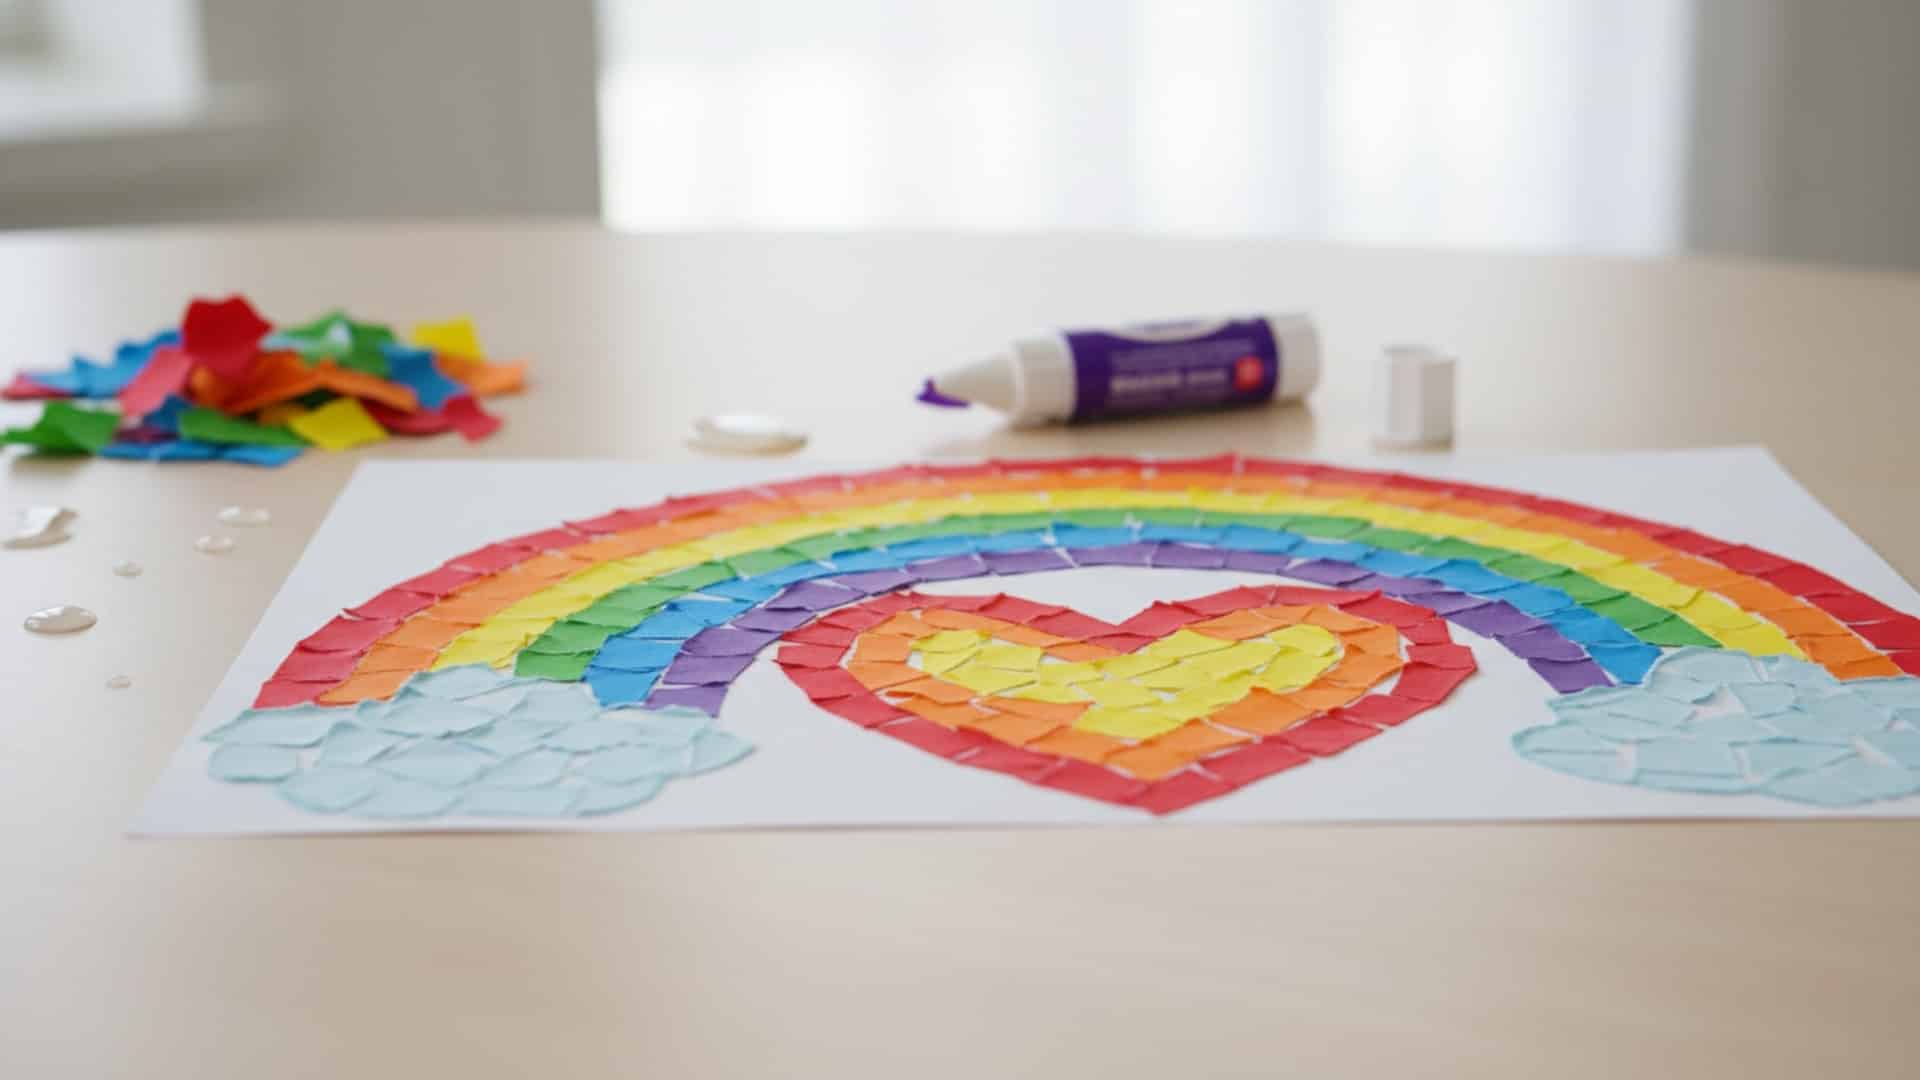
6. Nature Collage Art
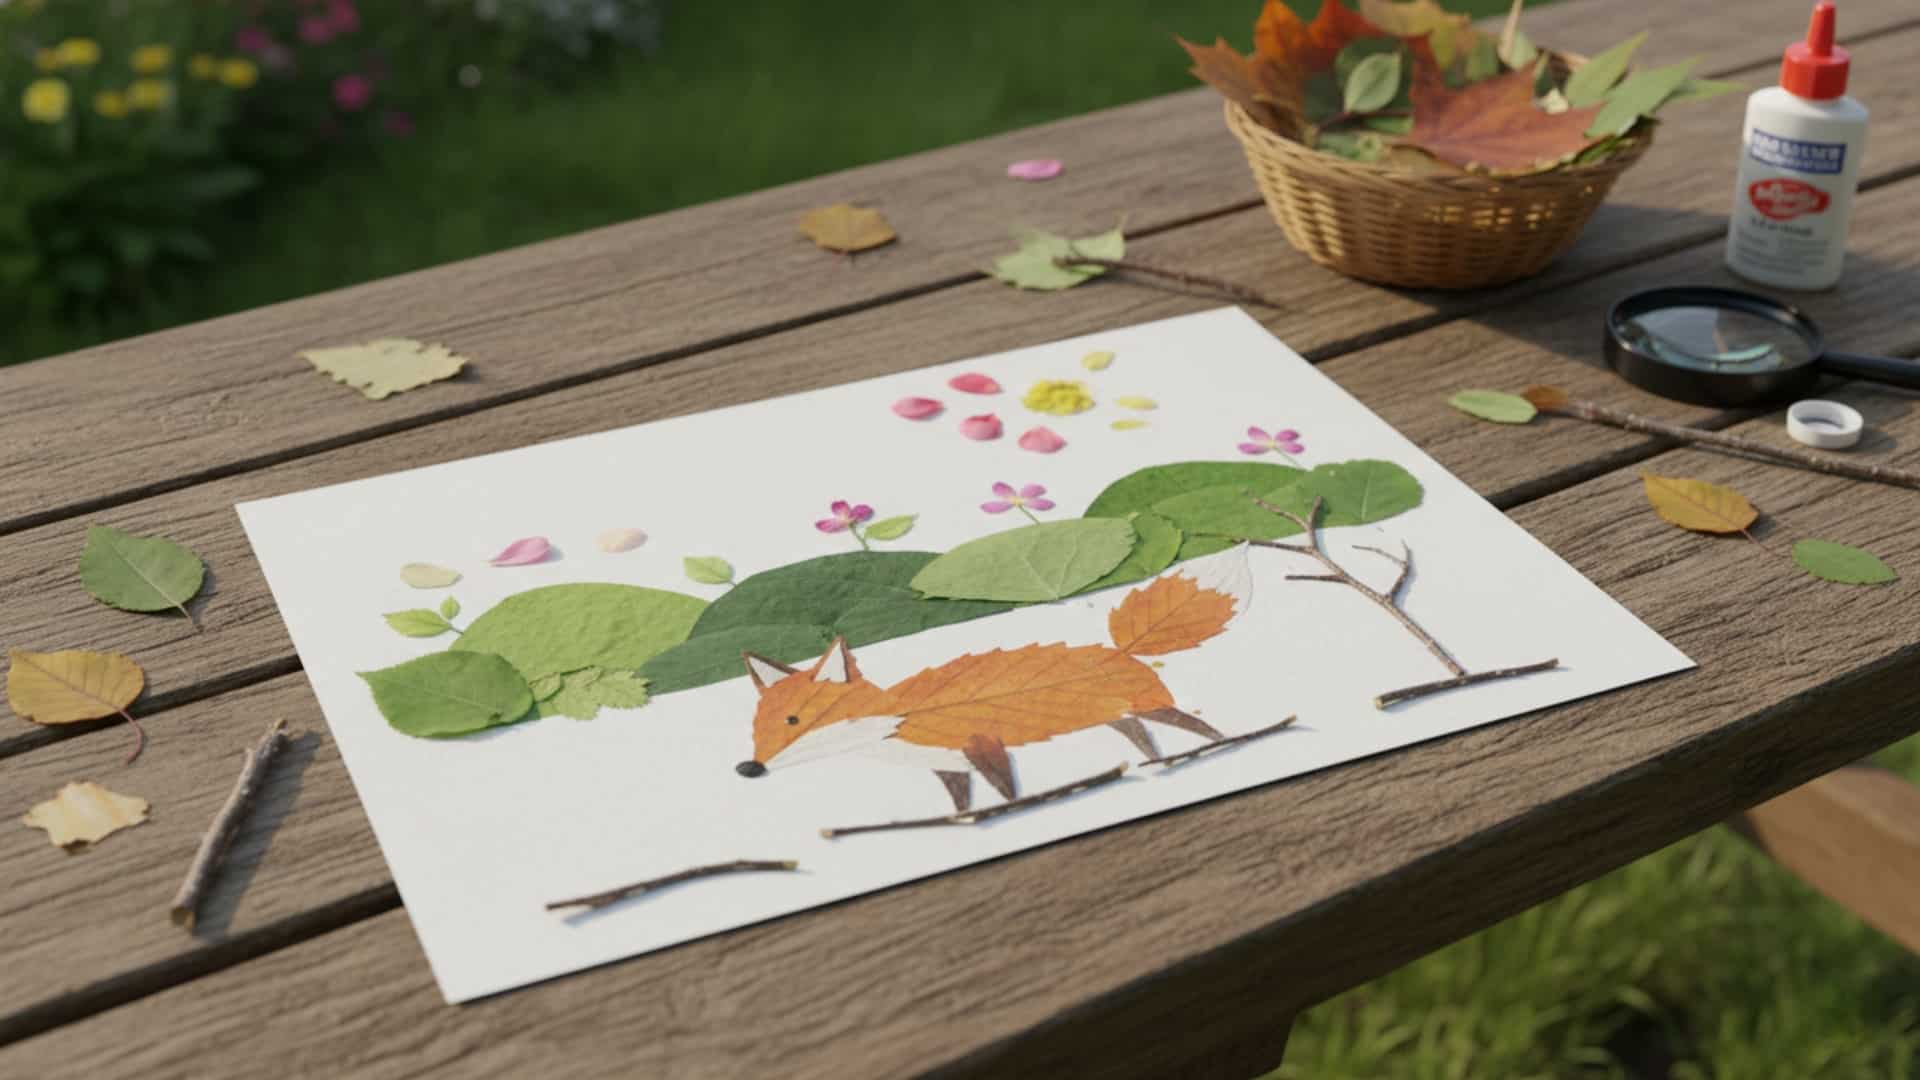
A hands-on art project that connects creativity with outdoor learning. Taking a nature walk to gather materials is half the fun.
Materials Required:
- Leaves
- Sticks
- Glue
- Paper
Simple Steps:
- Go outside and collect natural materials. Look for interesting leaves, small twigs, and flower petals. Choose items with different colors and shapes.
- Arrange materials on paper before gluing. Try different layouts to see what looks best. Create pictures or patterns with your found objects.
- Glue everything in place once you’re happy with the design. Press down firmly and let it dry completely before moving.
7. Rainbow Scratch Art
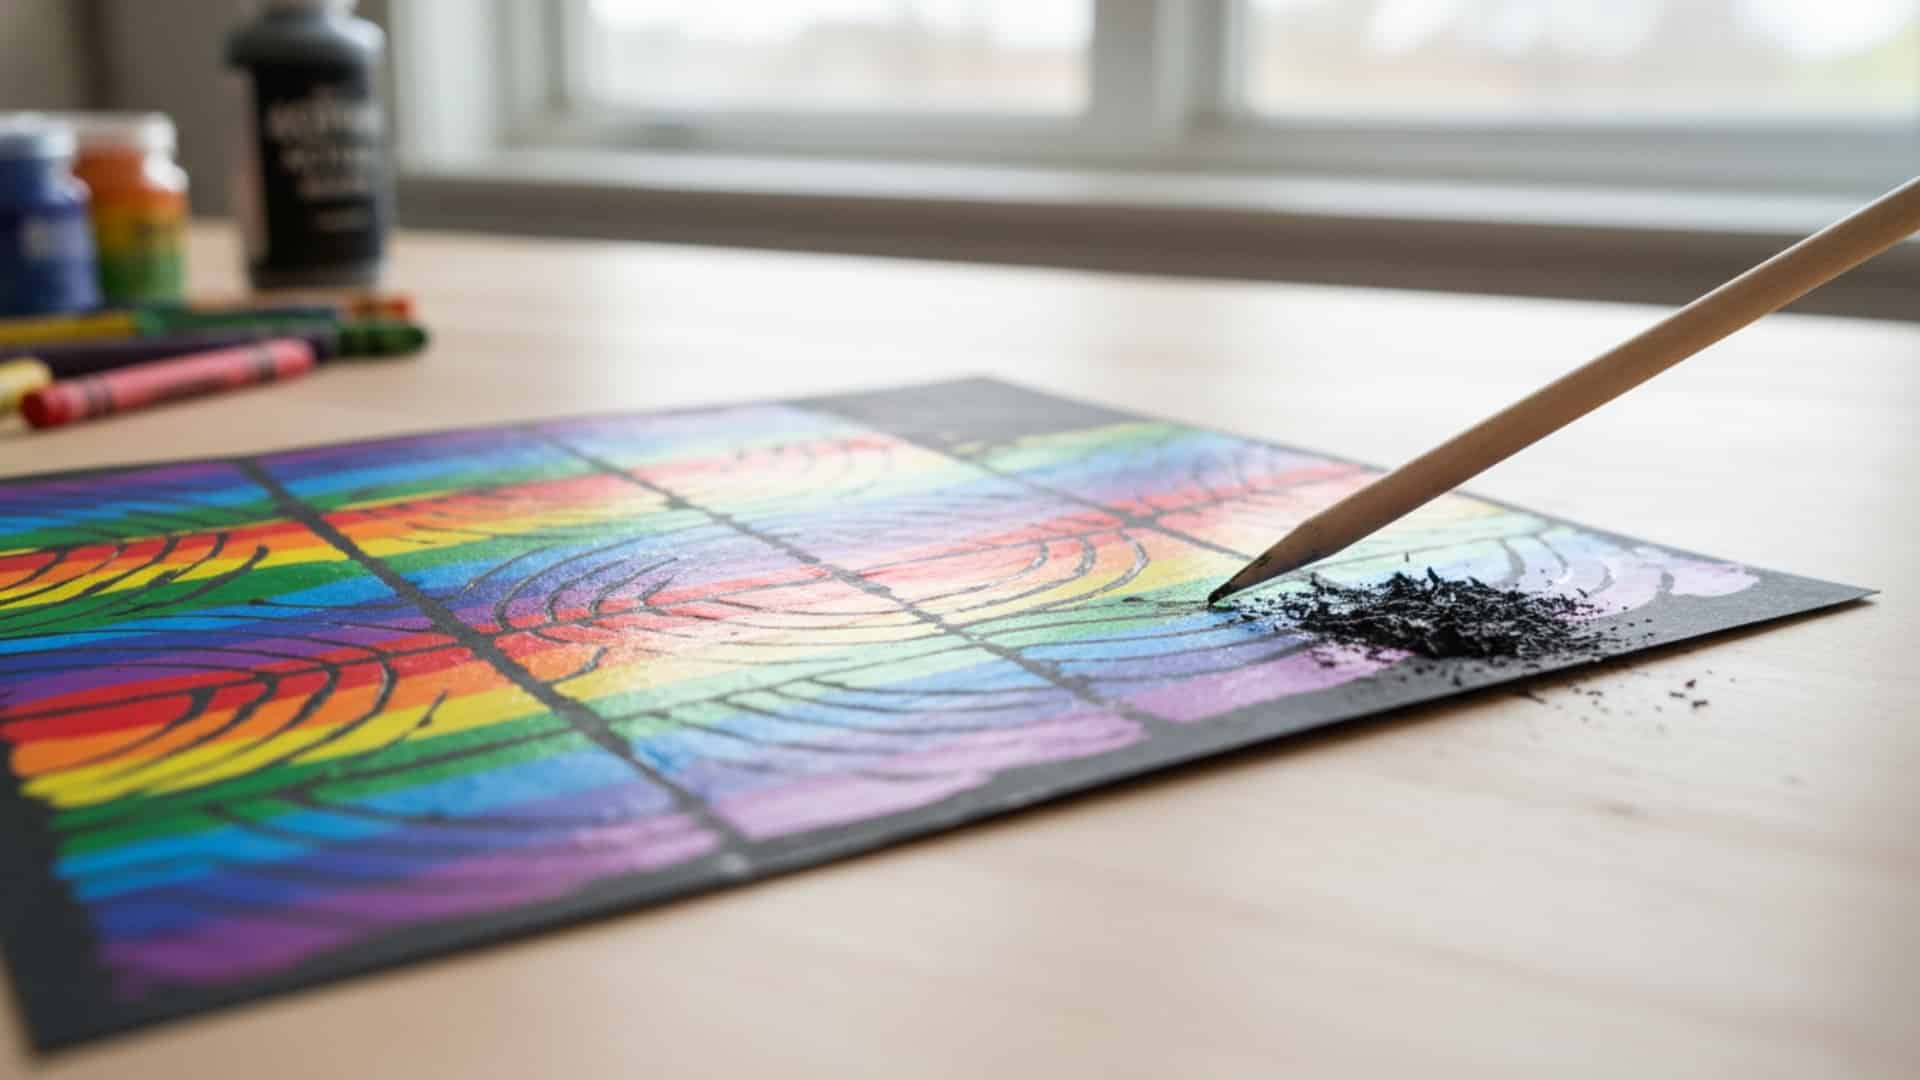
A colorful project that combines drawing and discovery. Kids love revealing hidden colors underneath the black surface.
Materials Required:
- Crayons
- Black paint
- Dish soap
- Wooden stick or toothpick
Simple Steps:
- Color the paper completely with bright crayons. Use thick layers of many colors. Don’t leave any white spaces showing.
- Mix black paint with a few drops of dish soap. This helps it stick to the waxy crayon. Paint over the entire colored surface and let it dry.
- Scratch designs into the black layer using a wooden stick. The bright colors show through underneath. Create pictures, patterns, or write messages.
8. Paper Bag Puppets
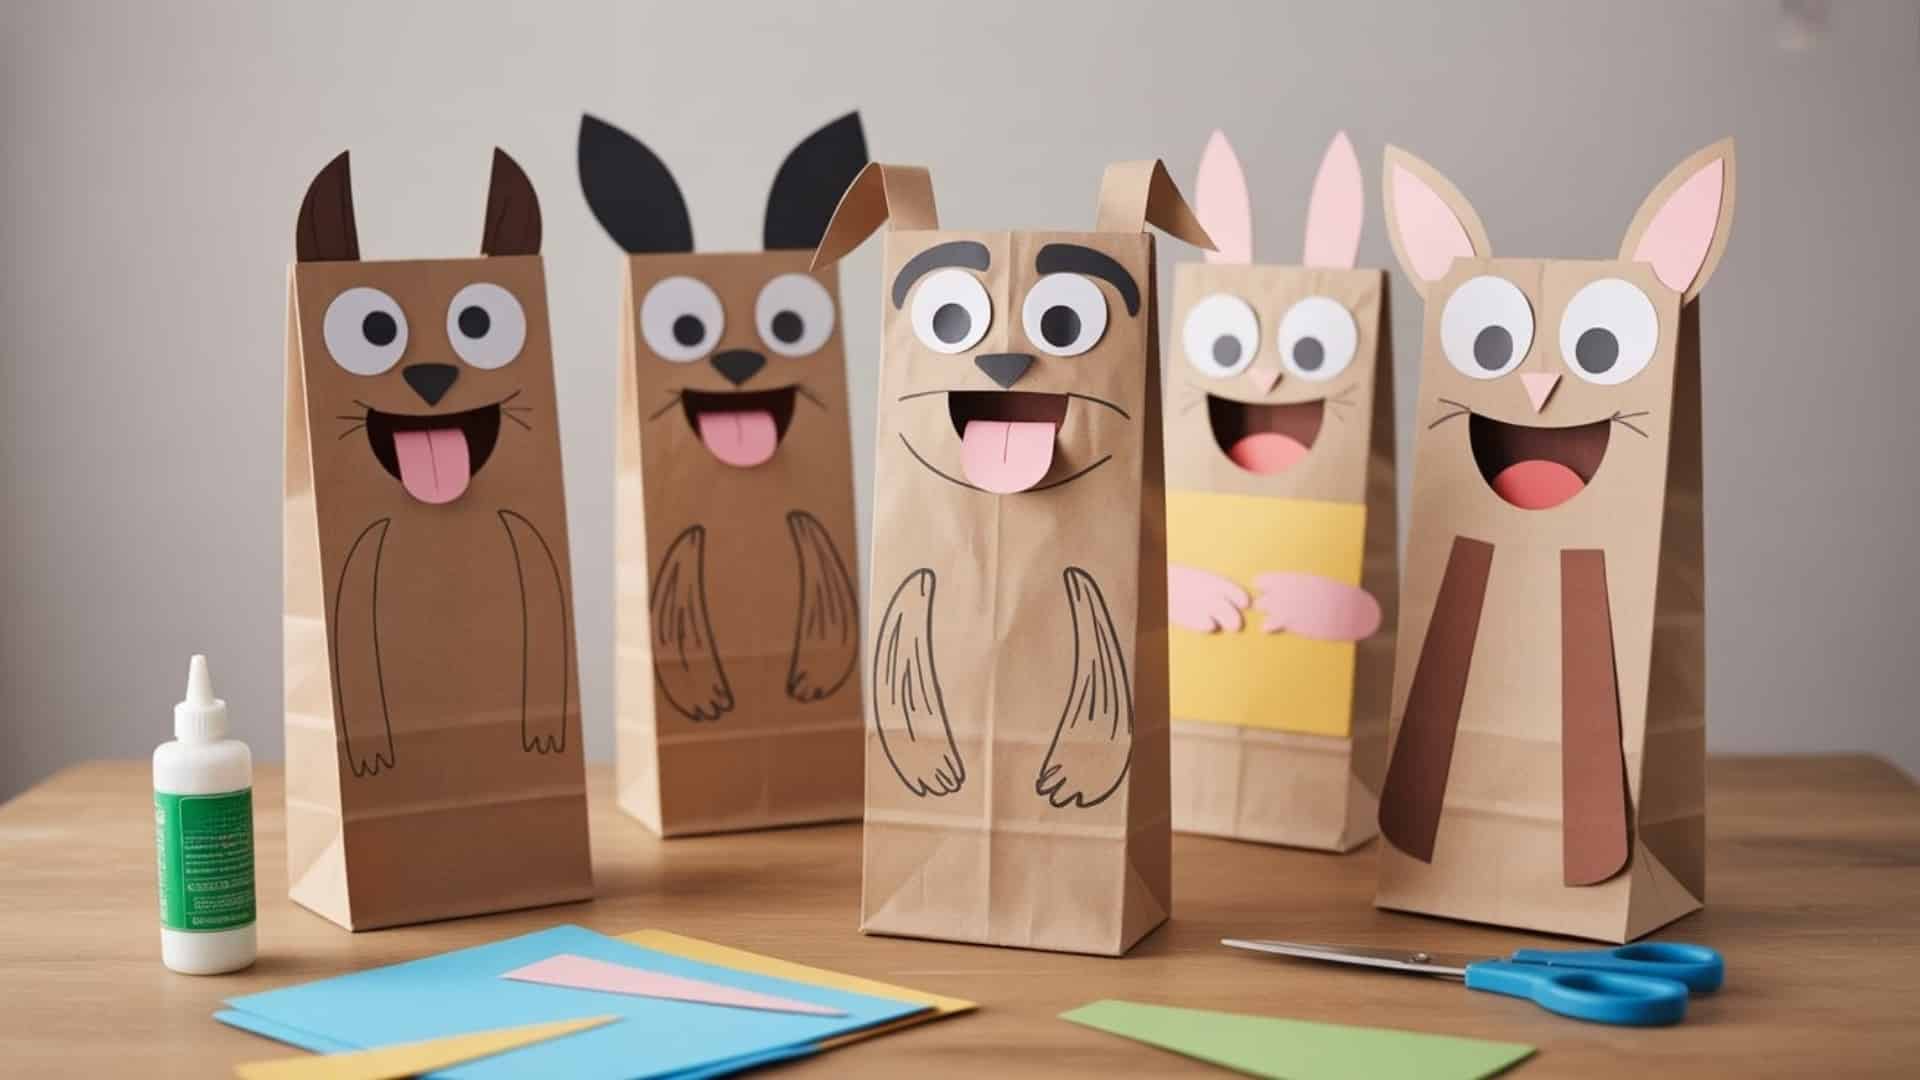
A creative storytelling art project that supports language development. These puppets work great for putting on shows after they’re finished.
Materials Required:
- Paper bags
- Markers
- Paper scraps
- Glue
Simple Steps:
- Decorate the paper bag as a character. The bottom flap becomes the mouth. Draw a face on the flap and below it.
- Add hair, ears, or other features using paper scraps. Glue them to the bag. Let kids choose whether to make people, animals, or imaginary creatures.
- Use the puppet for storytelling once the glue dries. Slip your hand inside the bag. Make the mouth move by bending the flap.
9. Chalk Art Paintings
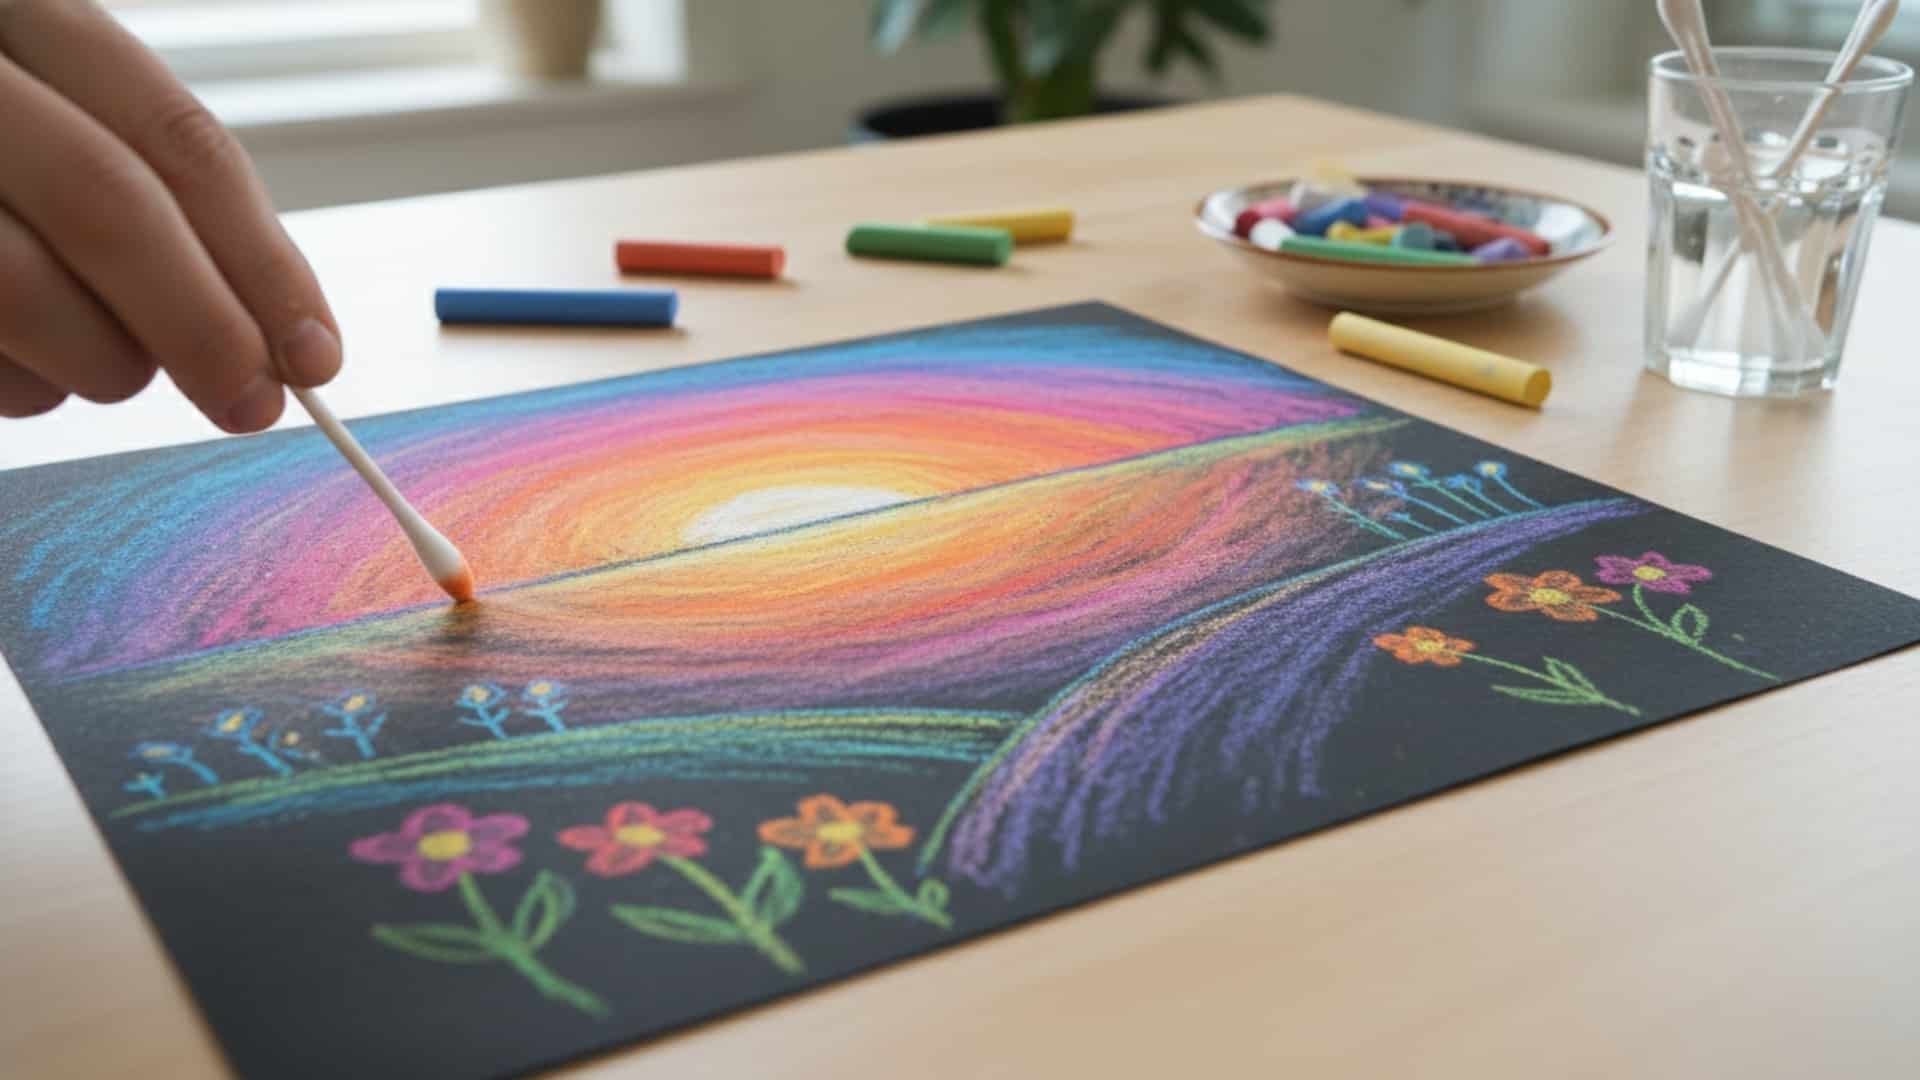
An easy project that blends drawing and painting techniques. The soft, blended look creates artwork that appears professional.
Materials Required:
- Chalk
- Black paper
- Cotton swabs
- Water
Simple Steps:
- Draw pictures or designs on black paper with chalk. Use bright colors that show up well. Cover areas completely with color.
- Dip a cotton swab in water. Gently blend the chalk lines using the damp swab. The chalk will spread and soften like paint.
- Let the artwork dry completely. The colors will set and won’t smudge anymore. Frame your chalk painting for display.
10. Marble Roll Painting
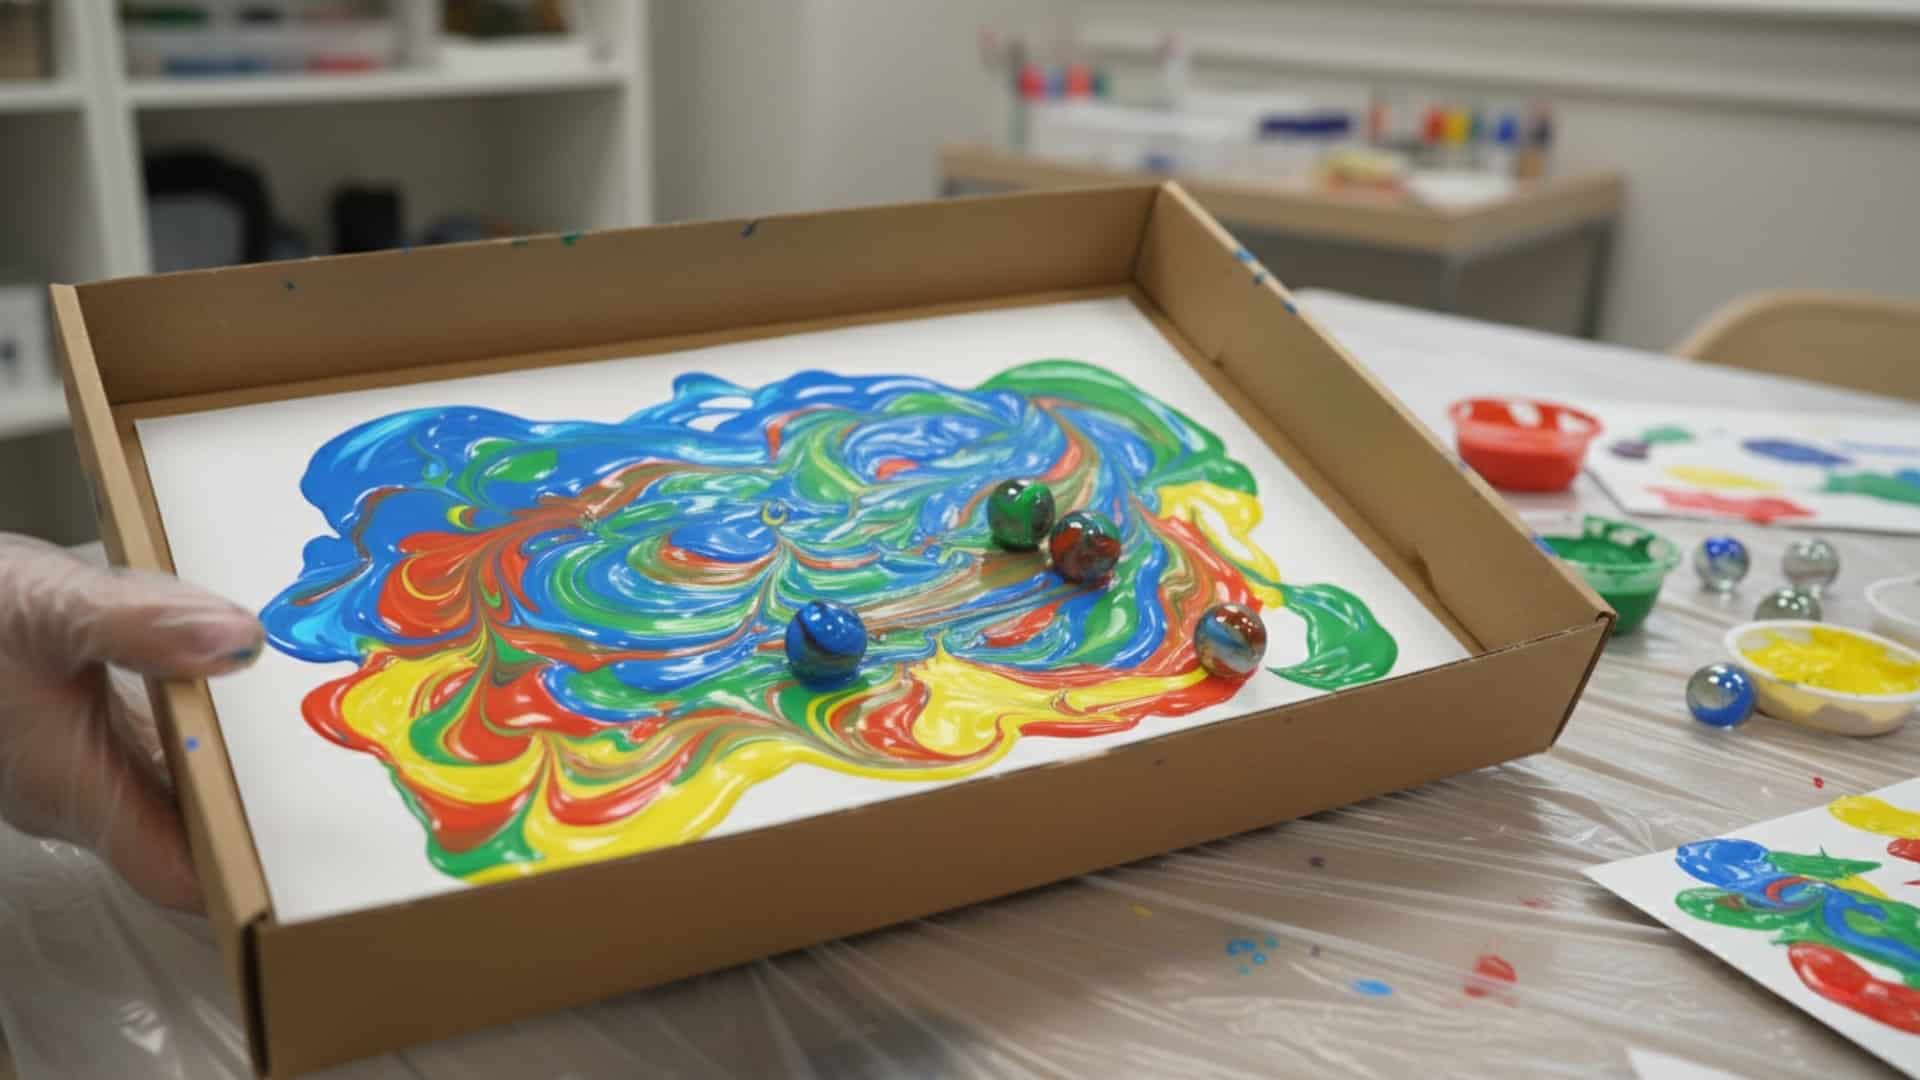
A fun process-art activity with movement and surprise results. Kids never know exactly how the design will turn out, which makes it exciting.
Materials Required:
- Box lid
- Paper
- Marbles
- Paint
Simple Steps:
- Place a piece of paper inside a box lid. The paper should fit snugly so it doesn’t move around. Trim it if needed.
- Put small drops of paint on the paper. Use two or three colors. Don’t use too much, or the colors will just make mud.
- Drop marbles into the box. Tilt and roll the box in different directions. The marbles roll through the paint and create patterns on the paper.
11. Fork Painted Flowers

A creative way to study texture using everyday tools. The fork tines create perfect petal shapes without any drawing skills needed.
Materials Required:
- Forks
- Paint
- Paper
Simple Steps:
- Pour paint onto a plate or palette. Choose flower colors like pink, red, or purple. Keep colors separate initially.
- Dip the back of a fork into paint. Make sure the paint covers all the tines. Press the fork onto paper to create a flower shape.
- Repeat to make multiple petals around a center point. Add stems and leaves with a paintbrush or green fork prints. Let dry completely.
12. Bubble Wrap Printing
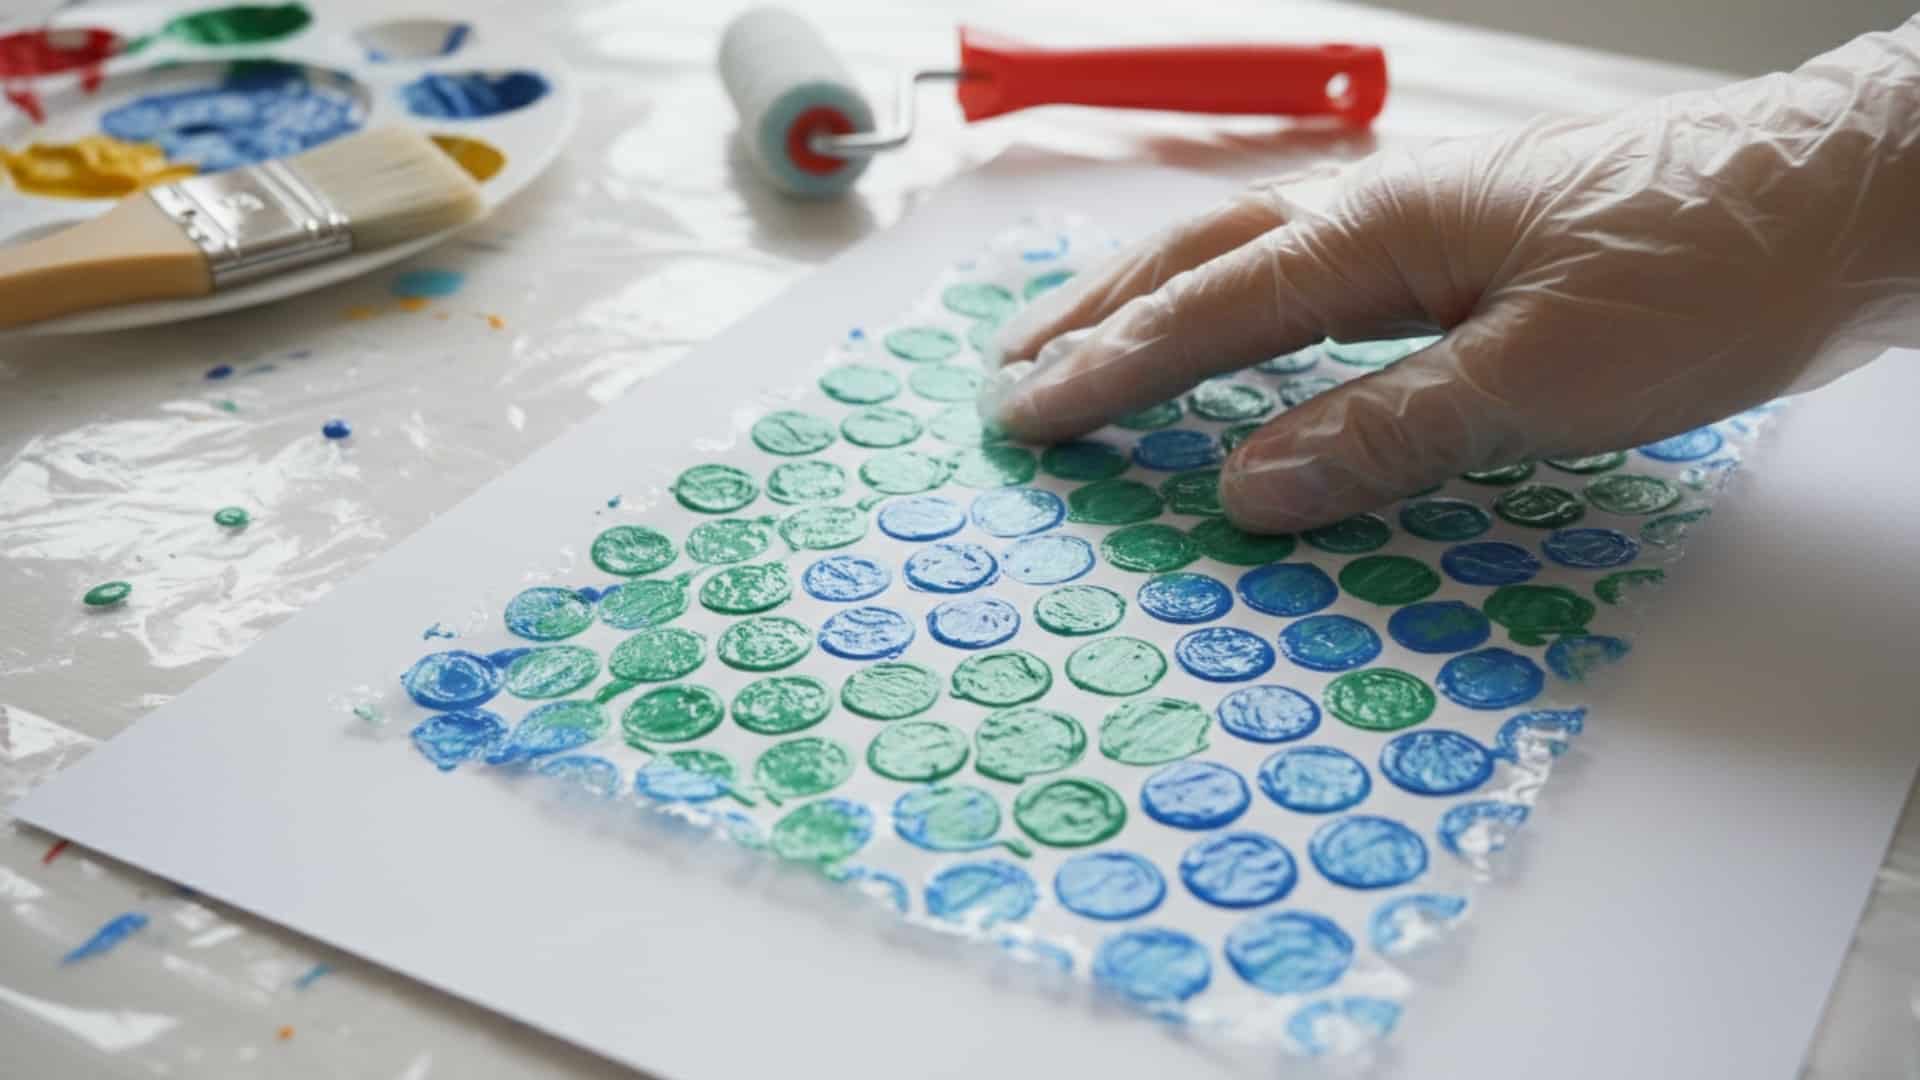
A sensory-friendly project with bold texture results. The popping sound while painting makes this activity extra fun for kids.
Materials Required:
- Bubble wrap
- Paint
- Paper
Simple Steps:
- Cut bubble wrap to a manageable size. Small pieces work better than large sheets. Make sure bubbles face outward.
- Paint the bubble side of the wrap. Use a brush or roll paint directly on it. Cover the bubbles completely with color.
- Press the painted bubble wrap onto paper. Push down firmly across the entire surface. Lift straight up to reveal the bubble pattern print.
13. Paper Mosaic Art
A simple art project that builds patience and pattern skills. Tearing paper is easier than cutting for younger children.
Materials Required:
- Construction paper
- Glue
- Base paper
Simple Steps:
- Tear construction paper into small pieces. Make them roughly the same size. Use many different colors for variety.
- Draw a simple outline on base paper if desired. This gives kids a guide for placing pieces. Simple shapes work best for beginners.
- Glue paper pieces inside the outline or across the entire page. Place pieces close together so not much background shows. Let dry flat overnight.
14. Yarn Wrapped Letters
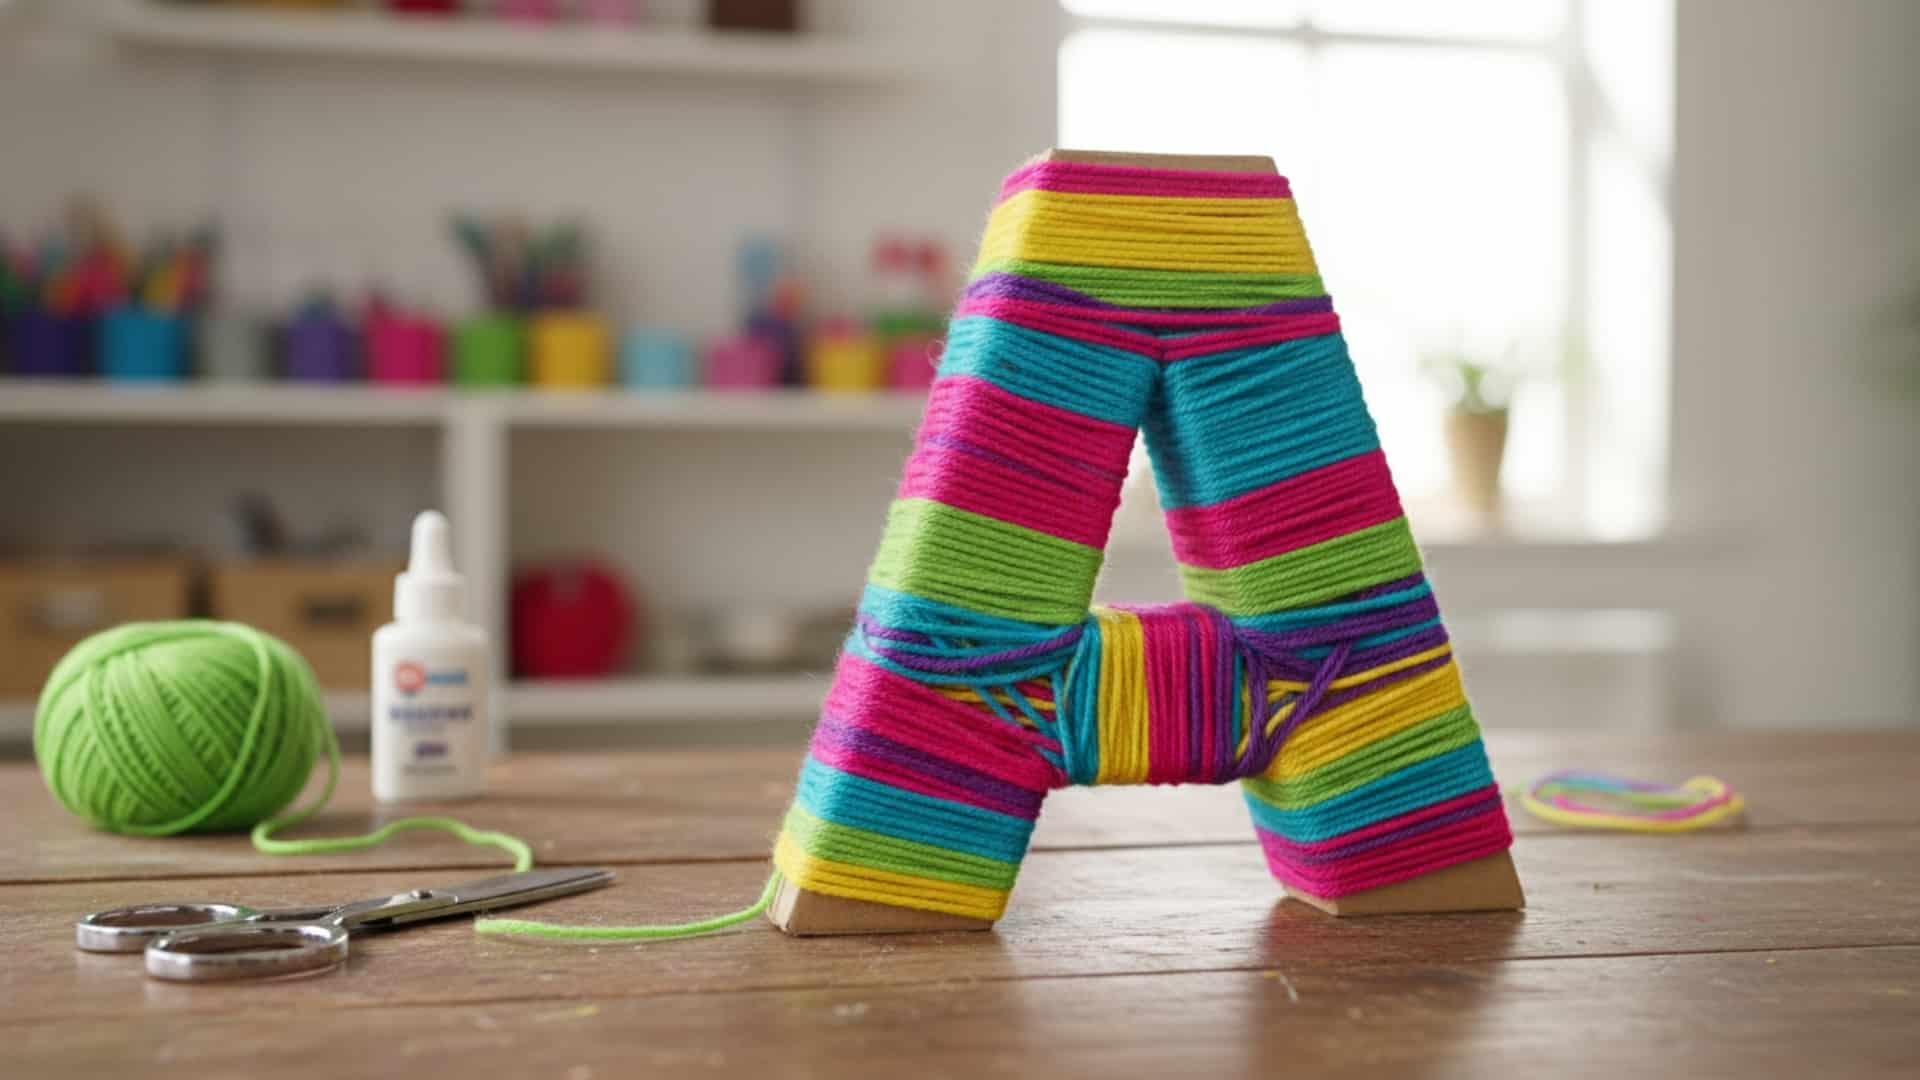
A letter-based art project that supports early literacy. Kids can make the first letter of their name or spell short words.
Materials Required:
- Cardboard letters
- Yarn
- Tape
Simple Steps:
- Cut letters from cardboard or buy pre-cut ones. Large letters work best for this project. Make them at least four inches tall.
- Tape one end of the yarn to the back of the letter. Bring the yarn to the front. Start wrapping around the letter in any direction.
- Keep wrapping until the entire letter is covered. Tape the end on the back when finished. Display your colorful letter proudly.
15. Tissue Paper Suncatchers

A bright, decorative project kids love displaying. These catch sunlight beautifully and add color to any window.
Materials Required:
- Tissue paper
- Contact paper
- Scissors
Simple Steps:
- Cut tissue paper into small pieces. Use many colors for a rainbow effect. Make pieces about one inch square.
- Place one sheet of contact paper sticky side up. Arrange tissue pieces on the sticky surface. Let kids place them randomly or in patterns.
- Cover with a second sheet of contact paper, sticky side down. Press firmly to seal. Trim edges and hang in a sunny window.
16. Straw Blown Paint Art
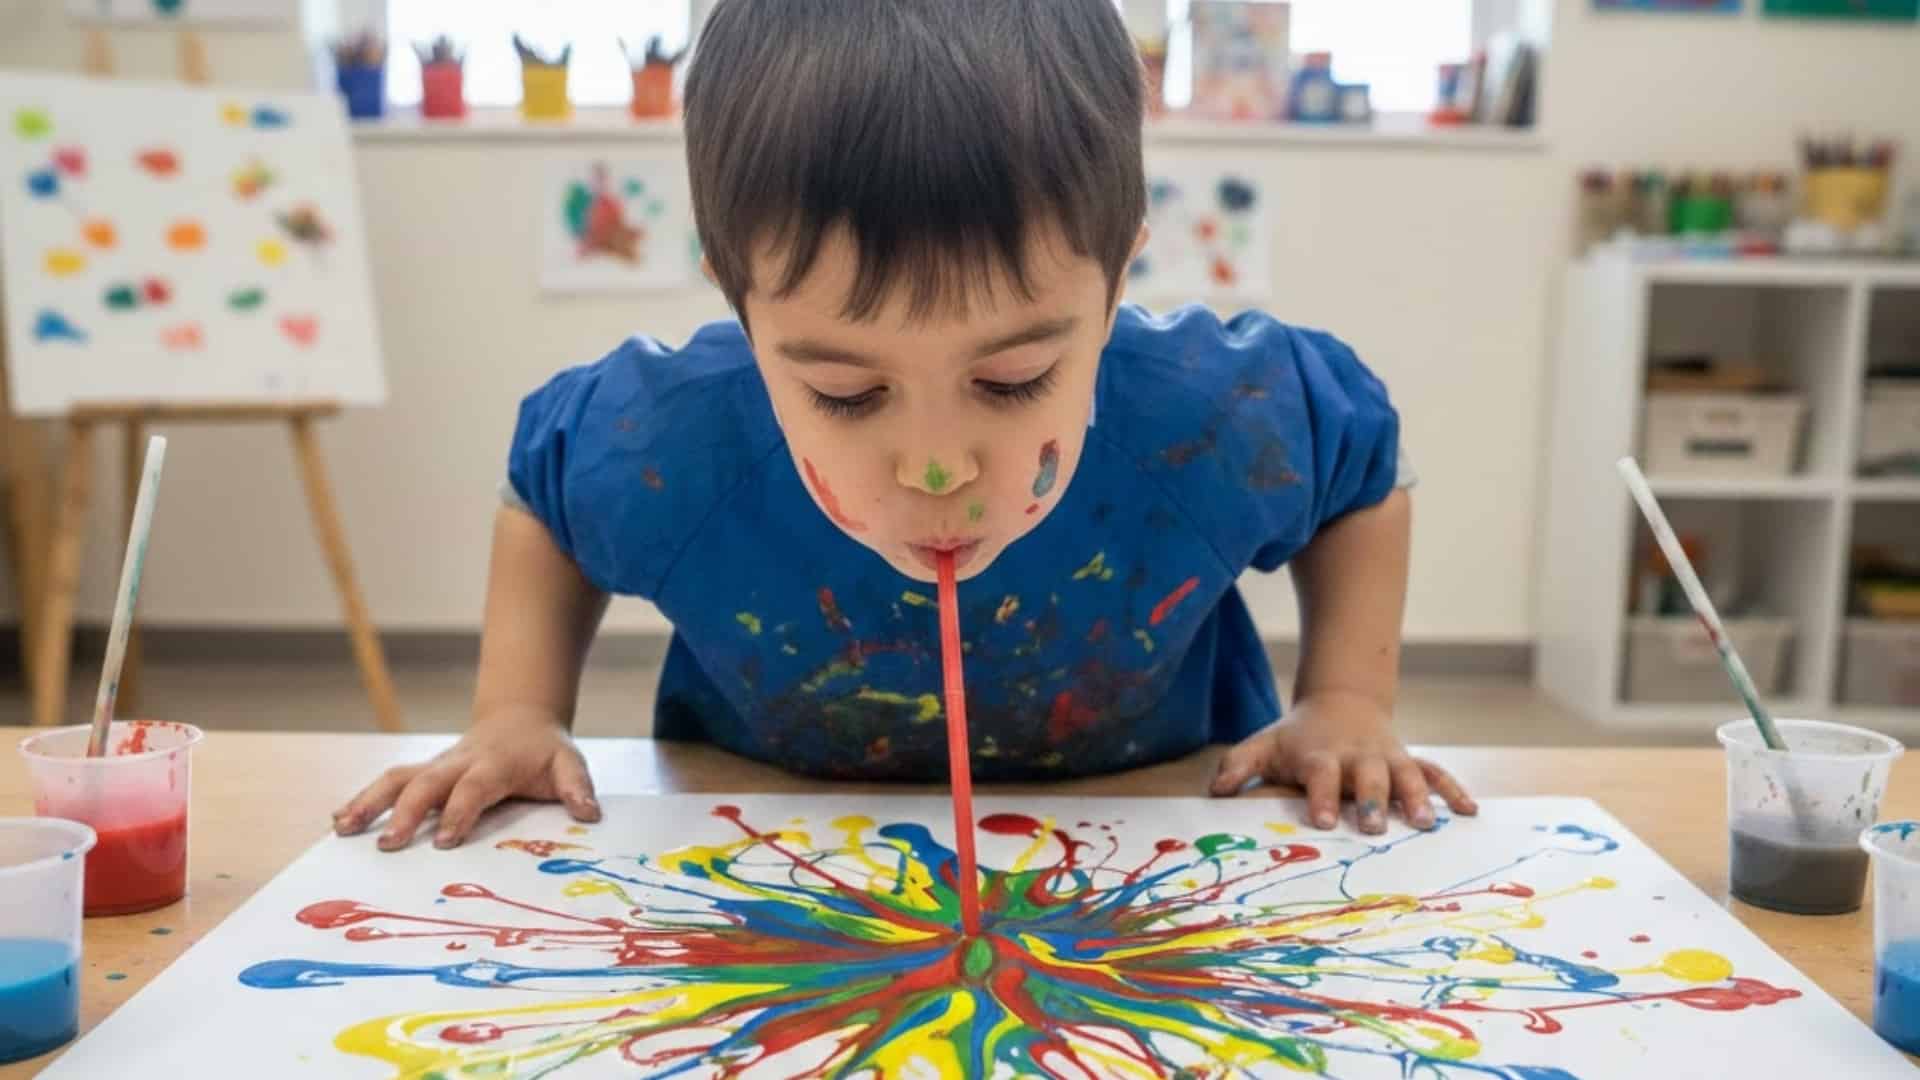
A playful way to learn airflow and abstract art. This project combines science concepts with creative expression.
Materials Required:
- Paint
- Straws
- Paper
Simple Steps:
- Water down the paint until it’s thin and runny. Too thick and it won’t blow well. Place small drops on paper.
- Use a straw to blow the paint across the paper. Point the straw at the paint and blow hard. The paint will spread in different directions.
- Add more paint drops and keep blowing. Try different colors that mix. Let the paper dry flat when finished.
17. Paper Roll Stamp Art
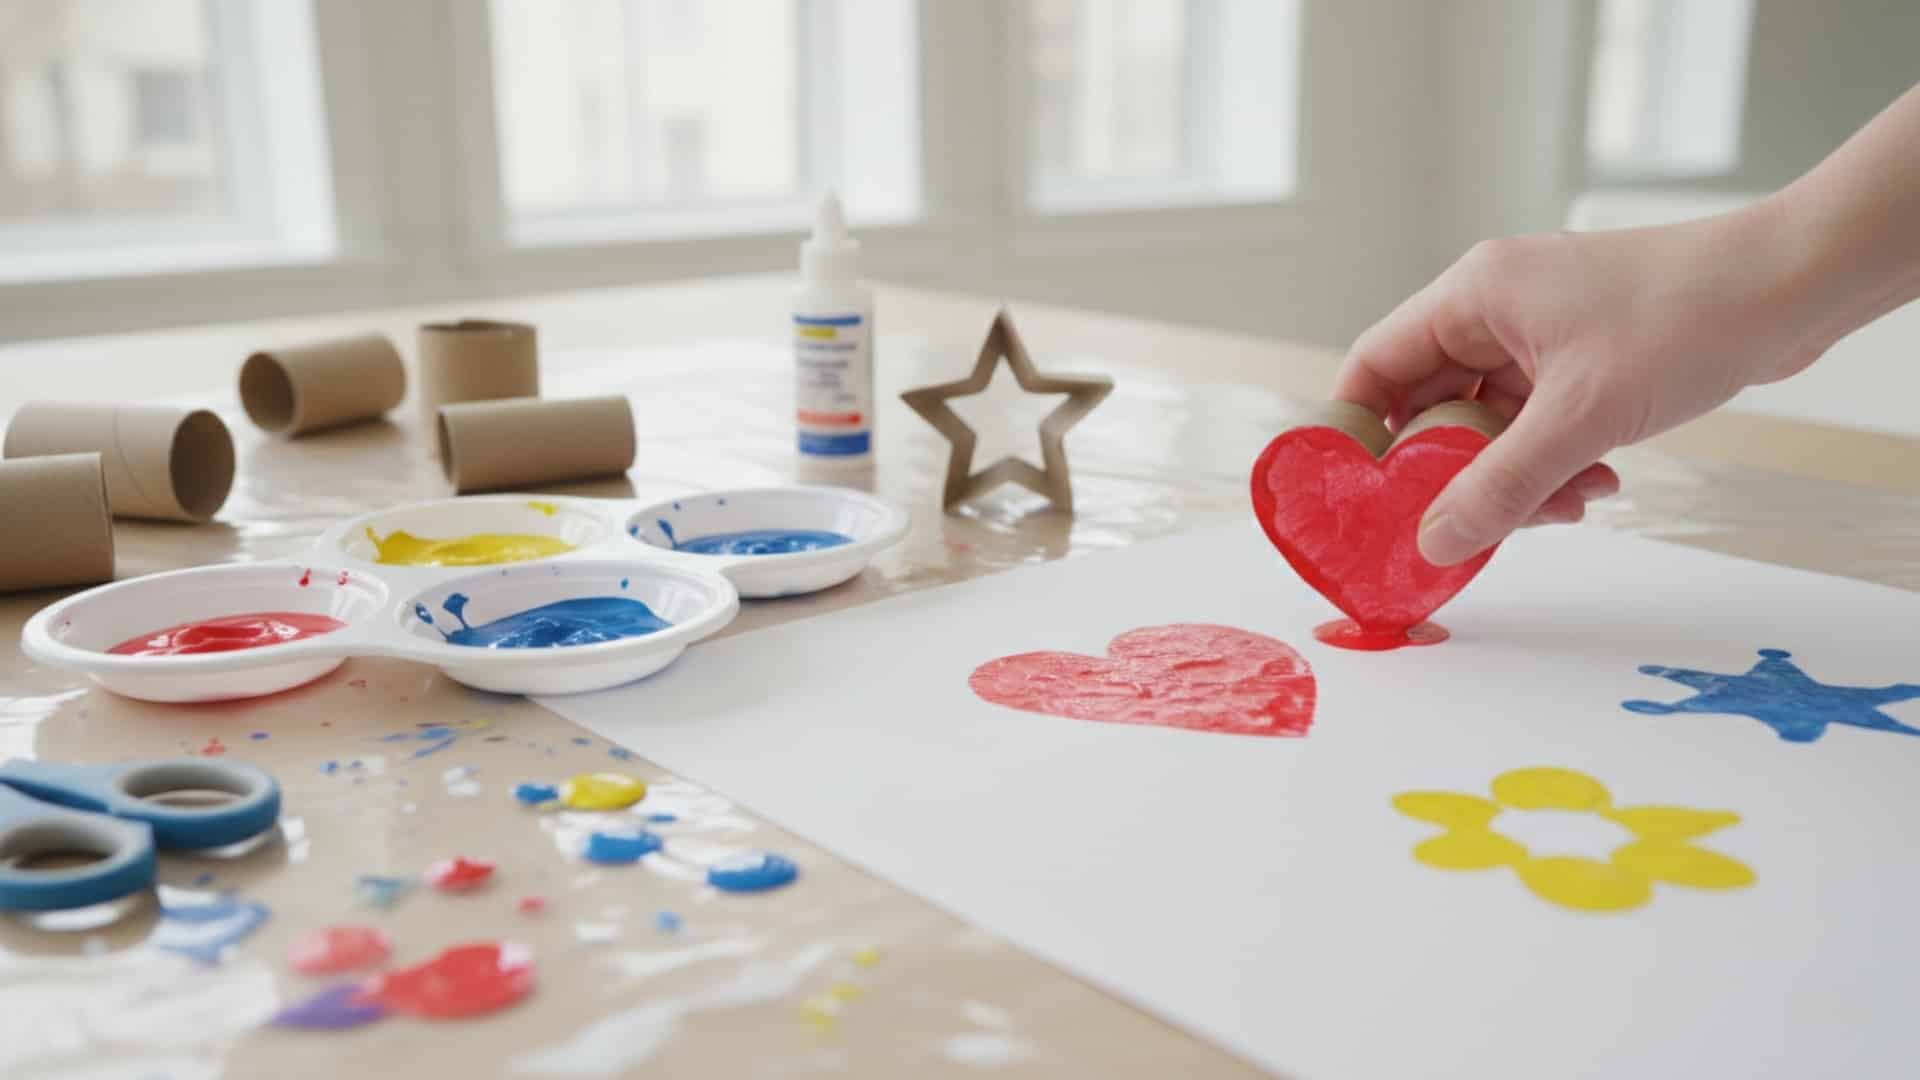
An upcycled art project using household materials. Empty paper towel rolls create interesting shapes when bent and stamped.
Materials Required:
- Paper towel rolls
- Paint
- Paper
Simple Steps:
- Bend paper rolls into different shapes. Make hearts, flowers, or stars. Secure with tape if needed to hold the shape.
- Dip the shaped end into paint. Make sure the entire edge is coated. Don’t dip too deep or the paint will drip.
- Stamp the shape onto paper repeatedly. Create patterns or pictures. Try overlapping stamps in different colors for interesting effects.
18. Symmetry Paint Folding
Kids learn about mirror images while creating beautiful designs.
Materials Required:
- Paint
- Paper
Simple Steps:
- Fold a piece of paper in half, then open it back up. The fold line marks the center of your symmetry.
- Add drops or streaks of paint to one half of the paper only. Use several colors. Place paint near the fold line.
- Fold the paper in half again along the same crease. Press down gently and rub across the surface. Open to reveal a symmetrical design.
19. Handprint Animals
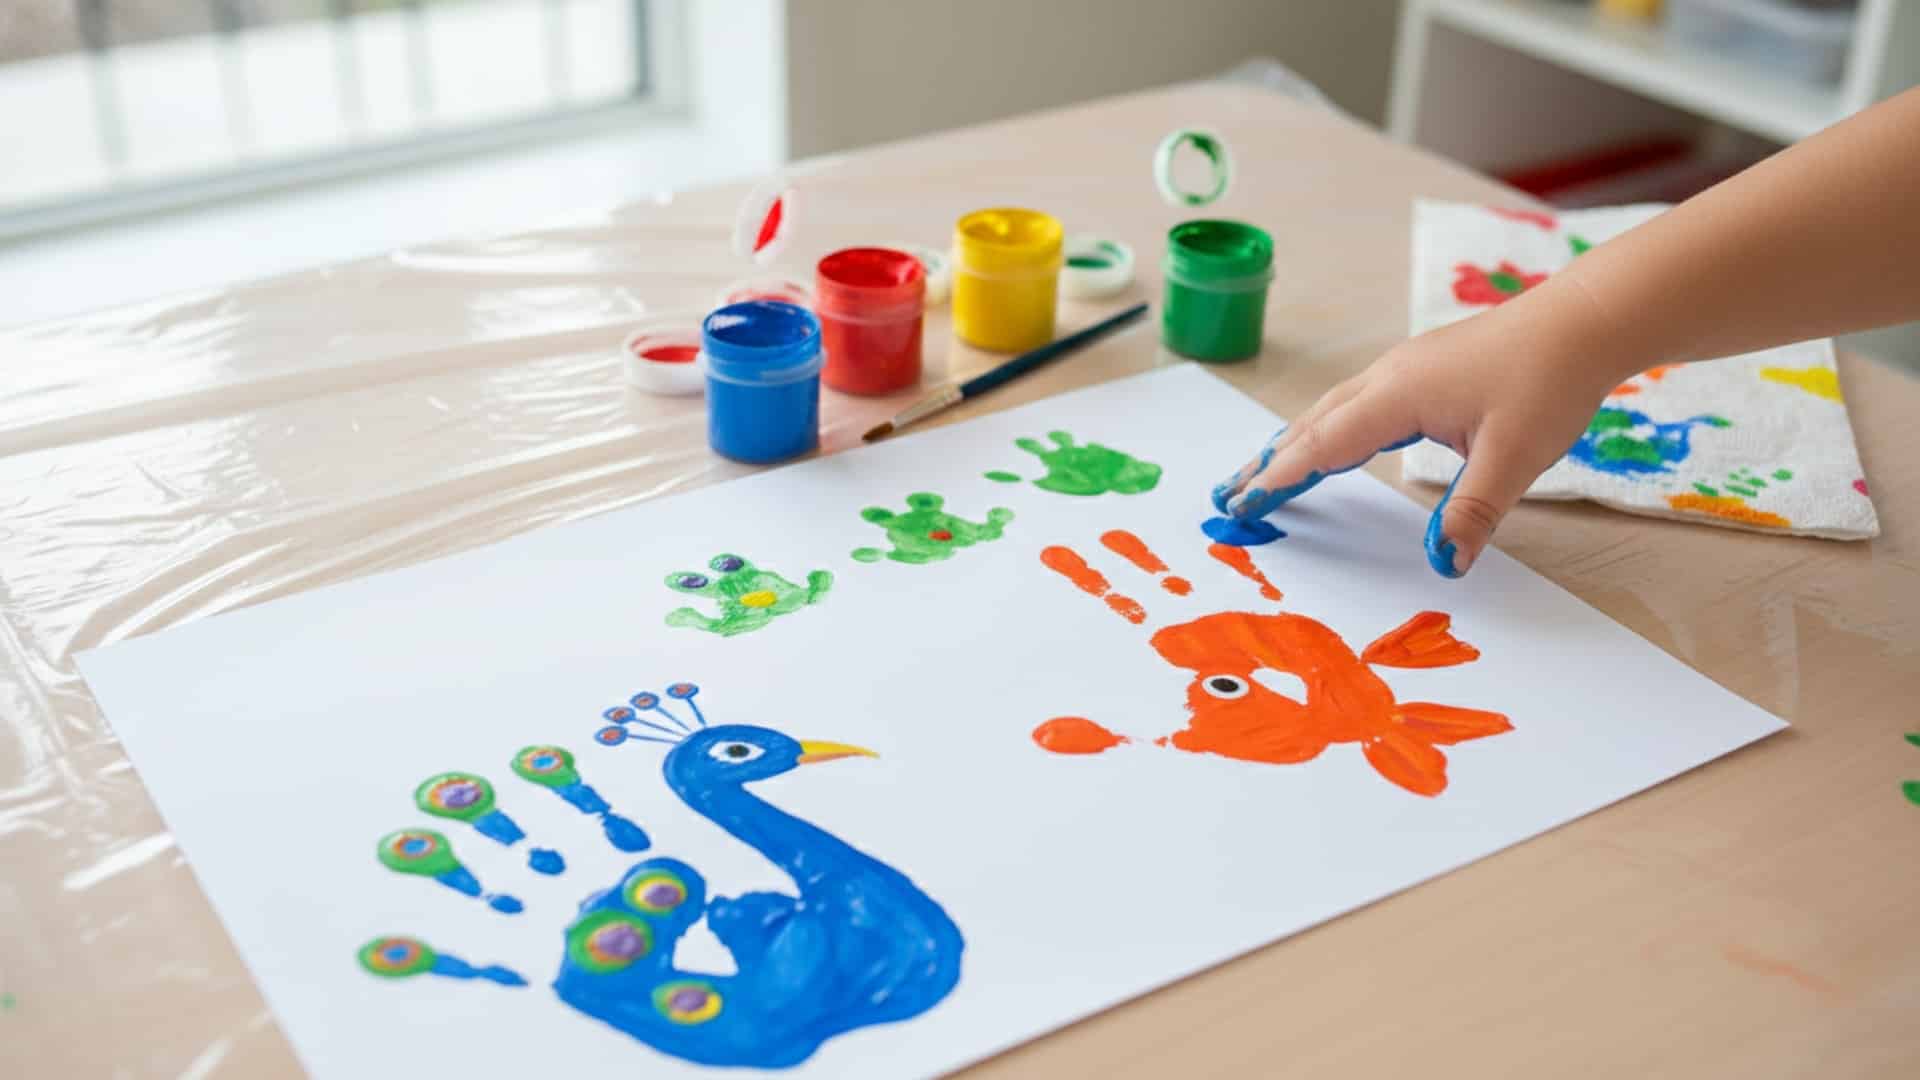
A keepsake-style art project that kids enjoy personalizing. These make wonderful gifts for grandparents and family members.
Materials Required:
- Paint
- Paper
Simple Steps:
- Paint a child’s hand completely. Use a brush to coat the palm and all fingers. Work quickly before the paint dries.
- Press the painted hand firmly onto paper. Hold still for a few seconds. Lift straight up to avoid smearing the print.
- Let the handprint dry. Add details with markers or paint to turn the print into an animal. A thumb becomes an elephant trunk or a fish tail.
20. Wax Resist Paintings
A simple science-meets-art activity. The oil in crayons repels water-based paint, creating interesting effects.
Materials Required:
- Crayons
- Paint
- Paper
Simple Steps:
- Draw pictures or patterns with crayons. Press hard to make thick, waxy lines. Use light colors like white or yellow for dramatic reveals.
- Paint over the entire paper with watercolor or watered-down tempera. The crayon lines will stay bright while the rest absorbs color.
- Let the painting dry completely. The contrast between crayon and paint creates eye-catching artwork. Display your finished piece.
21. Cardboard Weaving Loom
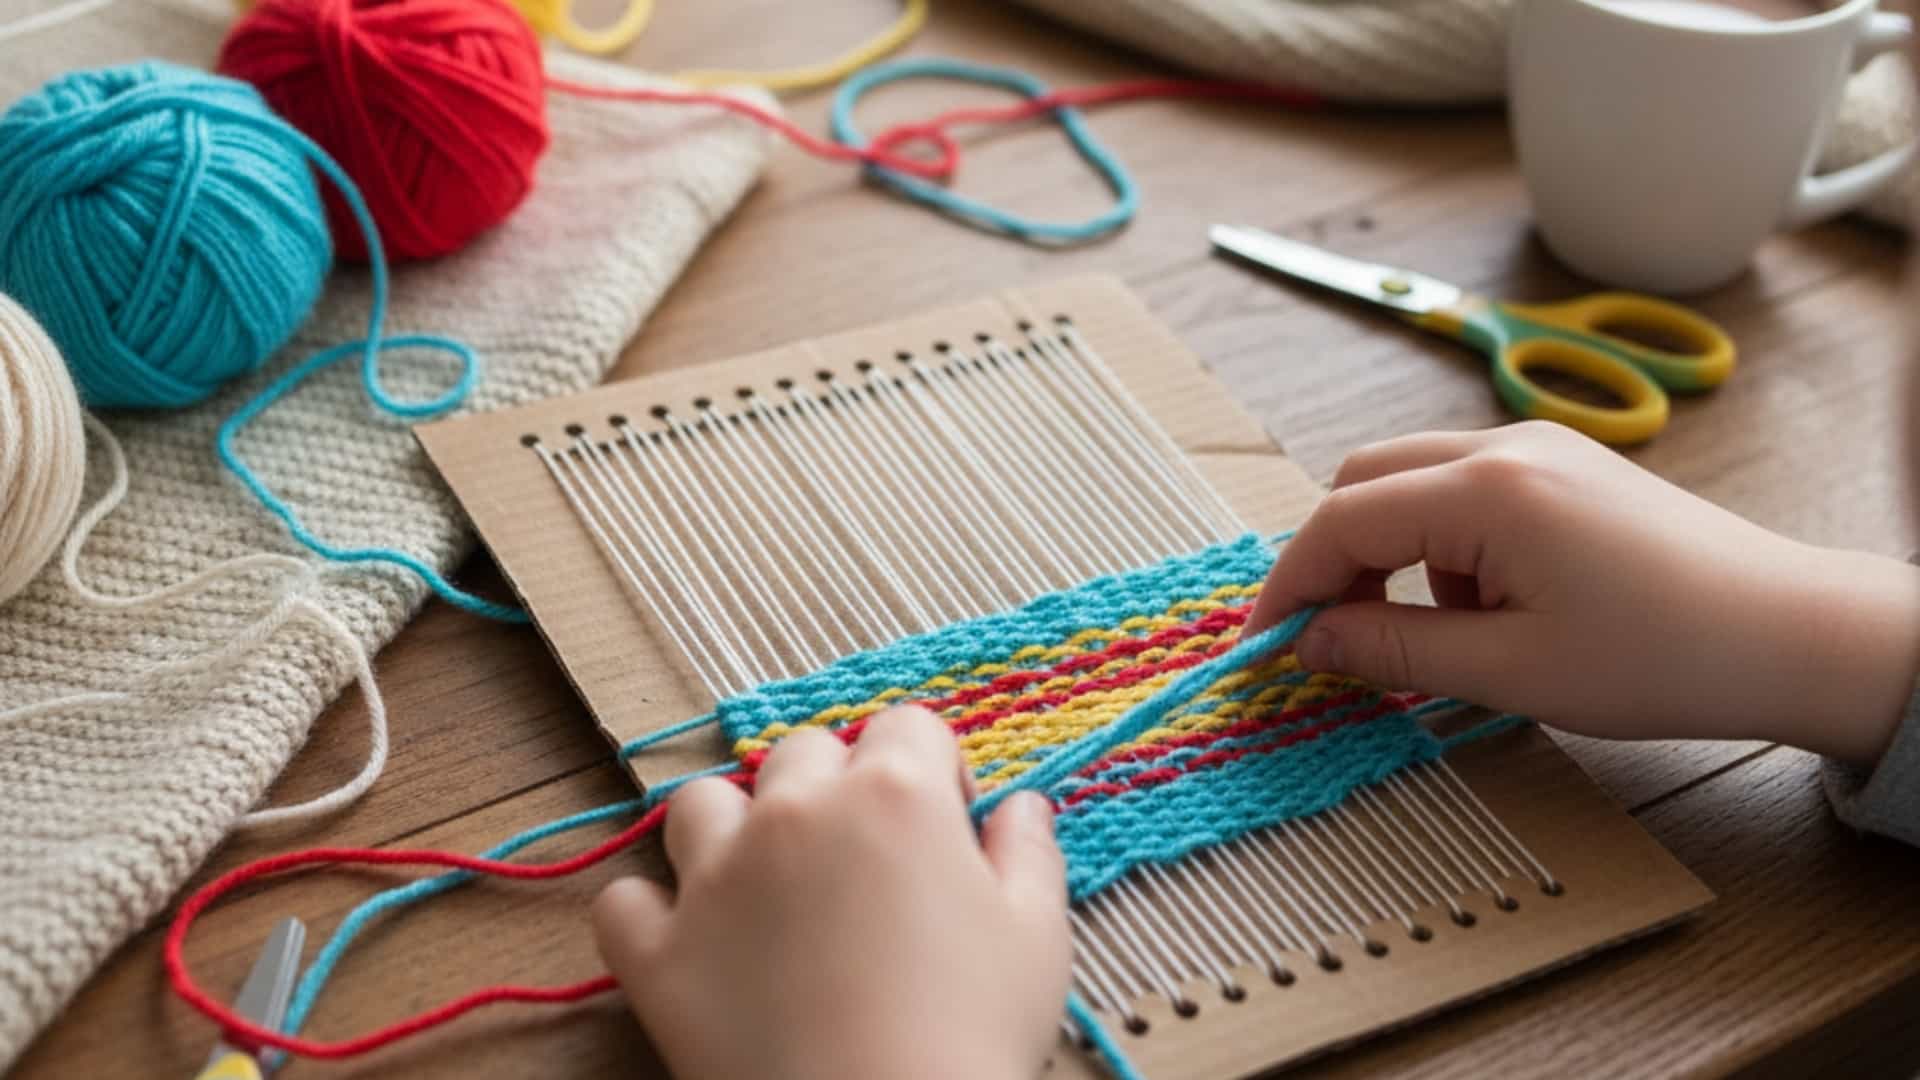
A beginner weaving project for fine motor practice. This introduces basic weaving concepts in a simple, manageable format.
Materials Required:
- Cardboard
- Yarn
Simple Steps:
- Cut slits along opposite edges of the cardboard. Space them about half an inch apart. Make an odd number of slits so that weaving works correctly.
- Thread yarn through the slits to create the warp. These are the vertical threads. Tie the yarn ends at the back.
- Intertwine yarn over and under the vertical threads. Go back and forth across the cardboard. Push each row down to keep weaving tight.
22. Salt Watercolor Art
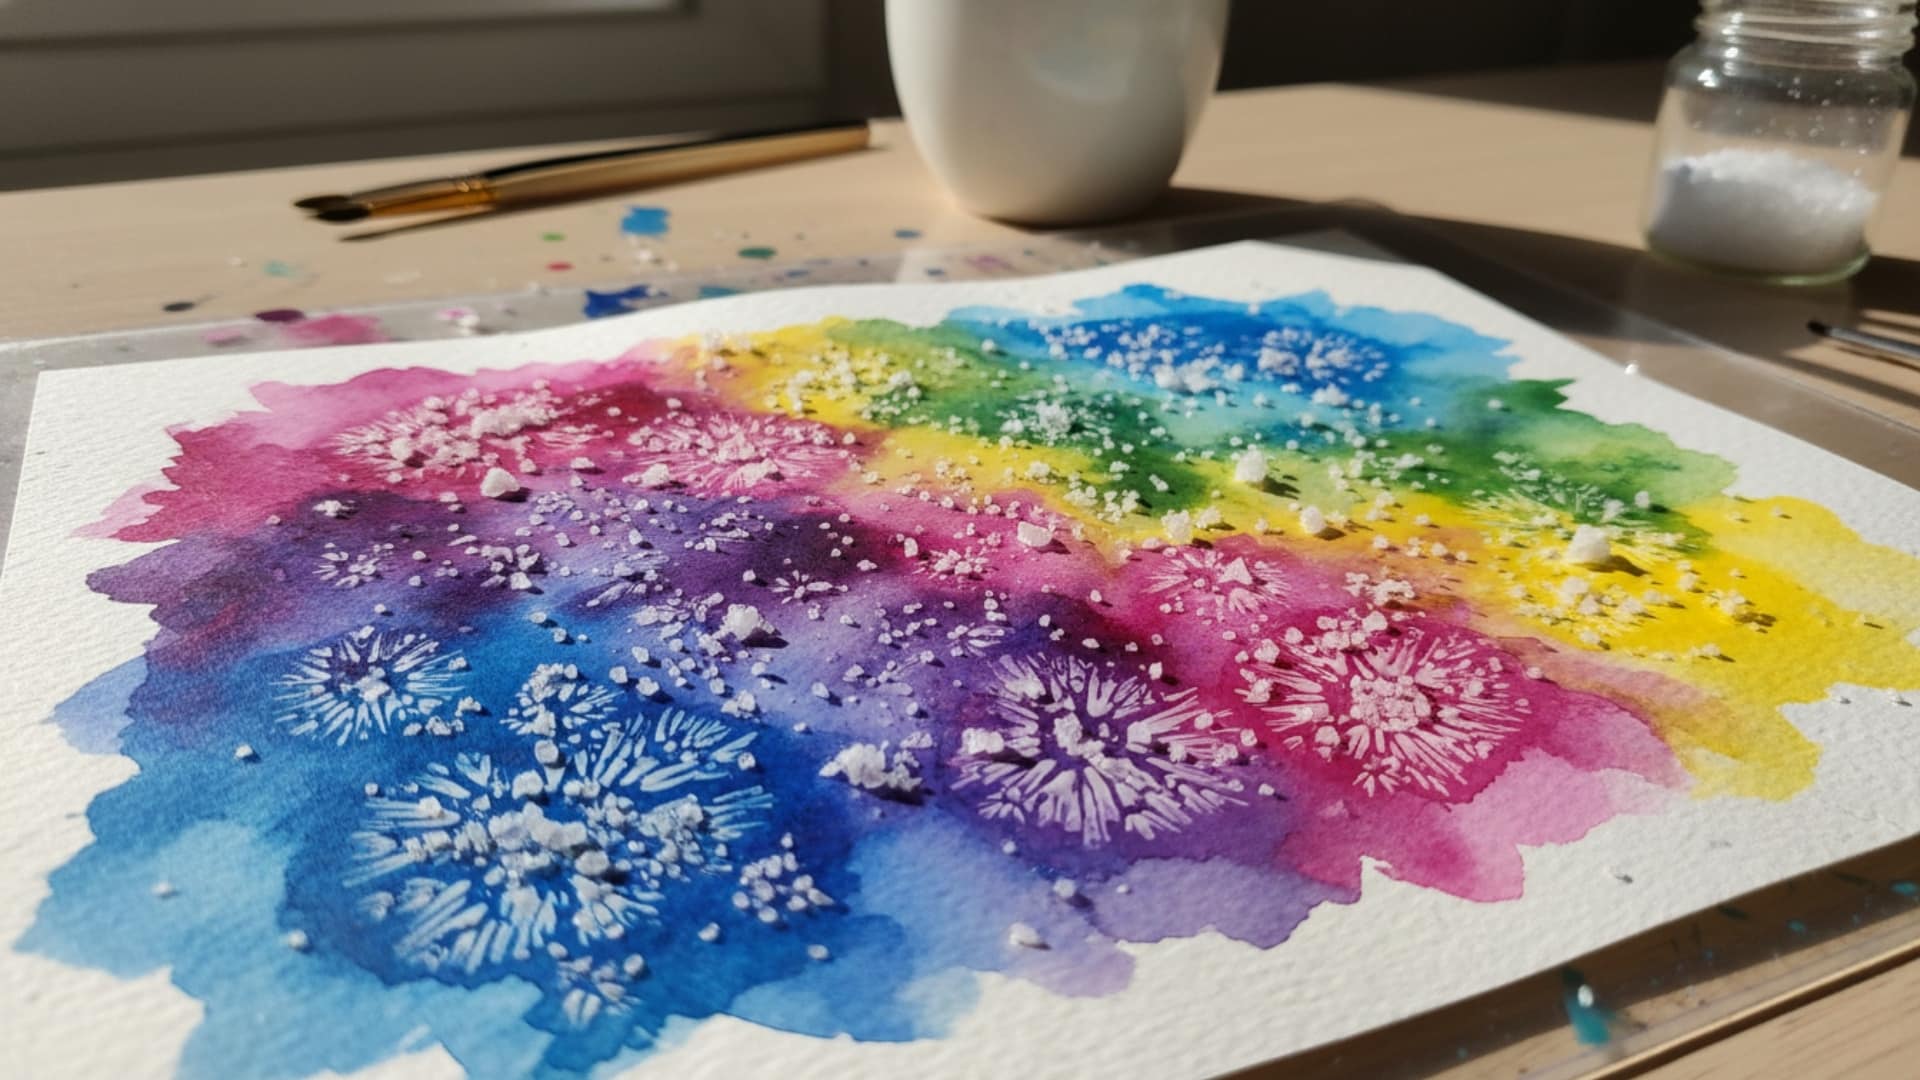
A visually exciting project showing texture changes. The salt absorbs paint in interesting ways that fascinate children.
Materials Required:
- Watercolors
- Salt
- Paper
Simple Steps:
- Paint on paper with very wet watercolors. Use lots of water so the paint pools on the surface. Work quickly on one area at a time.
- Sprinkle salt over the wet paint immediately. Use regular table salt. The salt will start absorbing the paint right away.
- Let the artwork dry completely without touching it. The salt creates starburst patterns where it absorbed the paint. Brush off excess salt when dry.
23. Sticker Resist Art
A mess-free project, great for younger kids. Peeling off stickers to reveal white shapes underneath is satisfying and fun.
Materials Required:
- Stickers
- Paint
- Paper
Simple Steps:
- Place stickers all over a piece of paper. Use different shapes and sizes. Press down firmly so the paint won’t seep underneath.
- Paint over the entire paper, including the stickers. Use one color or multiple colors. Make sure all white space is covered.
- Let the paint dry completely. Carefully peel off each sticker. White shapes remain where the stickers protected the paper from paint.
24. Newspaper Art Sculptures
An eco-friendly art project using recycled materials. Kids can create three-dimensional art while learning about reusing materials.
Materials Required:
- Newspaper
- Tape
- Paint
Simple Steps:
- Crumple and shape the newspaper into forms. Make balls, tubes, or other shapes. Combine pieces to build sculptures.
- Tape pieces together securely. Use lots of tape to make structures sturdy. Build animals, buildings, or abstract sculptures.
- Paint the dried newspaper sculpture. Cover the newsprint completely. Let it dry and display your three-dimensional creation.
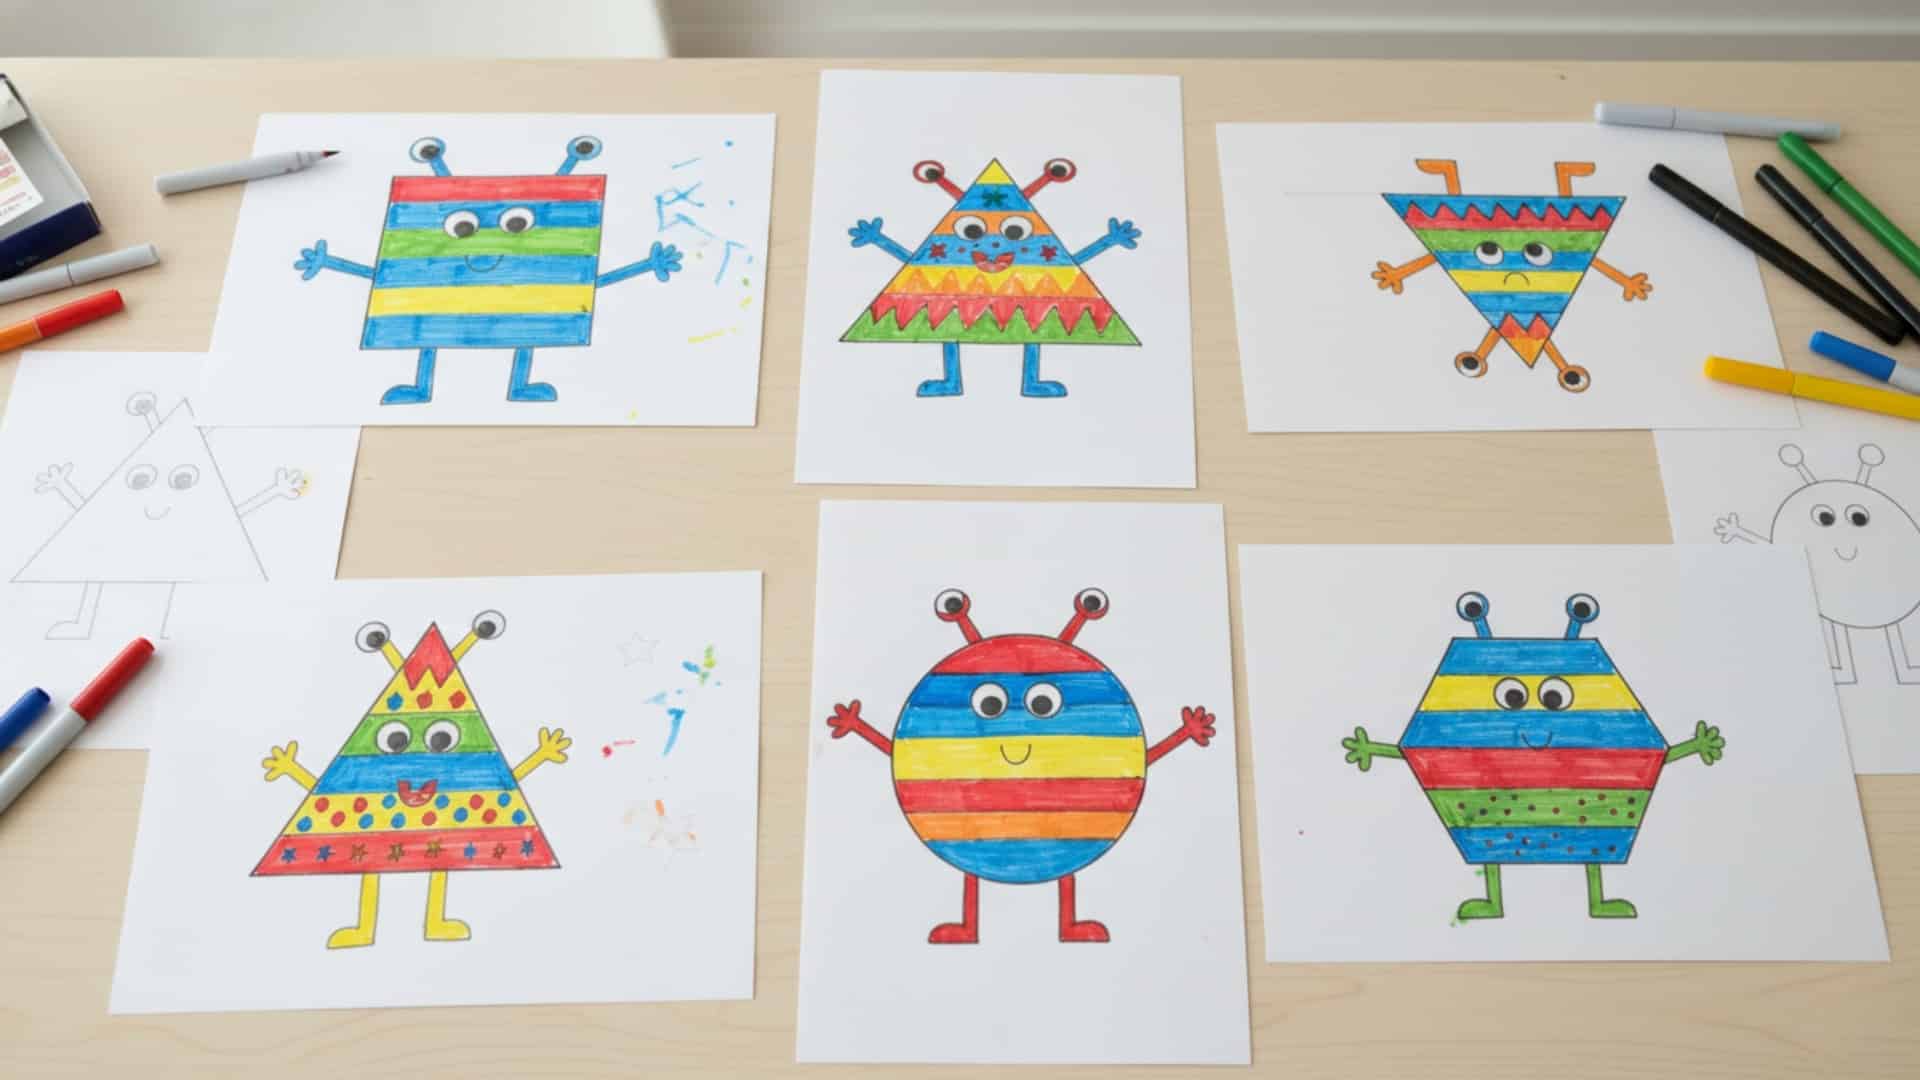
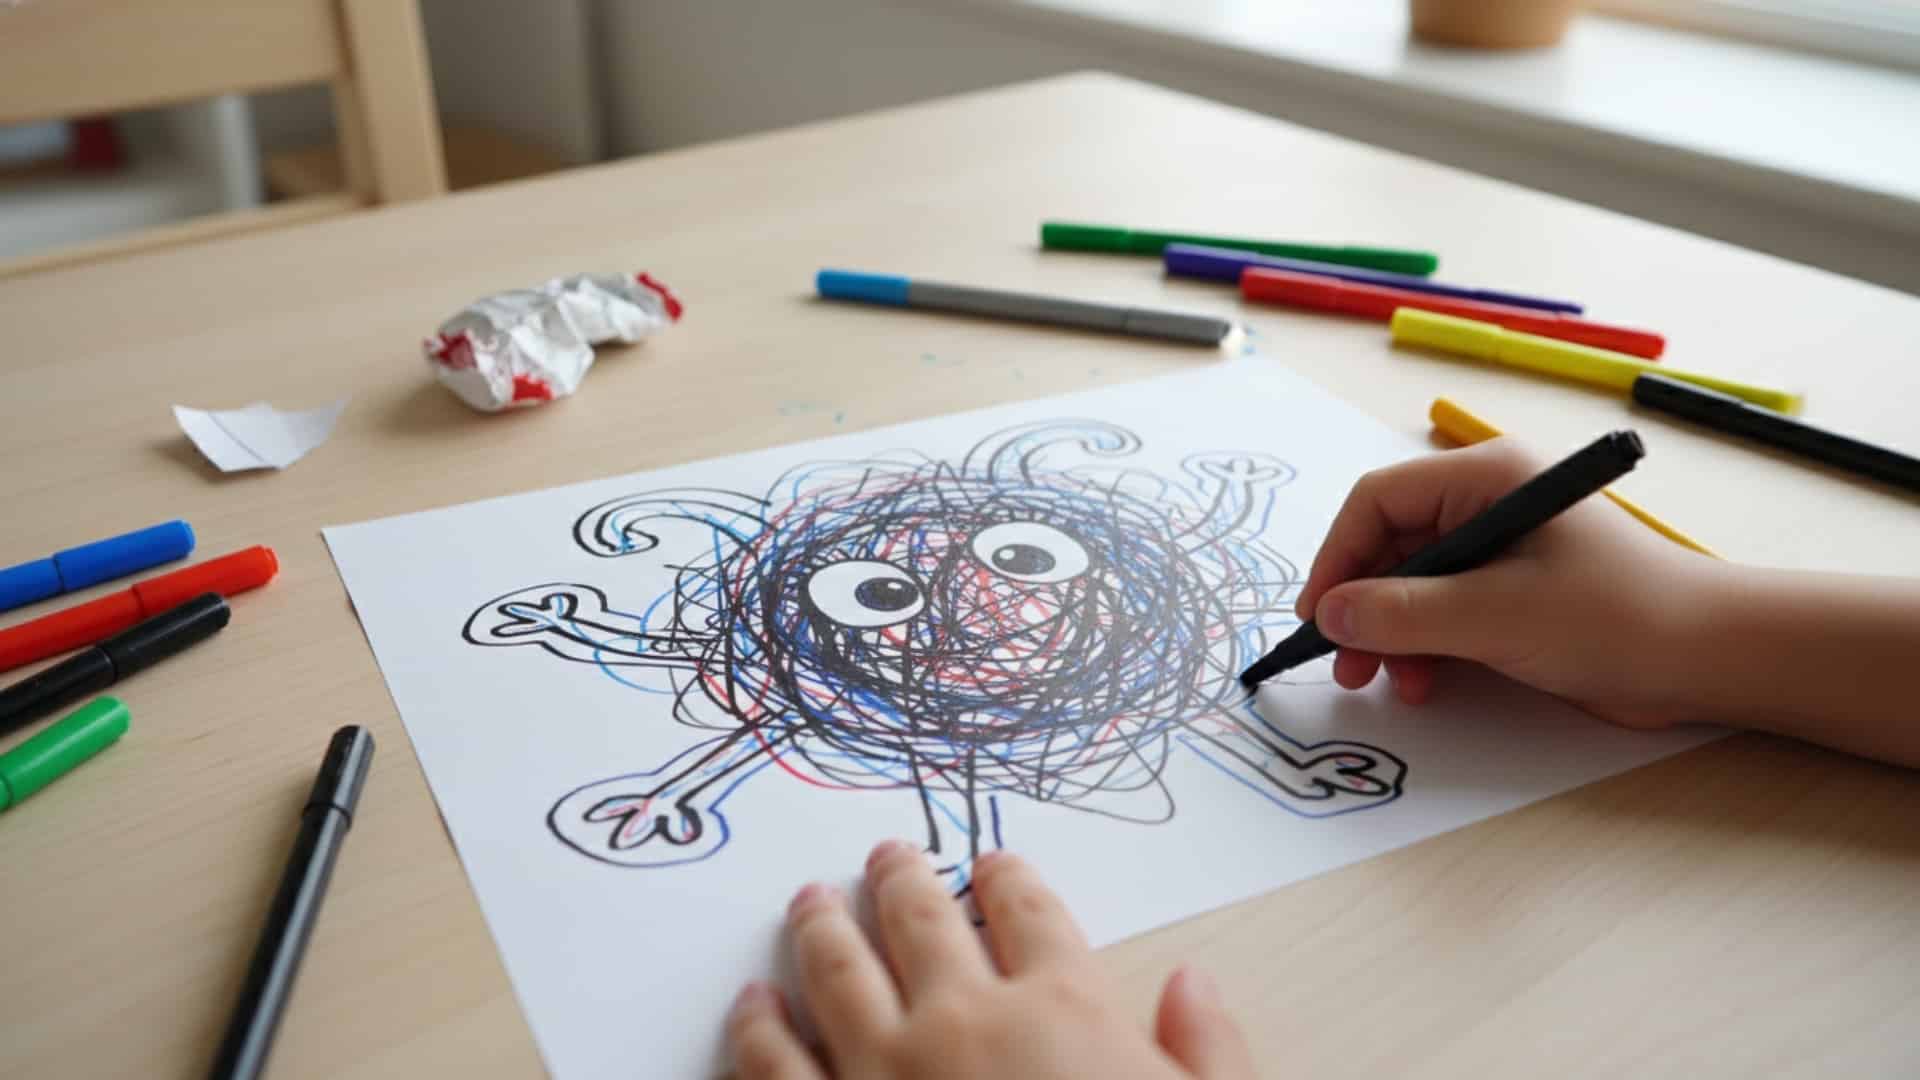
25. Shape Monster Drawings
A drawing activity that encourages imagination and geometry. Every child creates different monsters from the same starting shapes.
Materials Required:
- Paper
- Markers
Simple Steps:
- Draw random shapes all over the paper. Use circles, squares, triangles, and blobs. Make them different sizes and place them anywhere.
- Turn each shape into a silly monster. Add eyes, teeth, arms, and legs. Give each monster its own personality through features and expressions.
- Color your monsters with markers or crayons. Add spots, stripes, or other patterns. Name each monster if desired.
26. Ice Cube Painting
A cool sensory art activity with color blending. This is perfect for hot summer days when kids need to cool down.
Materials Required:
- Ice cubes
- Food coloring
- Paper
Simple Steps:
- Freeze colored water in ice cube trays. Add food coloring to water before freezing. Use different colors in separate sections.
- Place paper on a tray to catch drips. Take colored ice cubes outside or work over a sink. The melting can get messy.
- Paint with the ice cubes as they melt. Watch colors blend and drip together. The artwork will be very wet but dries beautifully.
27. Paper Straw Sculptures

A 3D art project that builds problem-solving skills. Kids figure out how to balance and connect pieces to make structures stand.
Materials Required:
- Paper straws
- Tape
Simple Steps:
- Connect straws at different angles using small pieces of tape. Experiment with triangles and squares. These shapes make strong structures.
- Keep adding straws to build larger sculptures. Make towers, bridges, or geometric designs. Test stability as you build.
- Display finished sculptures on a flat surface. Take photos from different angles. These structures are fragile but impressive.
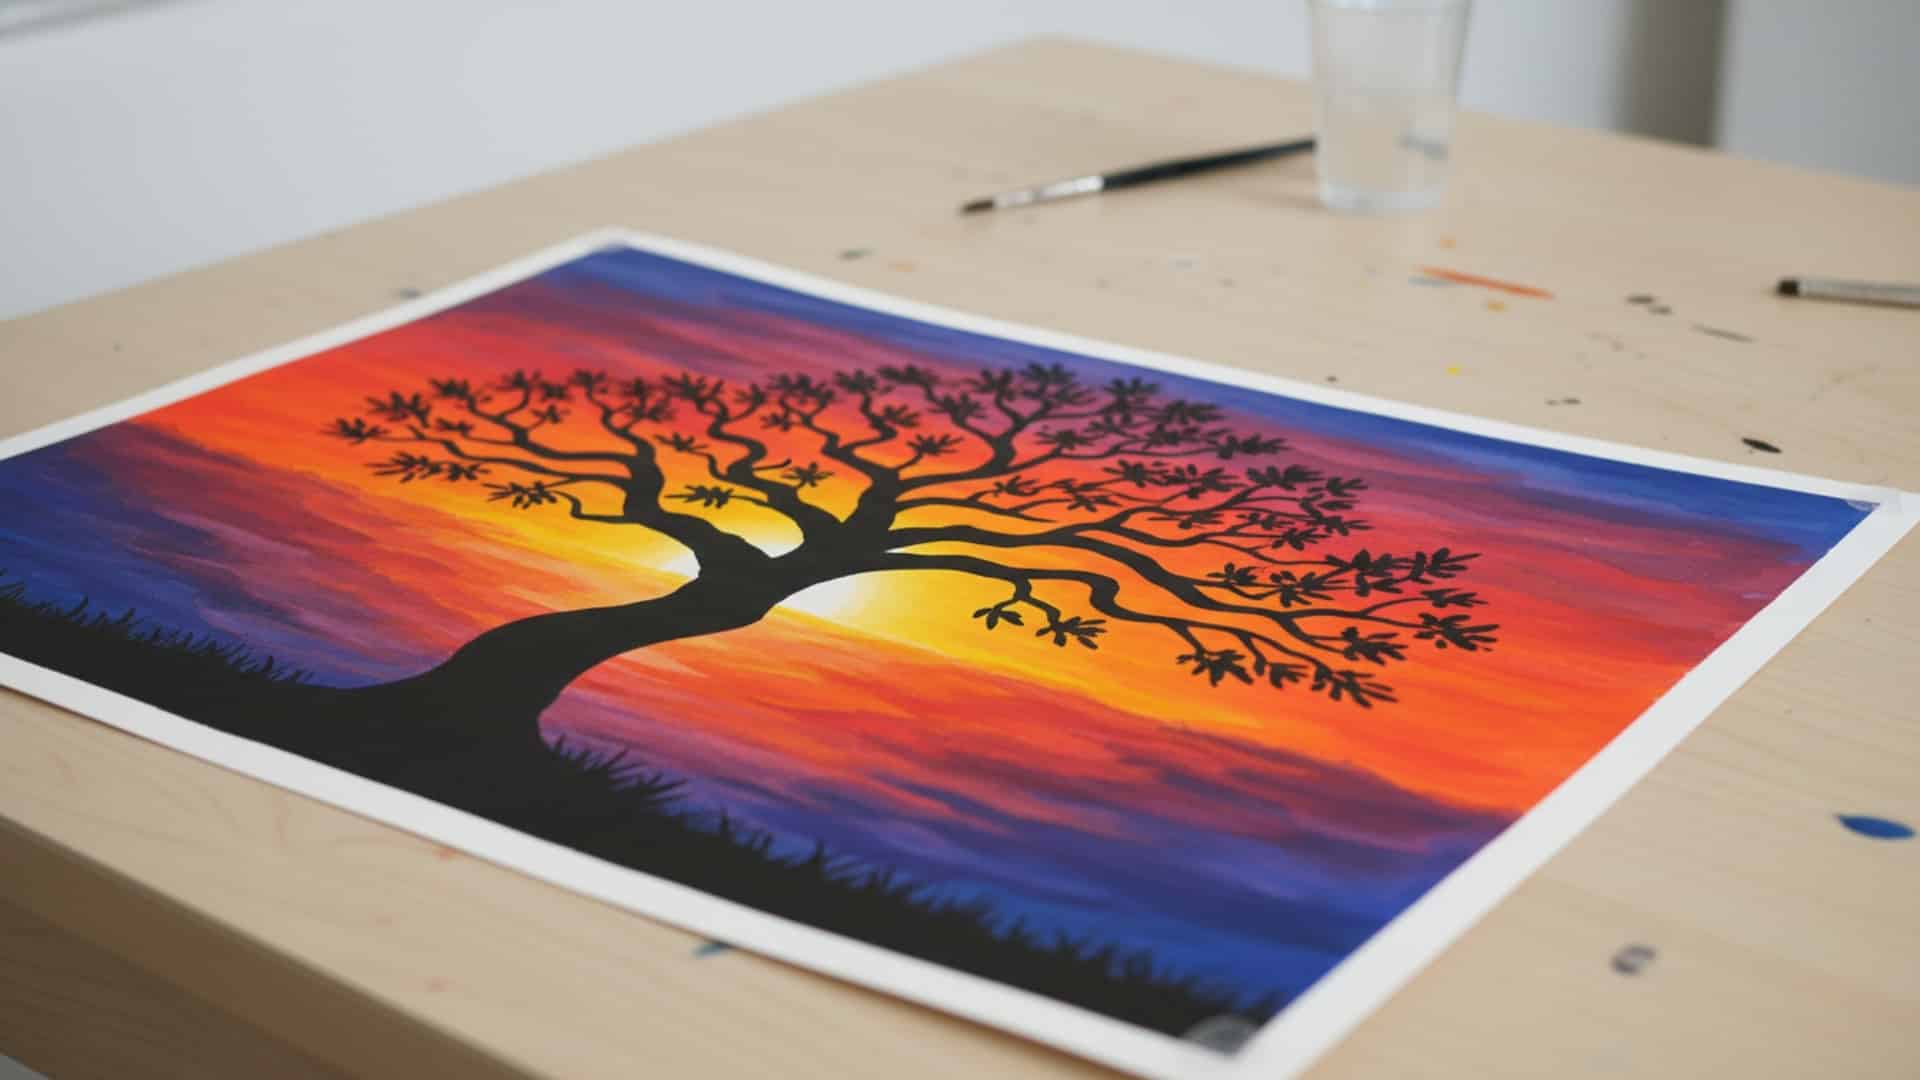
28. Silhouette Sunset Art
A visually striking project that kids love displaying. The contrast between bright backgrounds and dark silhouettes looks professional.
Materials Required:
- Paint
- Paper
- Black paper
Simple Steps:
- Paint a sunset background using warm colors. Blend red, orange, yellow, and pink together. Cover the entire paper with color and let it dry.
- Cut silhouette shapes from black paper. Trees, buildings, or animals work well. Keep shapes simple without interior details.
- Glue black silhouettes onto the dried sunset background. Place them along the bottom edge. The contrast creates a dramatic effect.
29. Crayon Shaving Art
A colorful project using heat and texture. Adult supervision is required for the ironing step.
Materials Required:
- Crayons
- Sharpener
- Wax paper
- Iron
Simple Steps:
- Sharpen crayons over wax paper. Let colorful shavings fall onto the paper. Use many colors scattered across the surface.
- Place a second sheet of wax paper on top. The crayon shavings are now sandwiched between two sheets. Be careful not to shift the shavings.
- Have an adult iron over the top sheet on low heat. The shavings will melt and spread. Let cool completely before peeling apart the sheets.
30. Sticker Collage Art
A confidence-building art activity for younger kids. There’s no wrong way to place stickers, making this a stress-free creative outlet.
Materials Required:
- Stickers
- Paper
Simple Steps:
- Provide kids with various stickers. Include different themes, sizes, and colors. The more variety, the better.
- Let children arrange stickers on paper however they want. They can create scenes, patterns, or random arrangements. Encourage them to fill the page.
- Add drawings with markers or crayons if desired. Kids can draw backgrounds or connect stickers into a story. Display the finished collage.
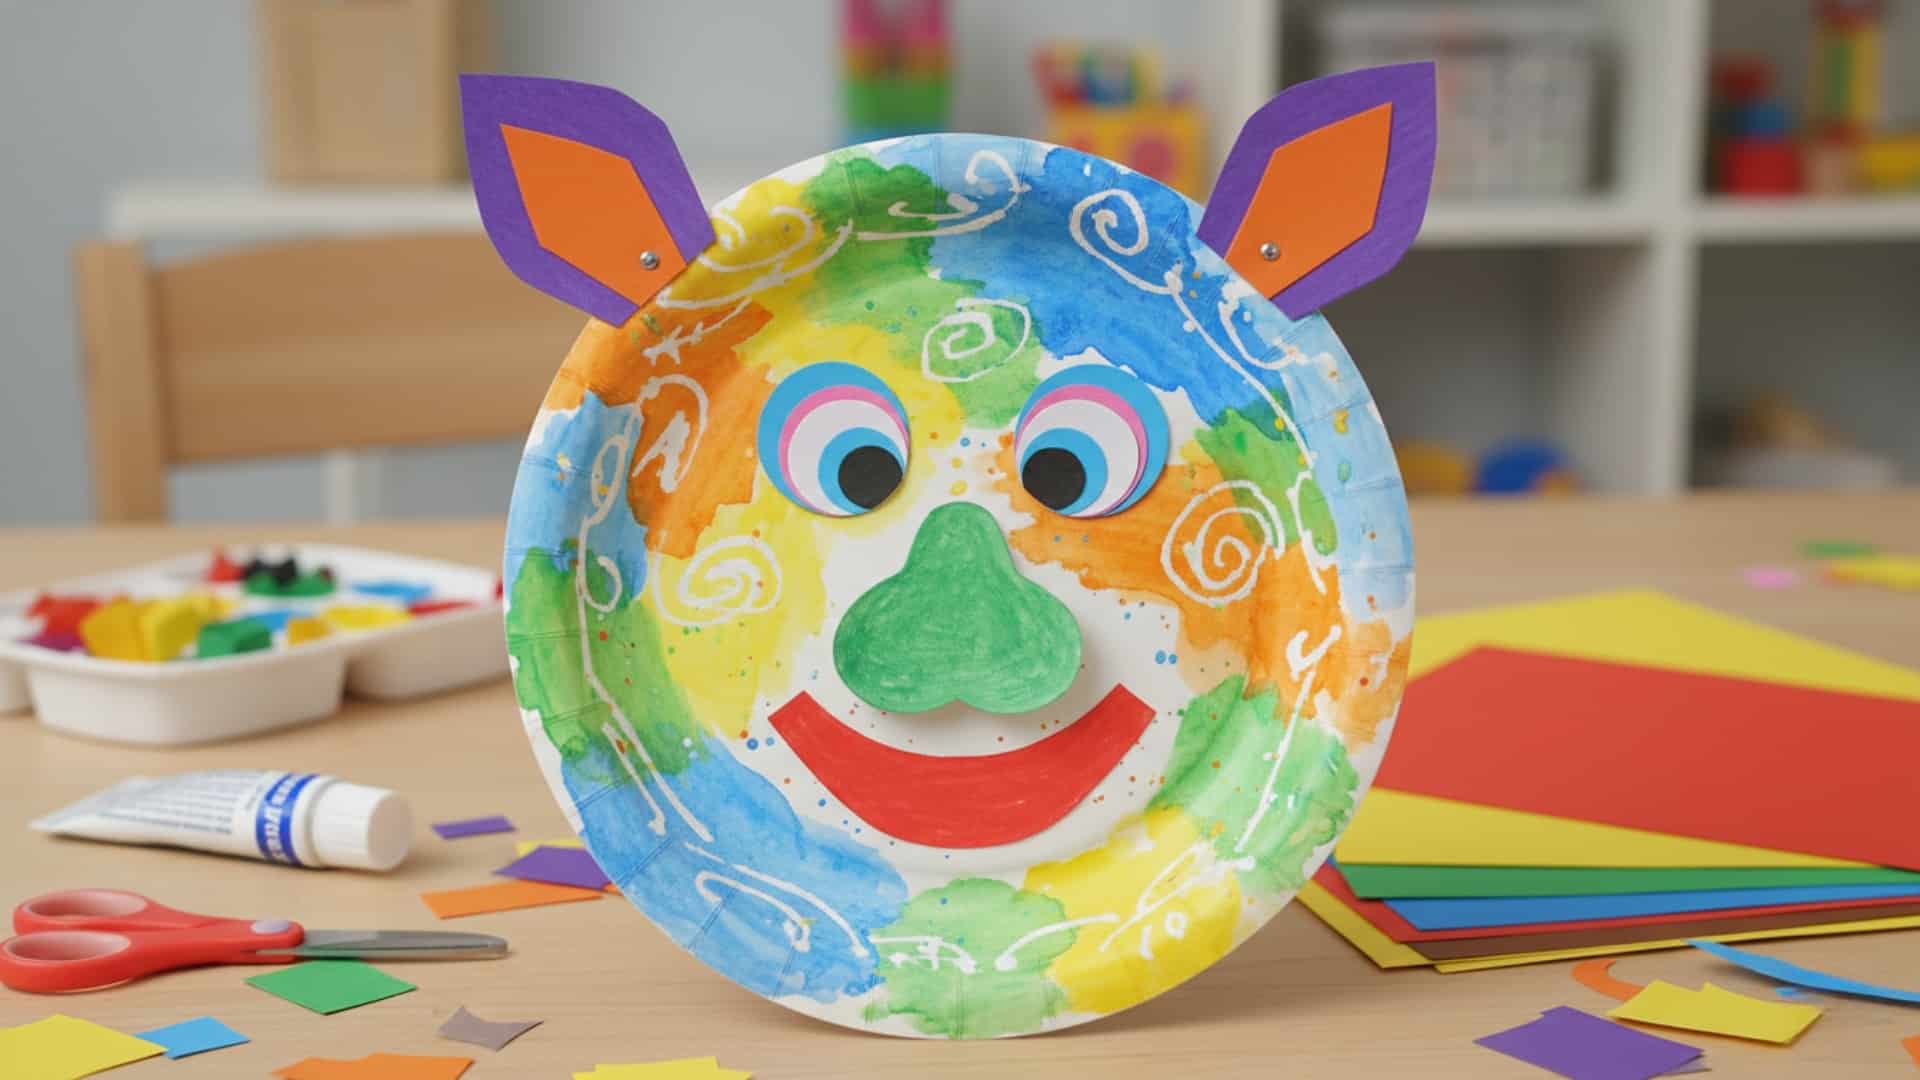
31. Mask Making Art
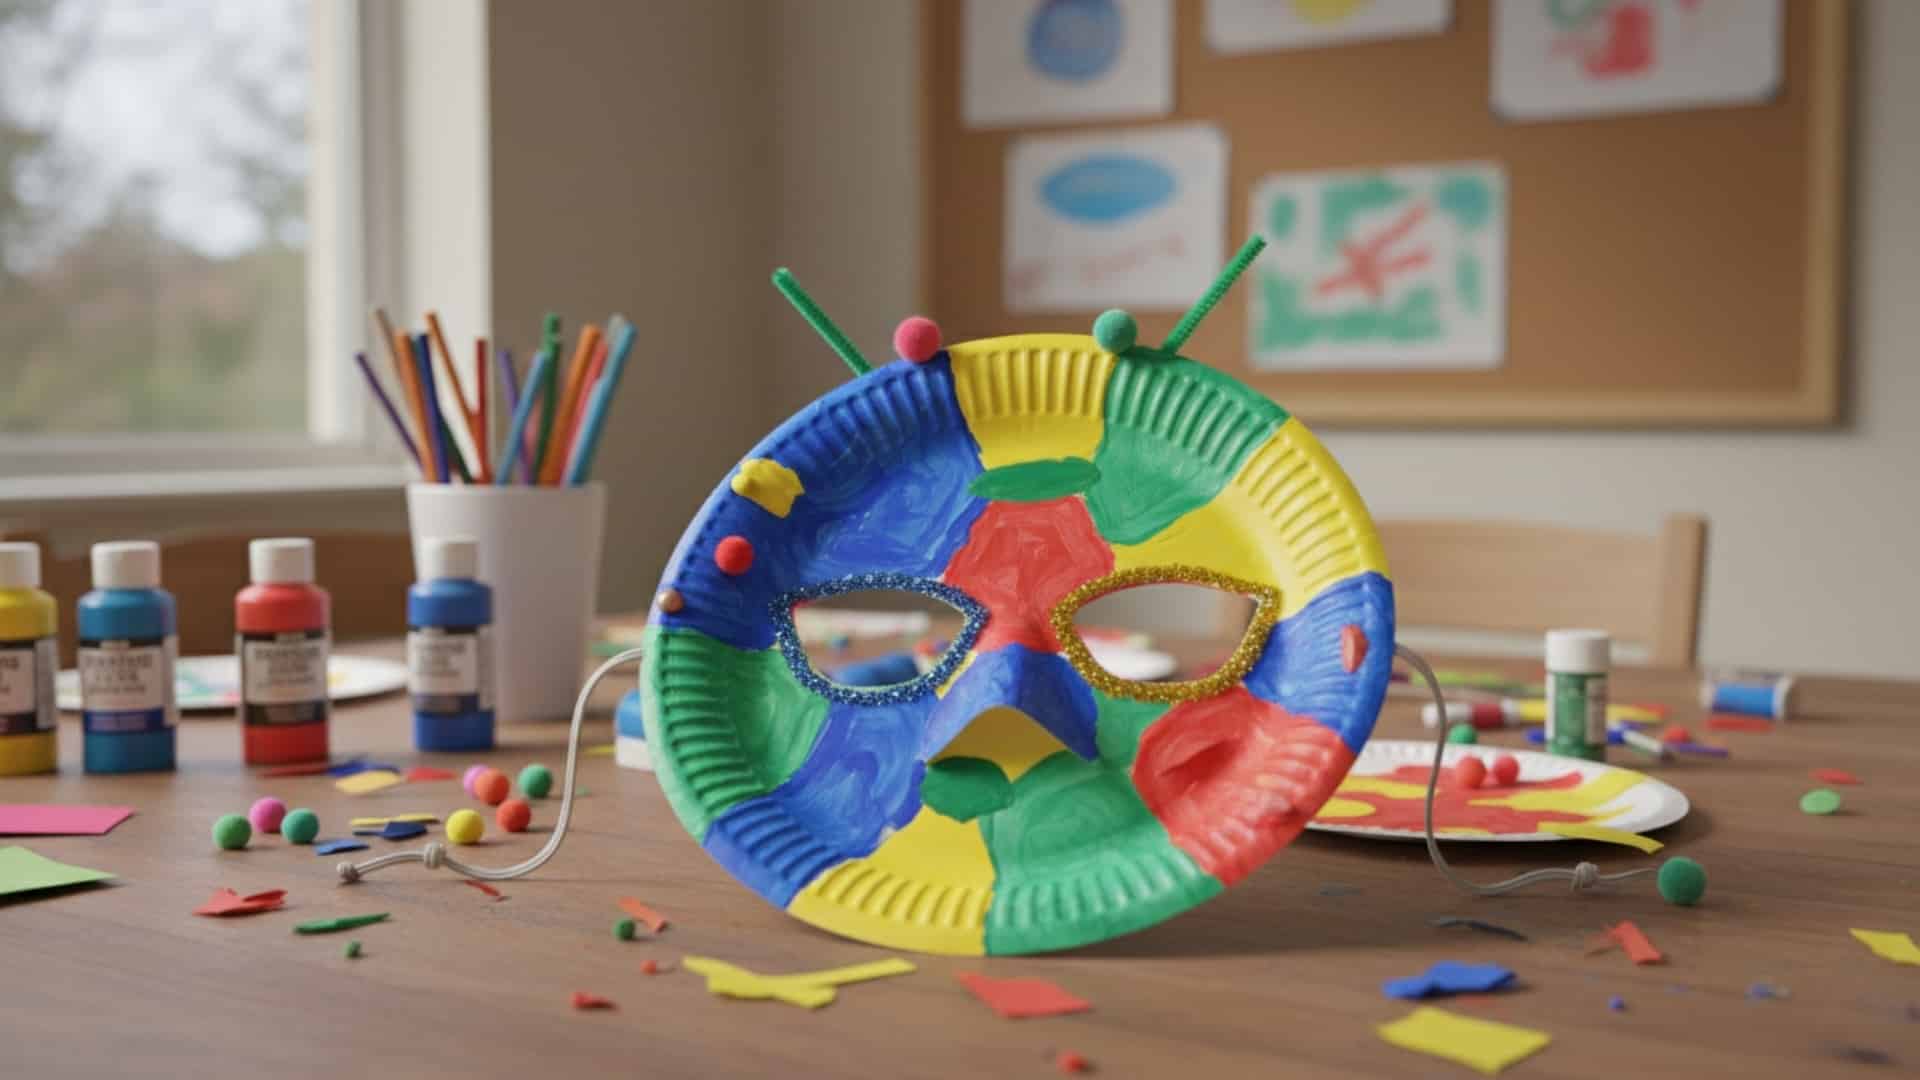
A creative project tied to dramatic play. Kids can wear their finished masks for pretend play or performances.
Materials Required:
- Paper plates
- Paint
- String
Simple Steps:
- Cut eye holes in a paper plate. Make sure they line up with the child’s eyes. Trim the holes carefully for comfort.
- Paint and decorate the plate as a character or animal. Let the paint dry completely. Add paper features like ears or noses.
- Attach a string to both sides of the mask. Tie it at a length that fits comfortably. The mask is ready to wear for imaginative play.
32. Leaf Rubbing Art

A nature-based art activity that highlights texture. This classic project never gets old and works in any season.
Materials Required:
- Leaves
- Crayons
- Paper
Simple Steps:
- Collect leaves with interesting shapes and textures. Look for prominent veins and varied edges. Fresh leaves work better than dried ones.
- Place a leaf under a piece of paper. Hold the paper steady with one hand. The leaf should stay flat underneath.
- Rub the side of a crayon over the paper above the leaf. Use gentle, even strokes. The leaf’s shape and texture will appear on the paper.
33. Button Art Pictures
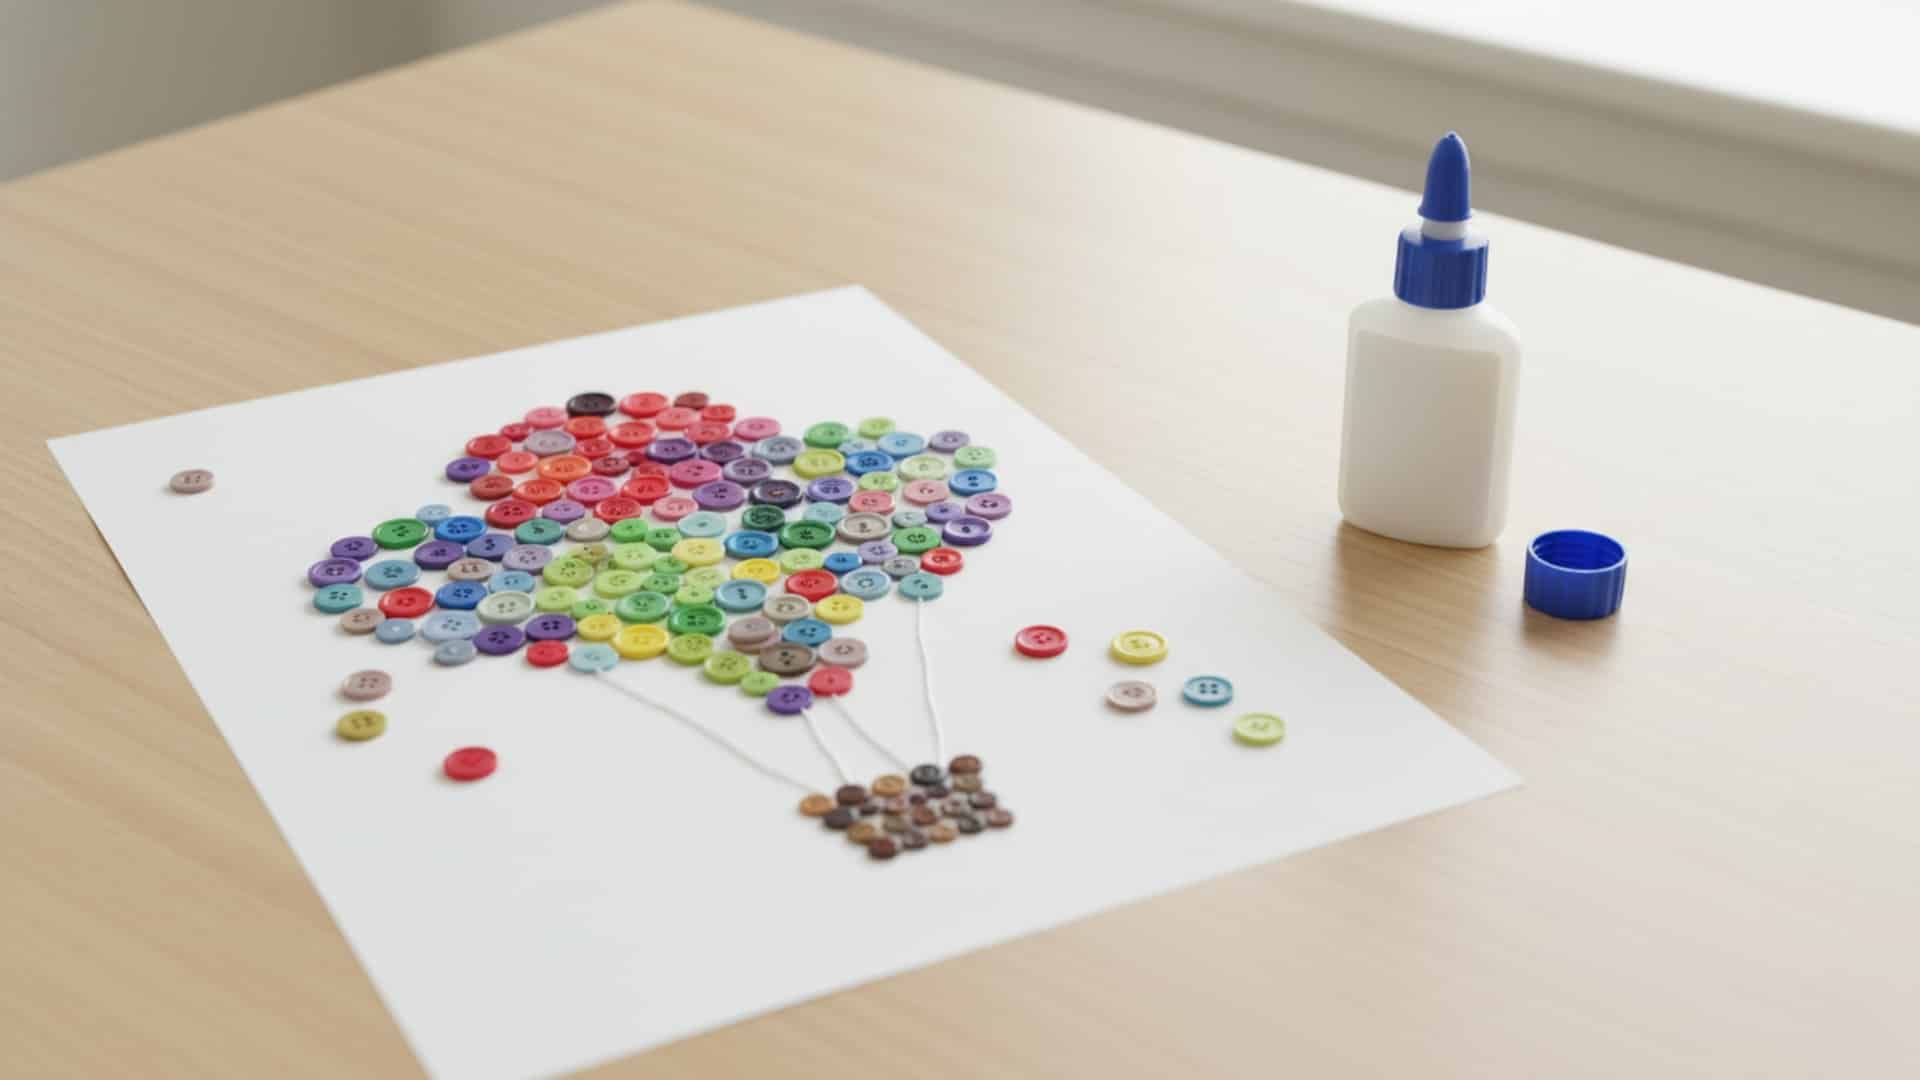
A fine motor project using simple materials. Sorting and placing buttons helps develop precision and planning skills.
Materials Required:
- Buttons
- Glue
- Paper
Simple Steps:
- Draw a simple outline on paper. Keep the design basic with large areas to fill. Animals, flowers, and shapes work well.
- Arrange buttons inside the outline before gluing. Try different colors and sizes. Plan the layout to see what looks best.
- Glue buttons in place one at a time. Use craft glue or a glue gun with adult help. Press each button down firmly and let it dry completely.
34. Paper Fan Painting
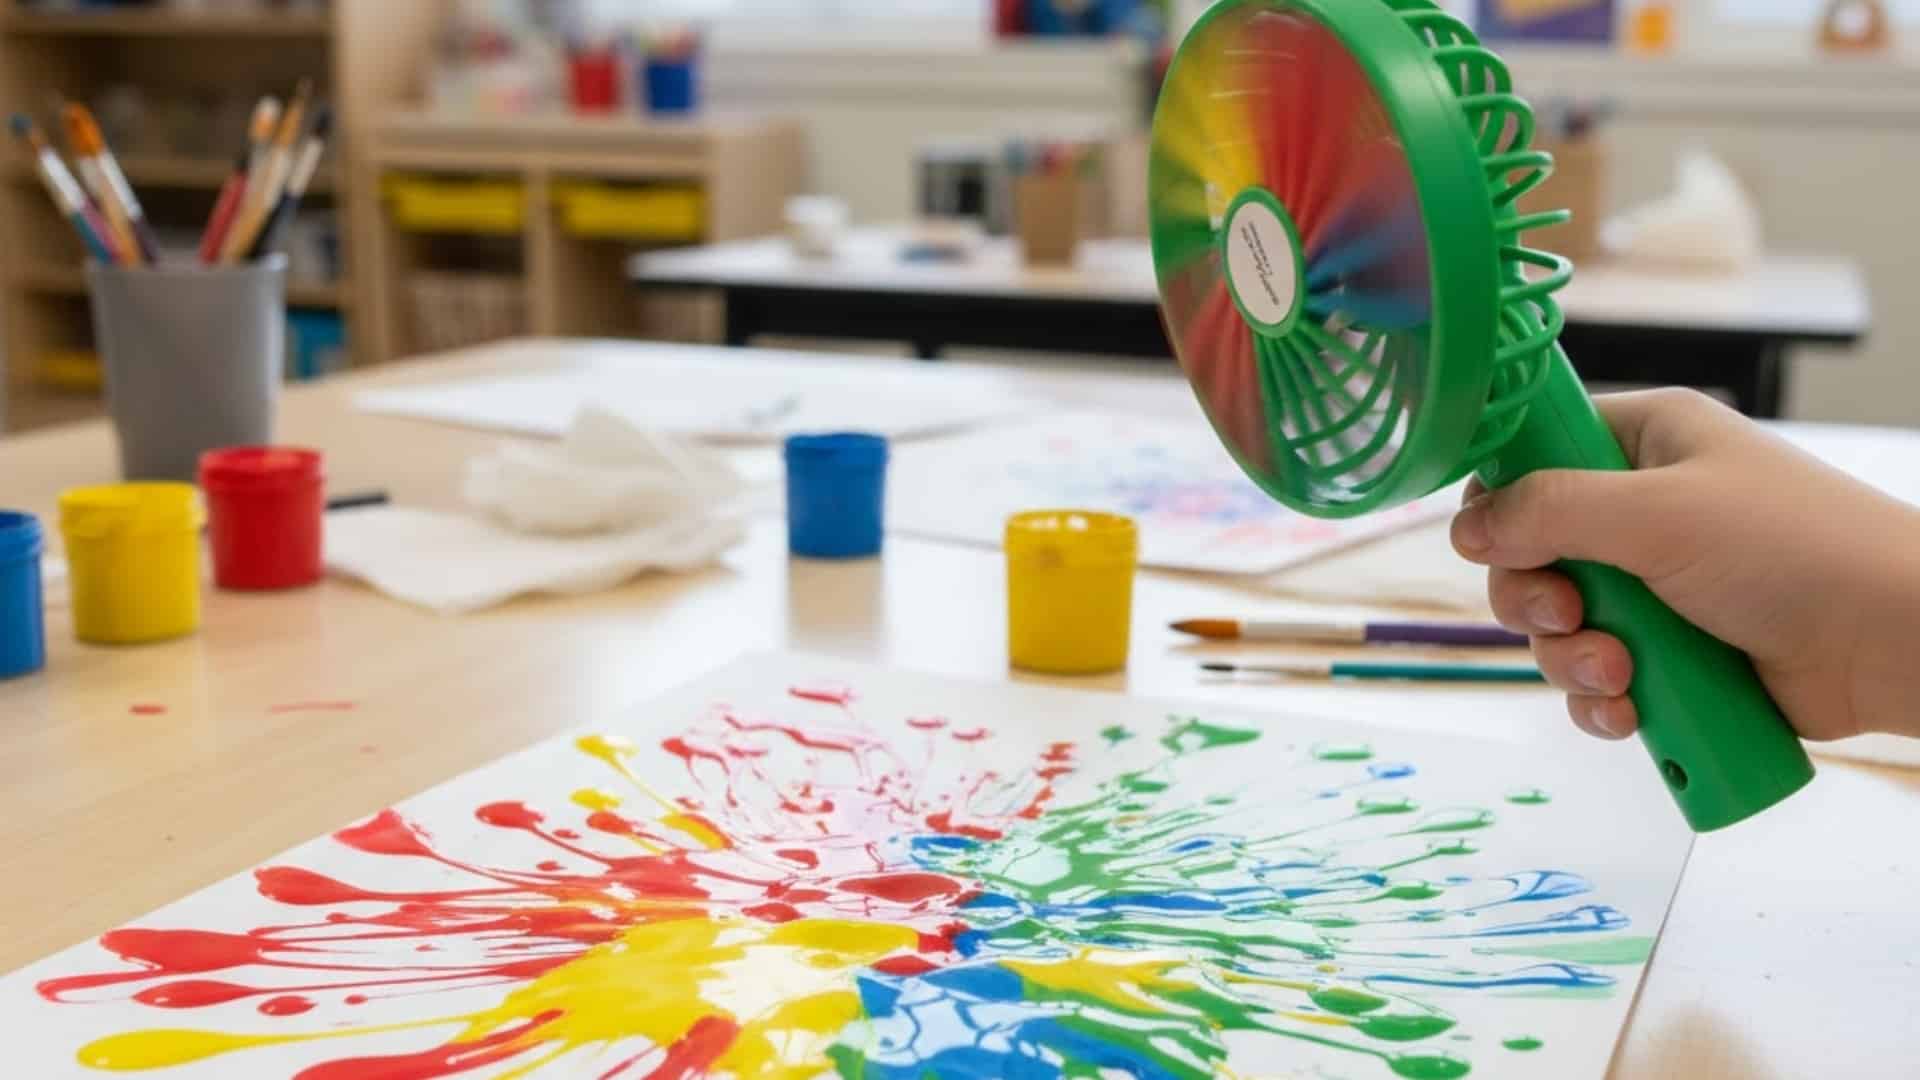
A motion-based painting activity with abstract results. Moving air creates unpredictable patterns that surprise kids.
Materials Required:
- Paper
- Paint
- Handheld fan
Simple Steps:
- Place drops of watery paint on paper. Use several colors, but don’t use too much. The paint needs to be thin enough to move.
- Turn on a handheld fan and aim it at the paint. The air will blow the paint across the paper. Tilt the paper to help direct the flow.
- Keep blowing until you like the design. Add more paint drops if needed. Let the artwork dry flat.
35. Masking Tape Art
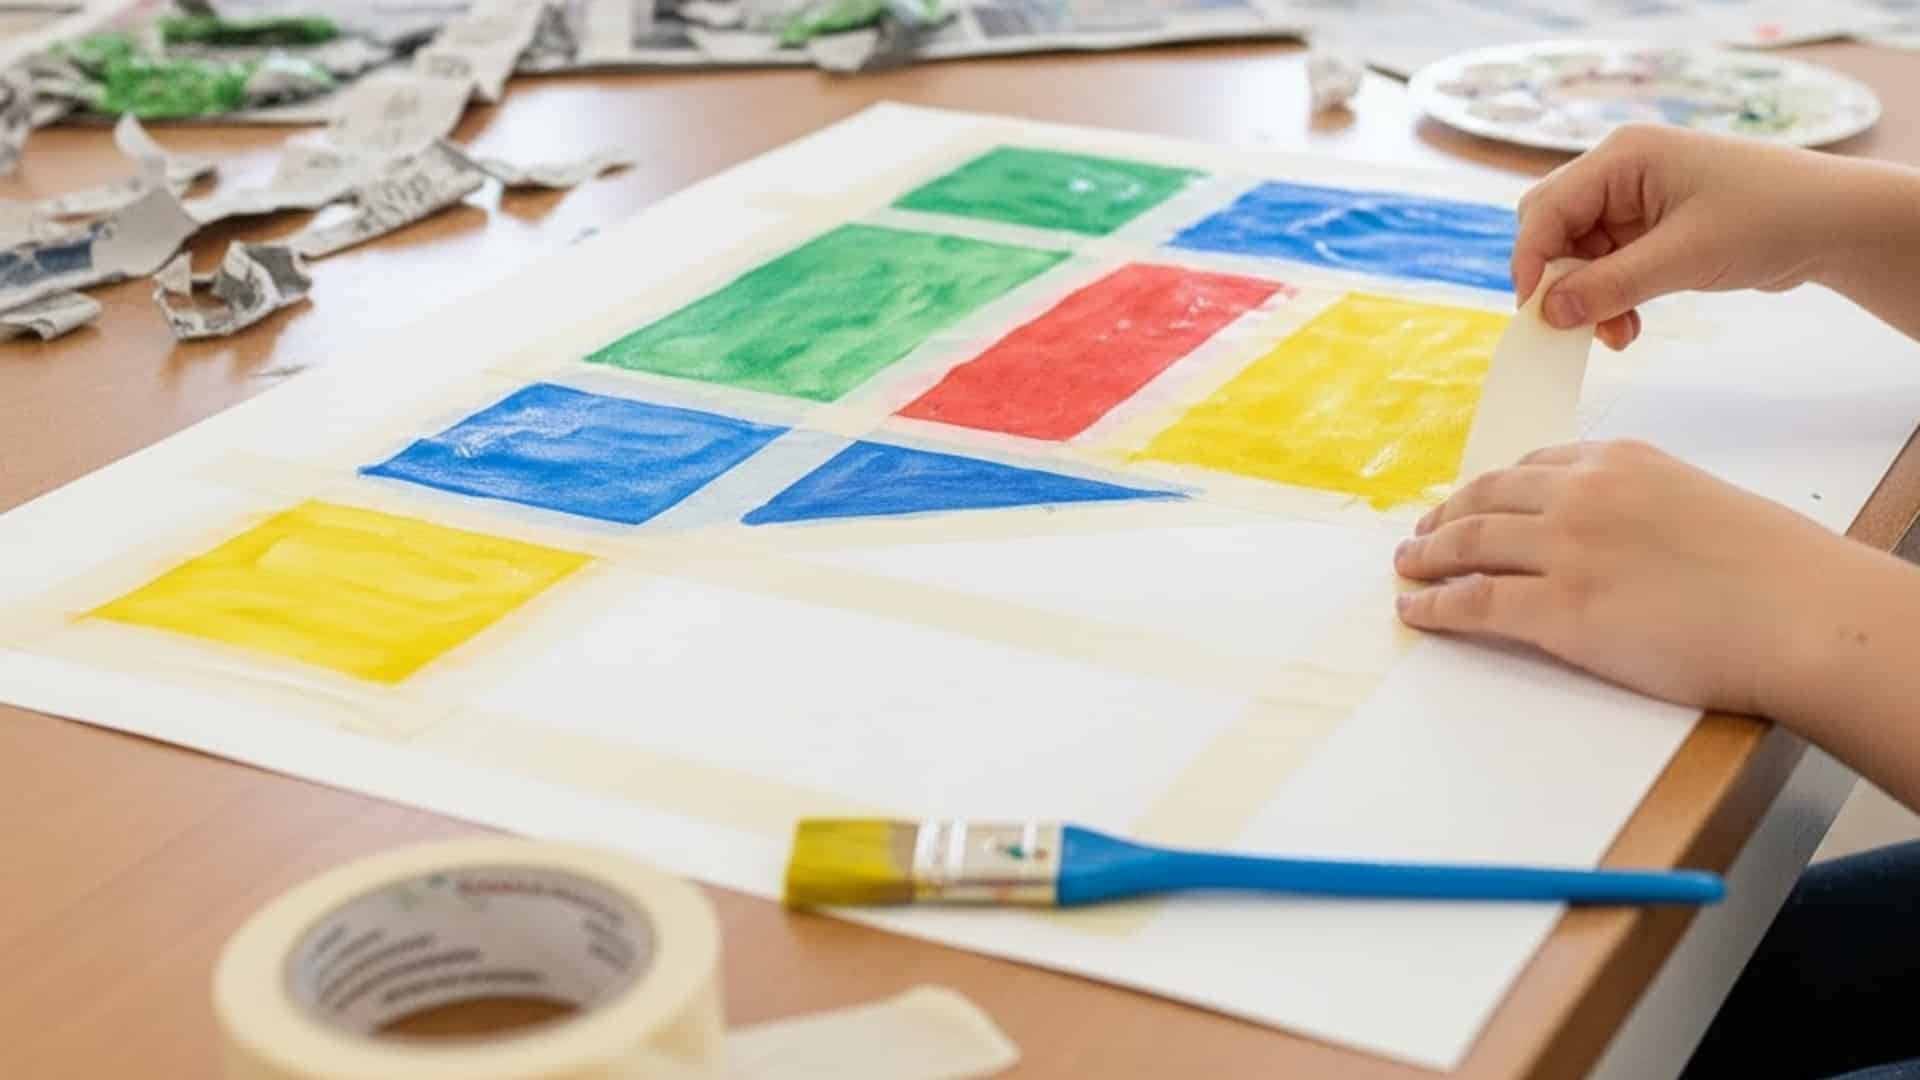
A clean-edged painting project kids enjoy peeling. The reveal at the end is always exciting and satisfying.
Materials Required:
- Tape
- Paint
- Paper
Simple Steps:
- Create patterns on paper using masking tape. Make stripes, geometric shapes, or abstract designs. Press the tape down firmly.
- Paint over the entire paper, including the tape. Use one color or many colors. Cover all visible surfaces with paint.
- Let the paint dry completely. Peel off the tape slowly and carefully. Clean white lines remain where the tape blocked the paint.
36. Paper Roll Animals
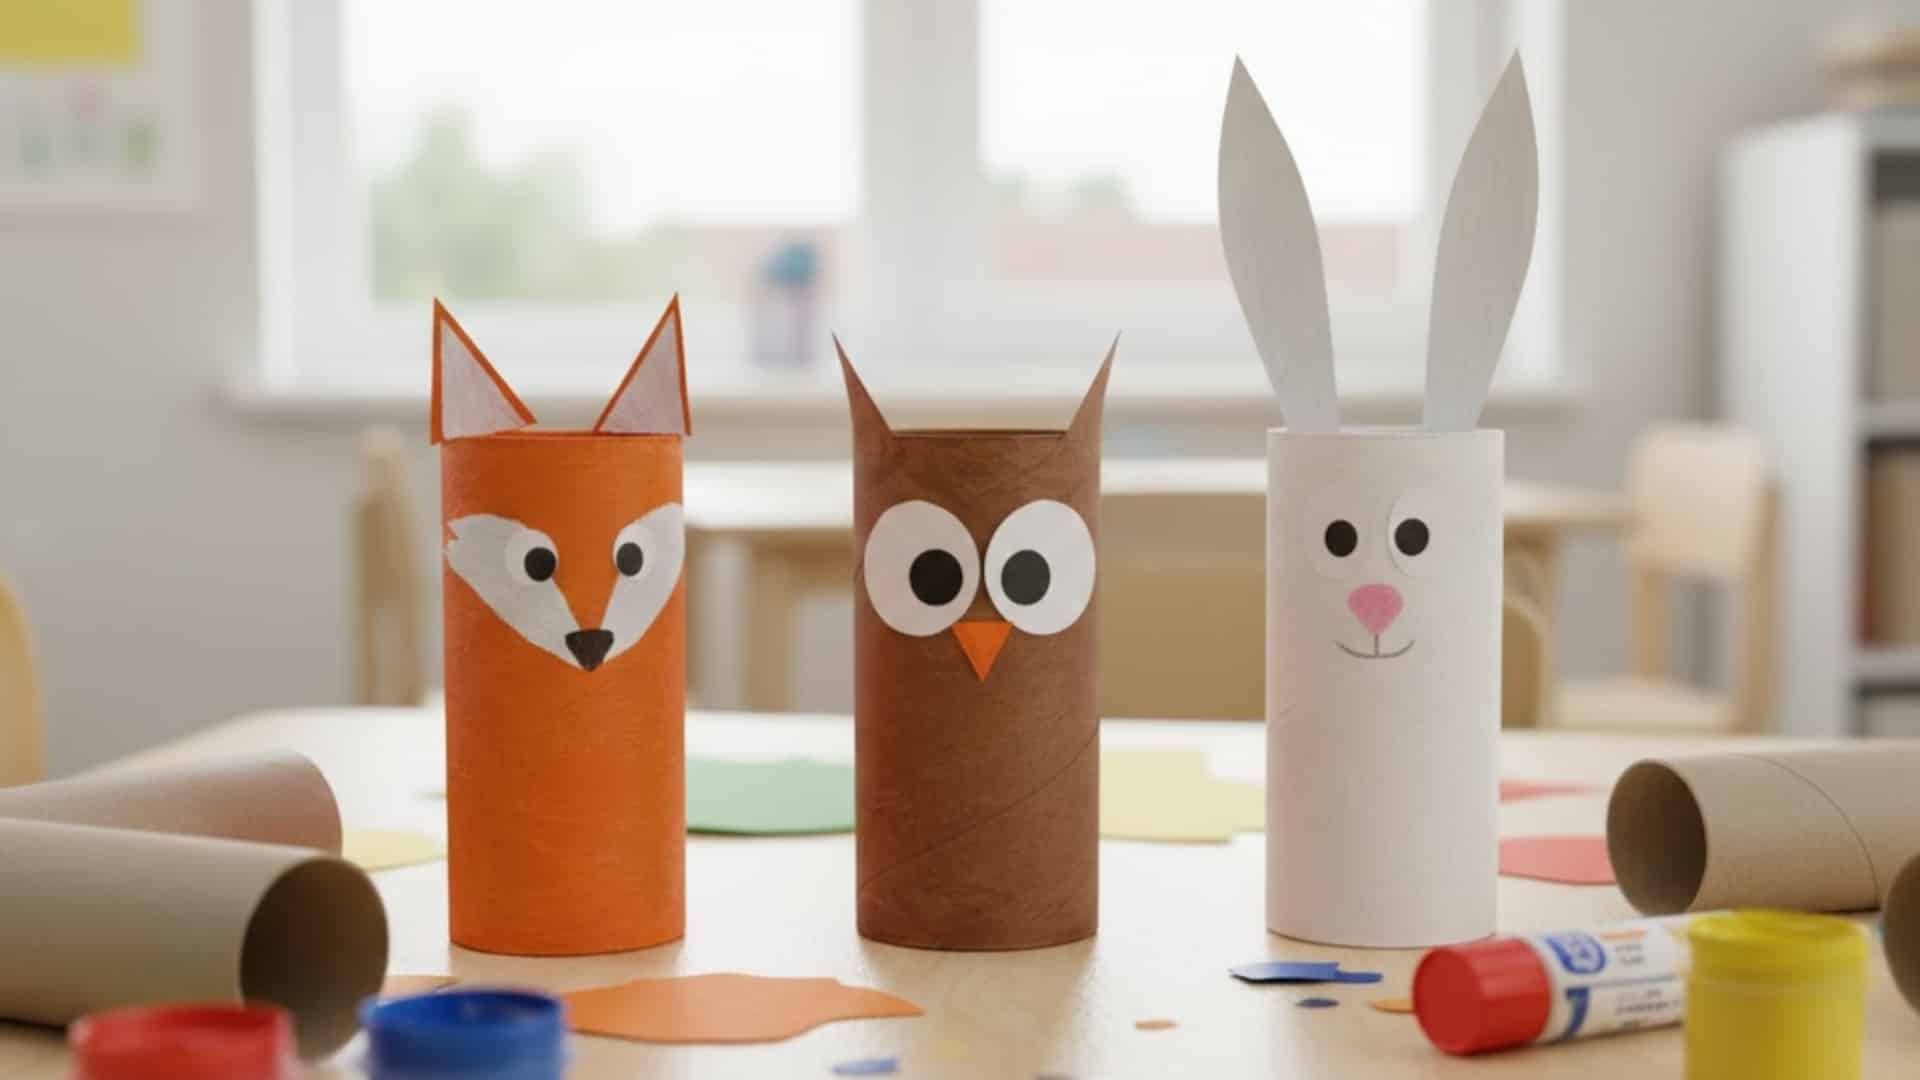
An easy recycled art project with variations. Empty toilet paper rolls change into cute creatures with minimal supplies.
Materials Required:
- Paper rolls
- Paint
- Glue
Simple Steps:
- Paint paper rolls in animal colors. Let them dry standing upright. Use bright colors that kids love.
- Add features using paper, googly eyes, or markers. Make ears, tails, and legs. Attach pieces with glue and let them dry.
- Display your paper roll zoo. Kids can use them for imaginative play. These animals are sturdy enough for gentle handling.
37. Foil Painting
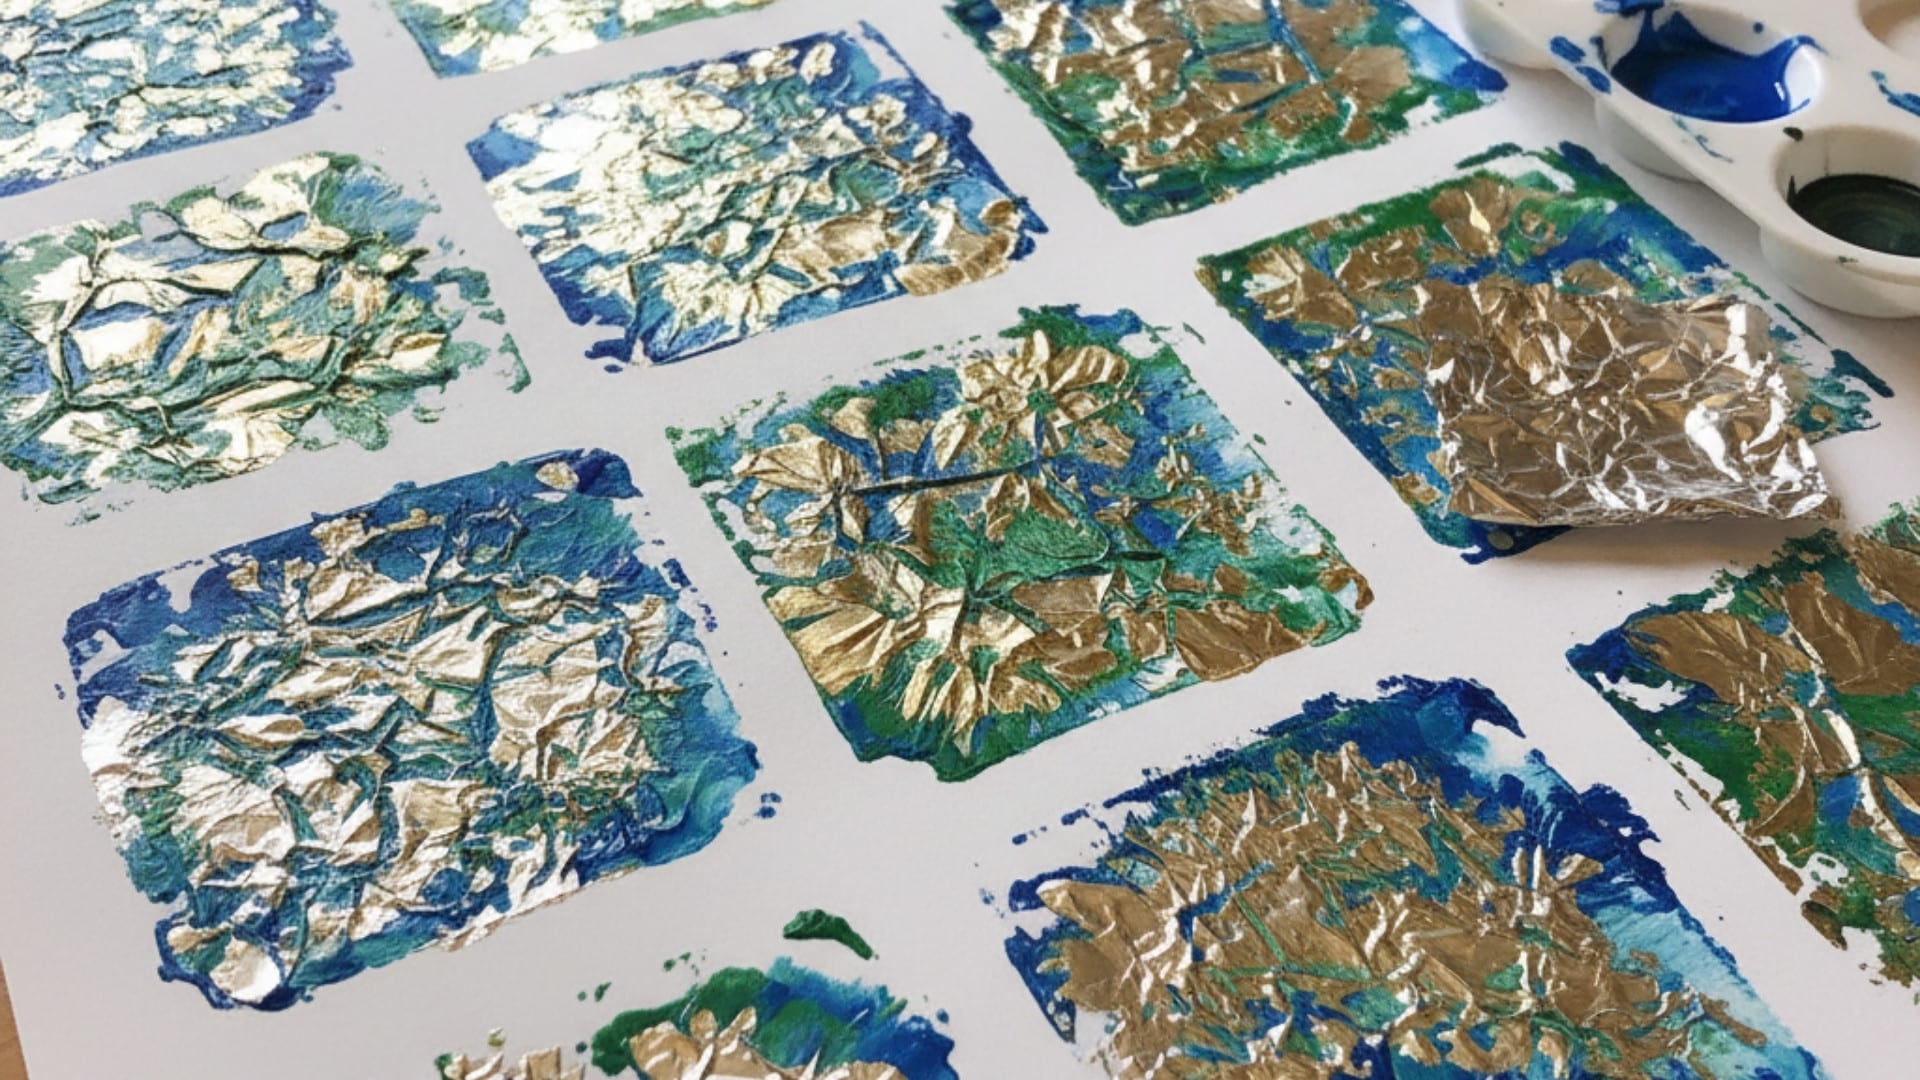
A texture-rich project using unexpected materials. The crinkly surface creates interesting paint effects different from regular paper.
Materials Required:
- Aluminum foil
- Paint
Simple Steps:
- Crumple aluminum foil, then smooth it out partially. Leave some texture, but make it flat enough to paint on. Tape edges to a table.
- Paint directly on the foil surface. The paint will pool in the creases. Use thick paint for best results.
- Let the paint dry completely on the foil. The finished piece has a unique metallic shine. Handle carefully, as foil tears easily.
38. Shape Stencil Art
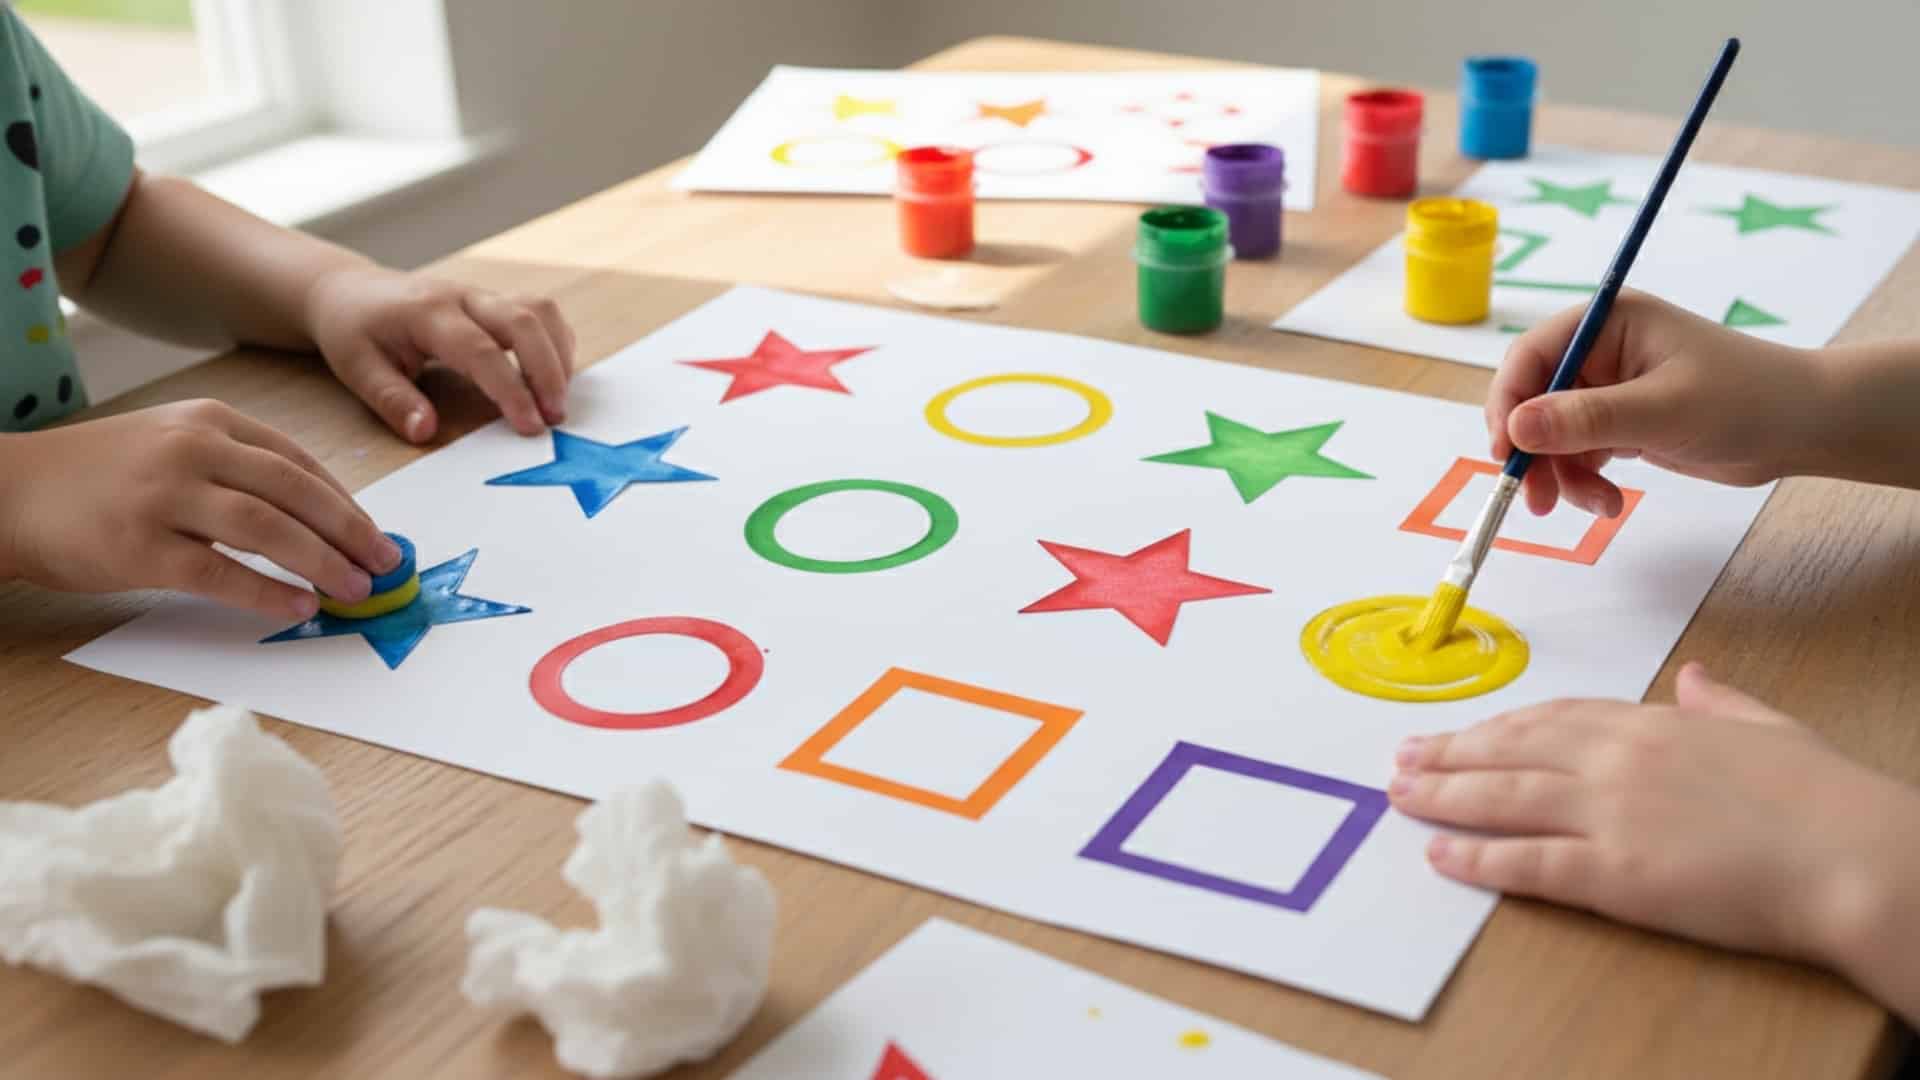
A beginner-friendly introduction to composition. Stencils help kids create clean shapes without drawing skills.
Materials Required:
- Stencils
- Paint
- Paper
Simple Steps:
- Place a stencil on paper and hold it steady. Make sure it lies flat so paint won’t seep underneath. Tape corners if needed.
- Dab paint over the stencil opening. Use a sponge or brush with an up-and-down motion. Don’t brush sideways or the paint will smear under the edge.
- Lift the stencil straight up to reveal the shape. Let the paint dry before adding more stencils nearby. Layer shapes to create pictures.
39. Scribble Drawing Art
A creativity-first drawing exercise. This activity removes pressure to draw perfectly and focuses on imagination.
Materials Required:
- Markers
- Paper
Simple Steps:
- Scribble all over the paper without lifting your marker. Let the line wander randomly. Make loops, curves, and crossed lines.
- Look at the scribble and find shapes or pictures hidden in it. Turn sections into animals, faces, or objects. Everyone will see different things.
- Color in the sections you turned into pictures. Add details with markers. The random scribble becomes organized art.
40. Paint Chip Art
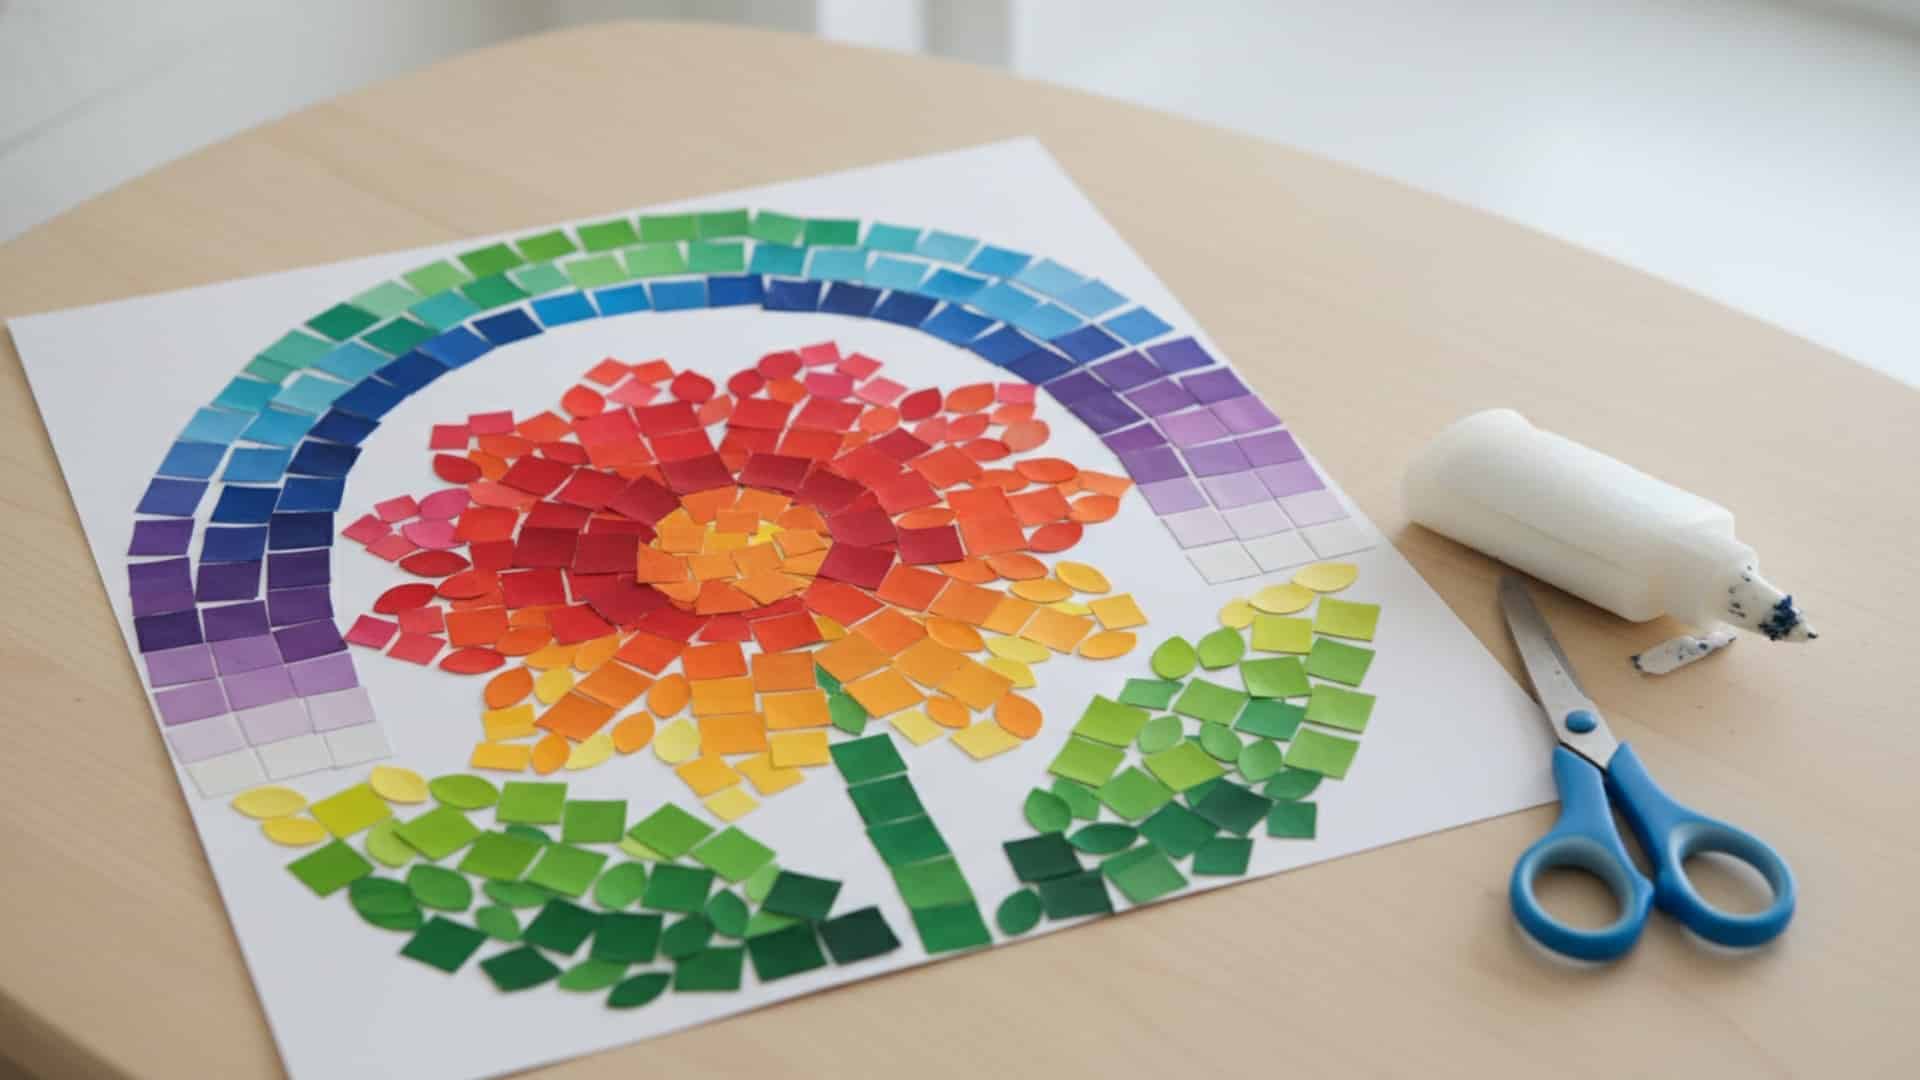
A budget-friendly art project using color samples. Paint stores often give these samples away for free.
Materials Required:
- Paint chips
- Scissors
- Glue
Simple Steps:
- Cut paint chips into various shapes. Make squares, triangles, circles, or leave them as strips. Gather many colors.
- Arrange cut pieces on paper to form pictures. Create rainbows, flowers, geometric designs, or mosaics. Plan the layout before gluing.
- Glue pieces down one at a time. Press firmly and let it dry completely. The finished piece has a modern, graphic look.
41. Cotton Ball Painting
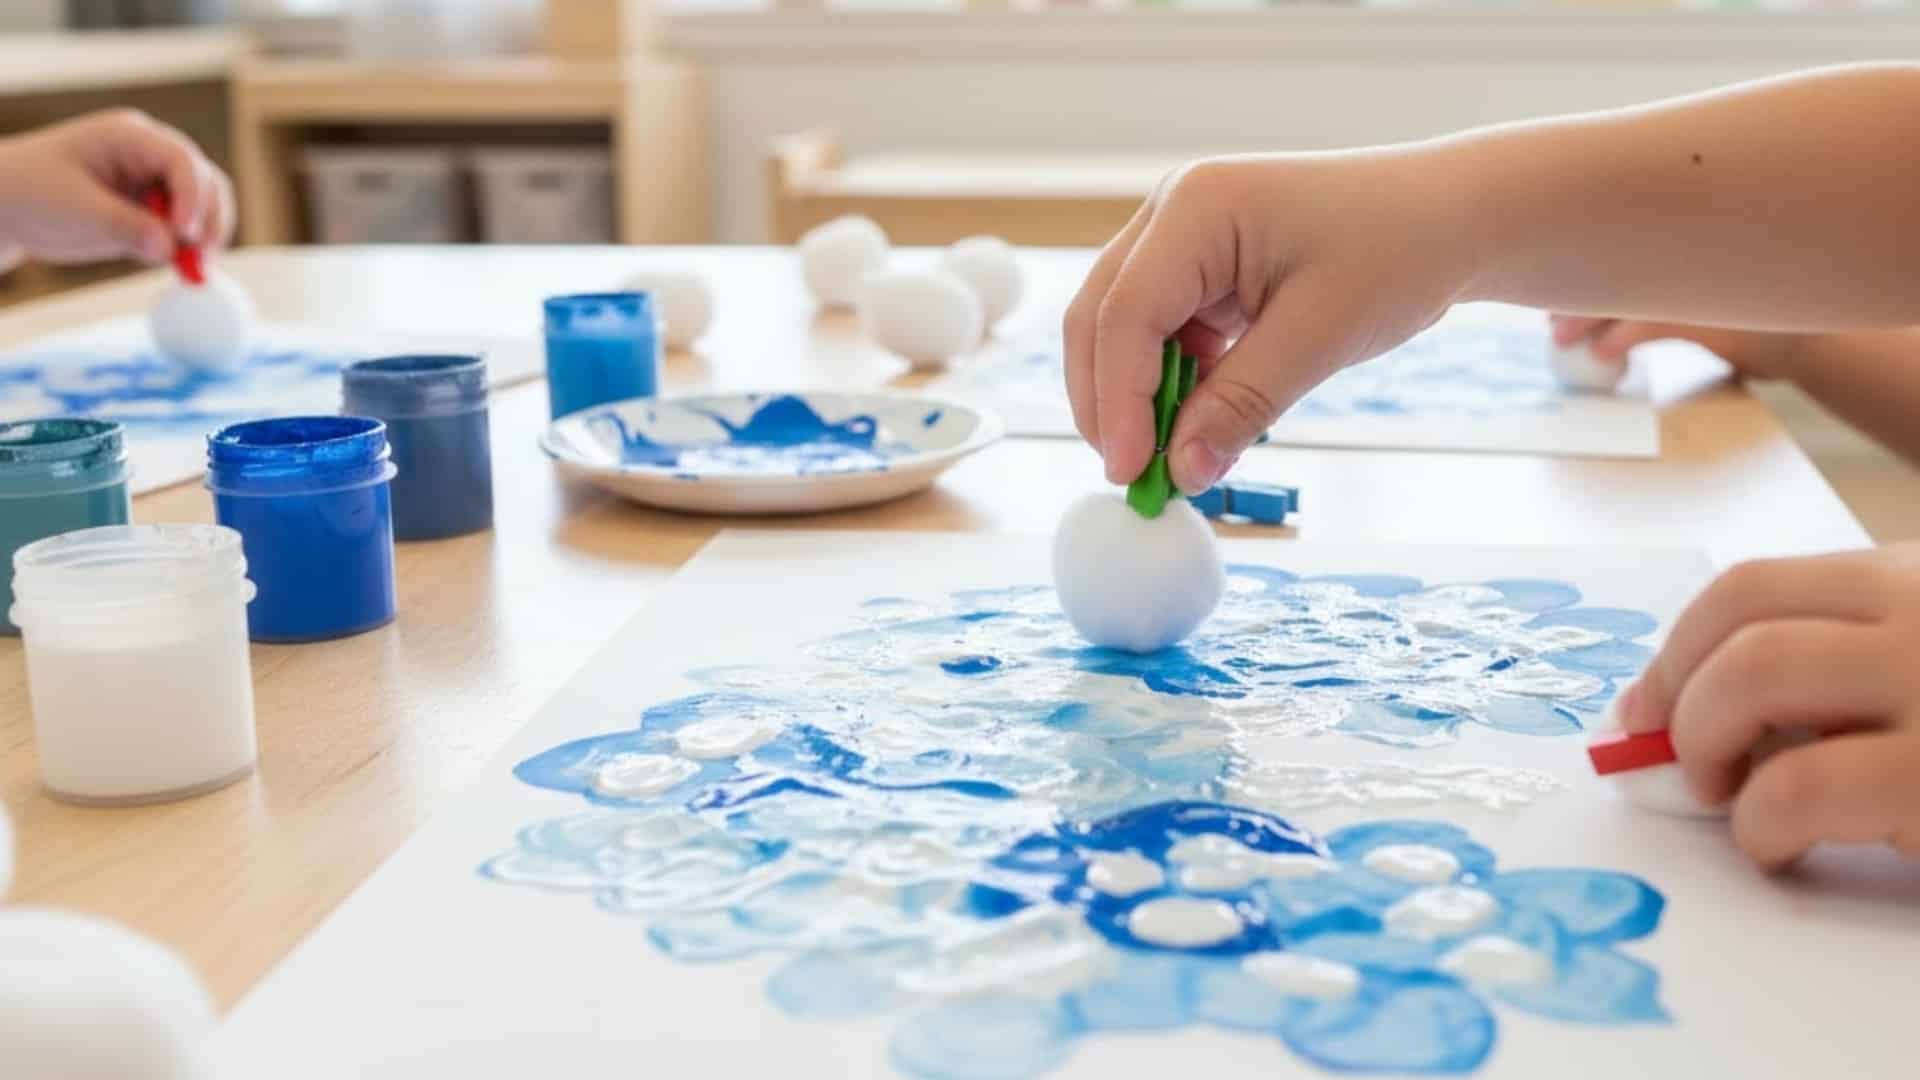
A soft-texture painting activity. The fluffy texture creates different effects than traditional brushes.
Materials Required:
- Cotton balls
- Paint
- Paper
Simple Steps:
- Pour paint into shallow containers. Use clothespins to hold cotton balls if desired. This keeps fingers cleaner during painting.
- Dip cotton balls into paint. Dab them onto paper to create soft, cloudy effects. Cotton balls work great for painting sheep, clouds, or snow.
- Use fresh cotton balls for each color. This keeps colors bright and separate. Let the painting dry flat when finished.
42. Paper Spiral Art
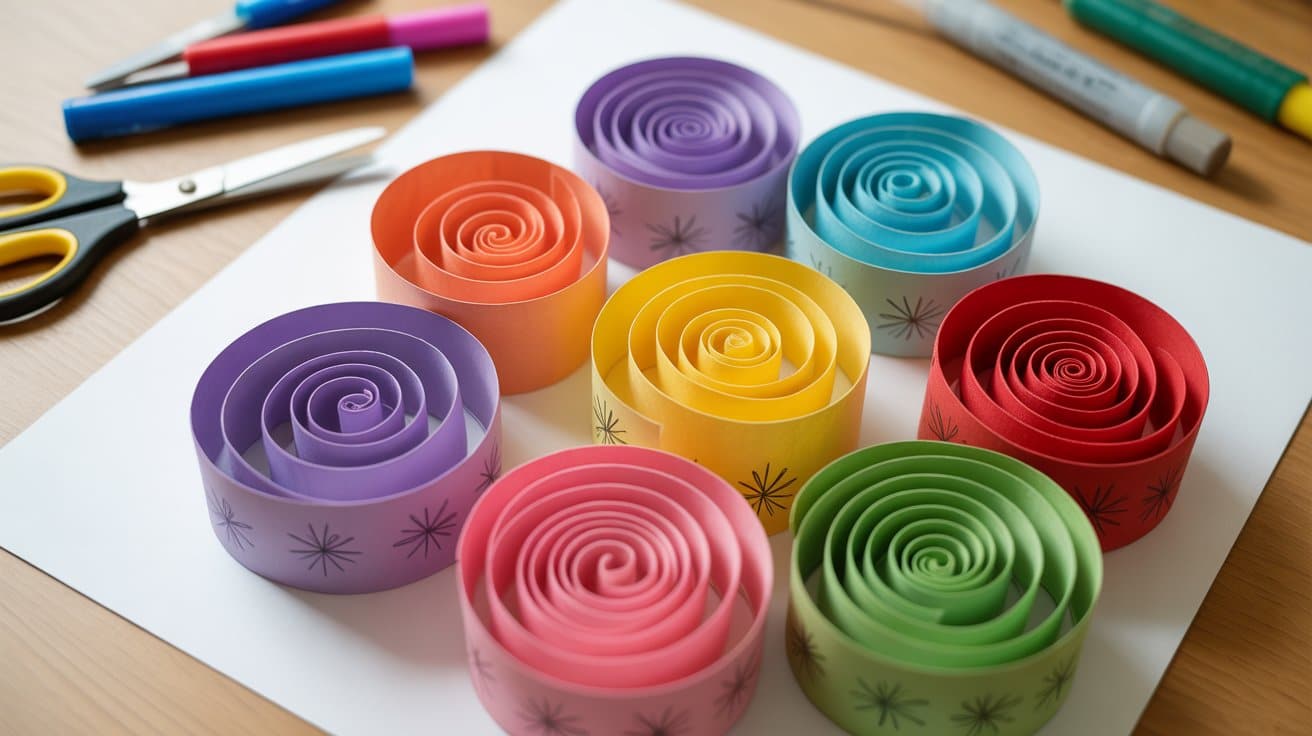
A calming cutting-and-design project. The repetitive nature of creating spirals is soothing for many children.
Materials Required:
- Paper
- Scissors
- Markers
Simple Steps:
- Draw a spiral on paper starting from the outside edge. Keep the line moving toward the center. Make the spiral as tight or loose as desired.
- Carefully cut along the spiral line. Start at the outside edge and work toward the center. The paper will become one long curly strip.
- Decorate the spiral with patterns using markers. Draw stripes, dots, or other designs. Hang the spiral to watch it twist and turn.
43. Mixed Media Art Boards
A free-form art project combining multiple materials. Kids learn texture, color, and composition without rules or limits.
Materials Required:
- Paper
- Paint
- Fabric scraps
- Glue
Simple Steps:
- Gather various art materials in one place. Include paint, fabric, buttons, ribbon, and paper scraps. The more variety, the better.
- Let kids layer materials on paper however they want. They can paint first or start with collage. Encourage experimentation without judgment.
- Glue everything down securely. Let the artwork dry completely before moving it. These mixed media pieces are always unique and personal.
44. Puffy Paint Art
A three-dimensional painting project that creates raised, textured designs. The paint puffs up as it dries, creating a fun tactile element.
Materials Required:
- Shaving cream
- White glue
- Food coloring
- Cardboard or heavy paper
Simple Steps:
- Mix equal parts shaving cream and white glue in separate bowls. Add food coloring to each bowl and stir gently. The mixture should be thick and fluffy.
- Use the puffy paint to create designs on cardboard. Draw pictures, write names, or make patterns. The paint will feel soft and airy.
- Let the artwork dry completely for several hours. The paint will harden and keep its puffy texture. Display your raised artwork where everyone can see it.
45. Pasta Jewelry
A classic craft that turns pantry staples into wearable art. Kids practice threading while creating custom necklaces and bracelets.
Materials Required:
- Dry pasta with holes (penne, rigatoni, wagon wheels)
- Paint or markers
- String or yarn
- Scissors
Simple Steps:
- Paint or color the pasta pieces first. Let them dry completely before using. Use bright colors or patterns to make each piece unique.
- Cut the string to the desired length for a necklace or bracelet. Add a few extra inches for tying. Tape one end to keep pasta from sliding off.
- Thread pasta pieces onto the string in any pattern. Mix different shapes and colors. When finished, tie the ends together securely and trim excess string.
46. Egg Carton Creatures
An upcycling project that changes egg cartons into cute animals and insects. This craft teaches resourcefulness while encouraging creativity.
Materials Required:
- Cardboard egg cartons
- Scissors
- Paint
- Pipe cleaners
- Googly eyes
Simple Steps:
- Cut individual cups from the egg carton. Each cup becomes one creature’s body. Trim edges neatly for a clean look.
- Paint the cups in bright colors. Let the paint dry completely. Different colors work for different creatures like caterpillars, ladybugs, or bees.
- Add features using pipe cleaners for antennae or legs. Glue on googly eyes. Add spots or stripes with markers to complete each creature’s look.
47. Popsicle Stick Picture Frames
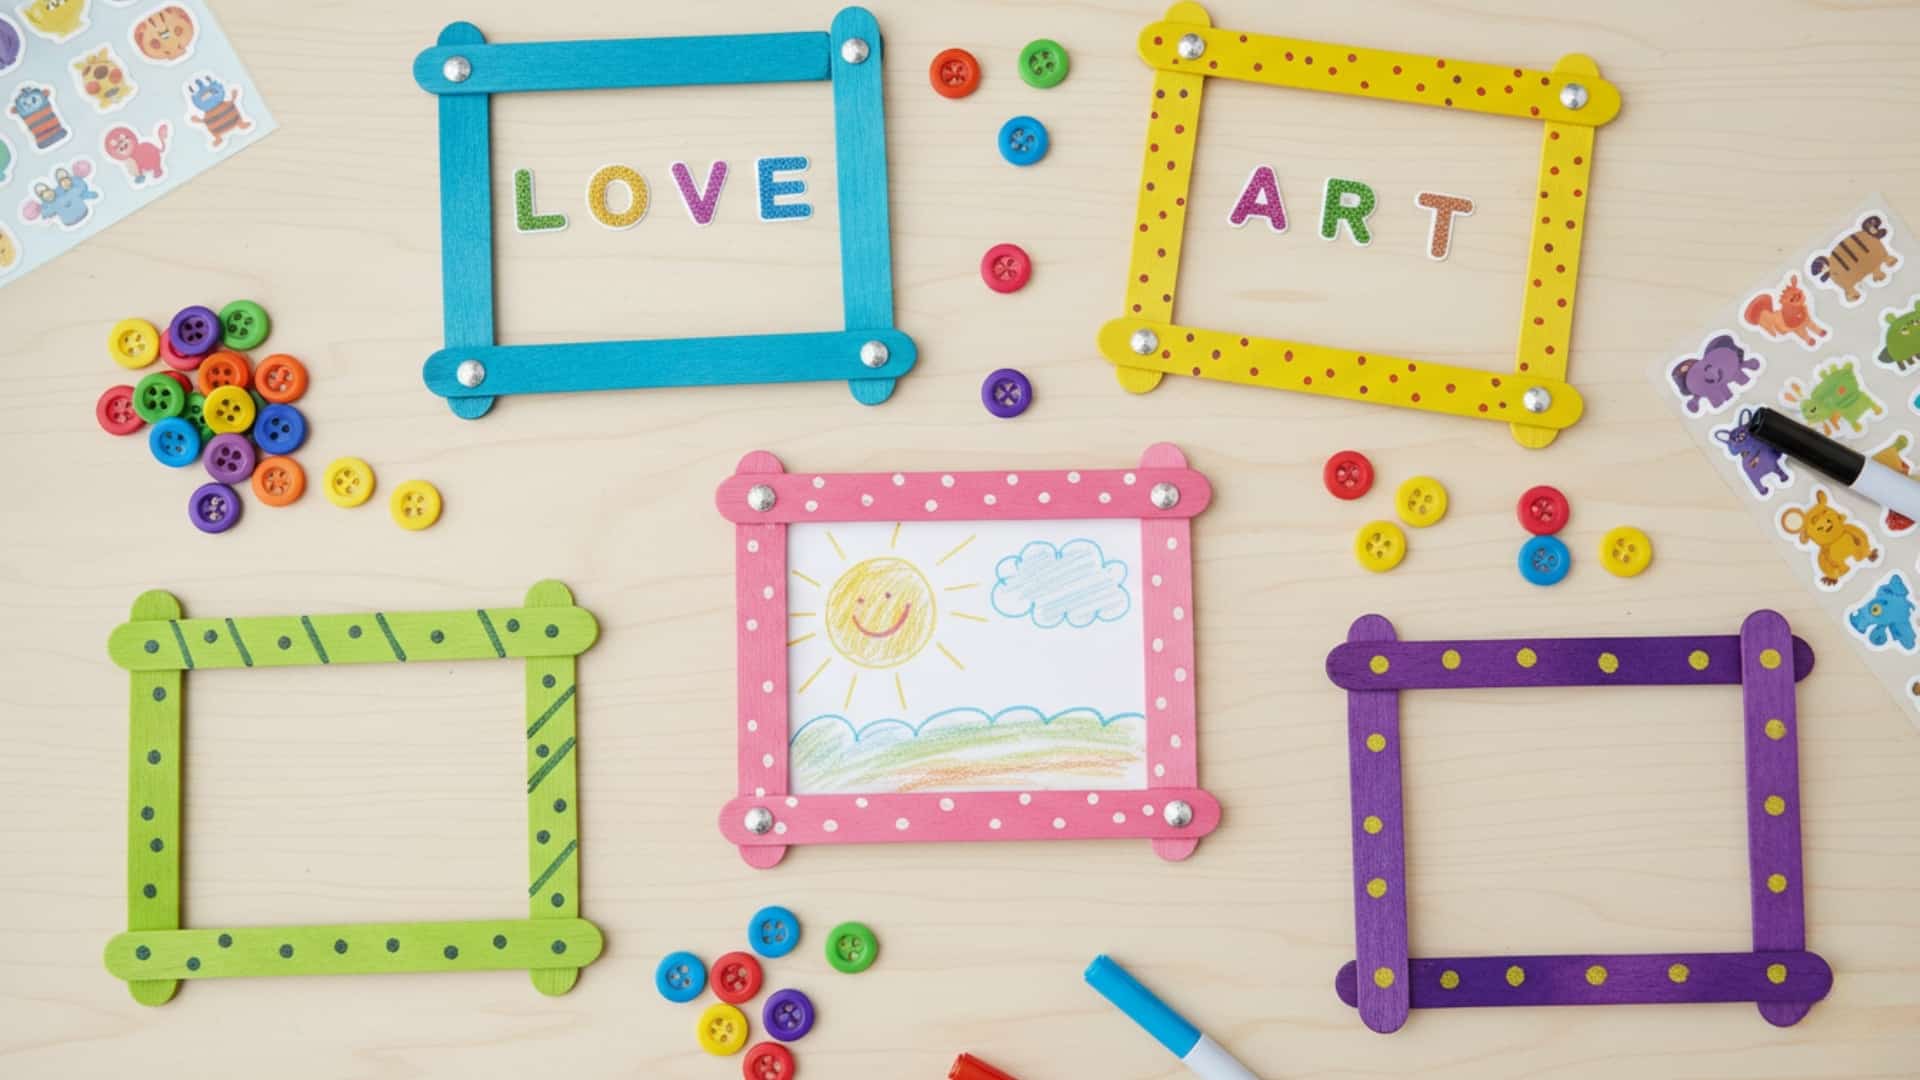
A functional craft that kids can use to display their artwork or photos. These frames make wonderful gifts for family members.
Materials Required:
- Popsicle sticks (4 per frame)
- Glue
- Paint or markers
- Decorations (stickers, buttons, glitter)
Simple Steps:
- Arrange four Popsicle sticks in a square shape. The ends should overlap at the corners. Glue corners together and let dry completely.
- Paint or color the frame. Add decorative elements like buttons, sequins, or drawn designs. Let creativity guide the decoration process.
- Attach a photo or artwork to the back using tape. Add a string or ribbon loop at the top for hanging. The frame is ready to display.
48. Paper Weaving Mats
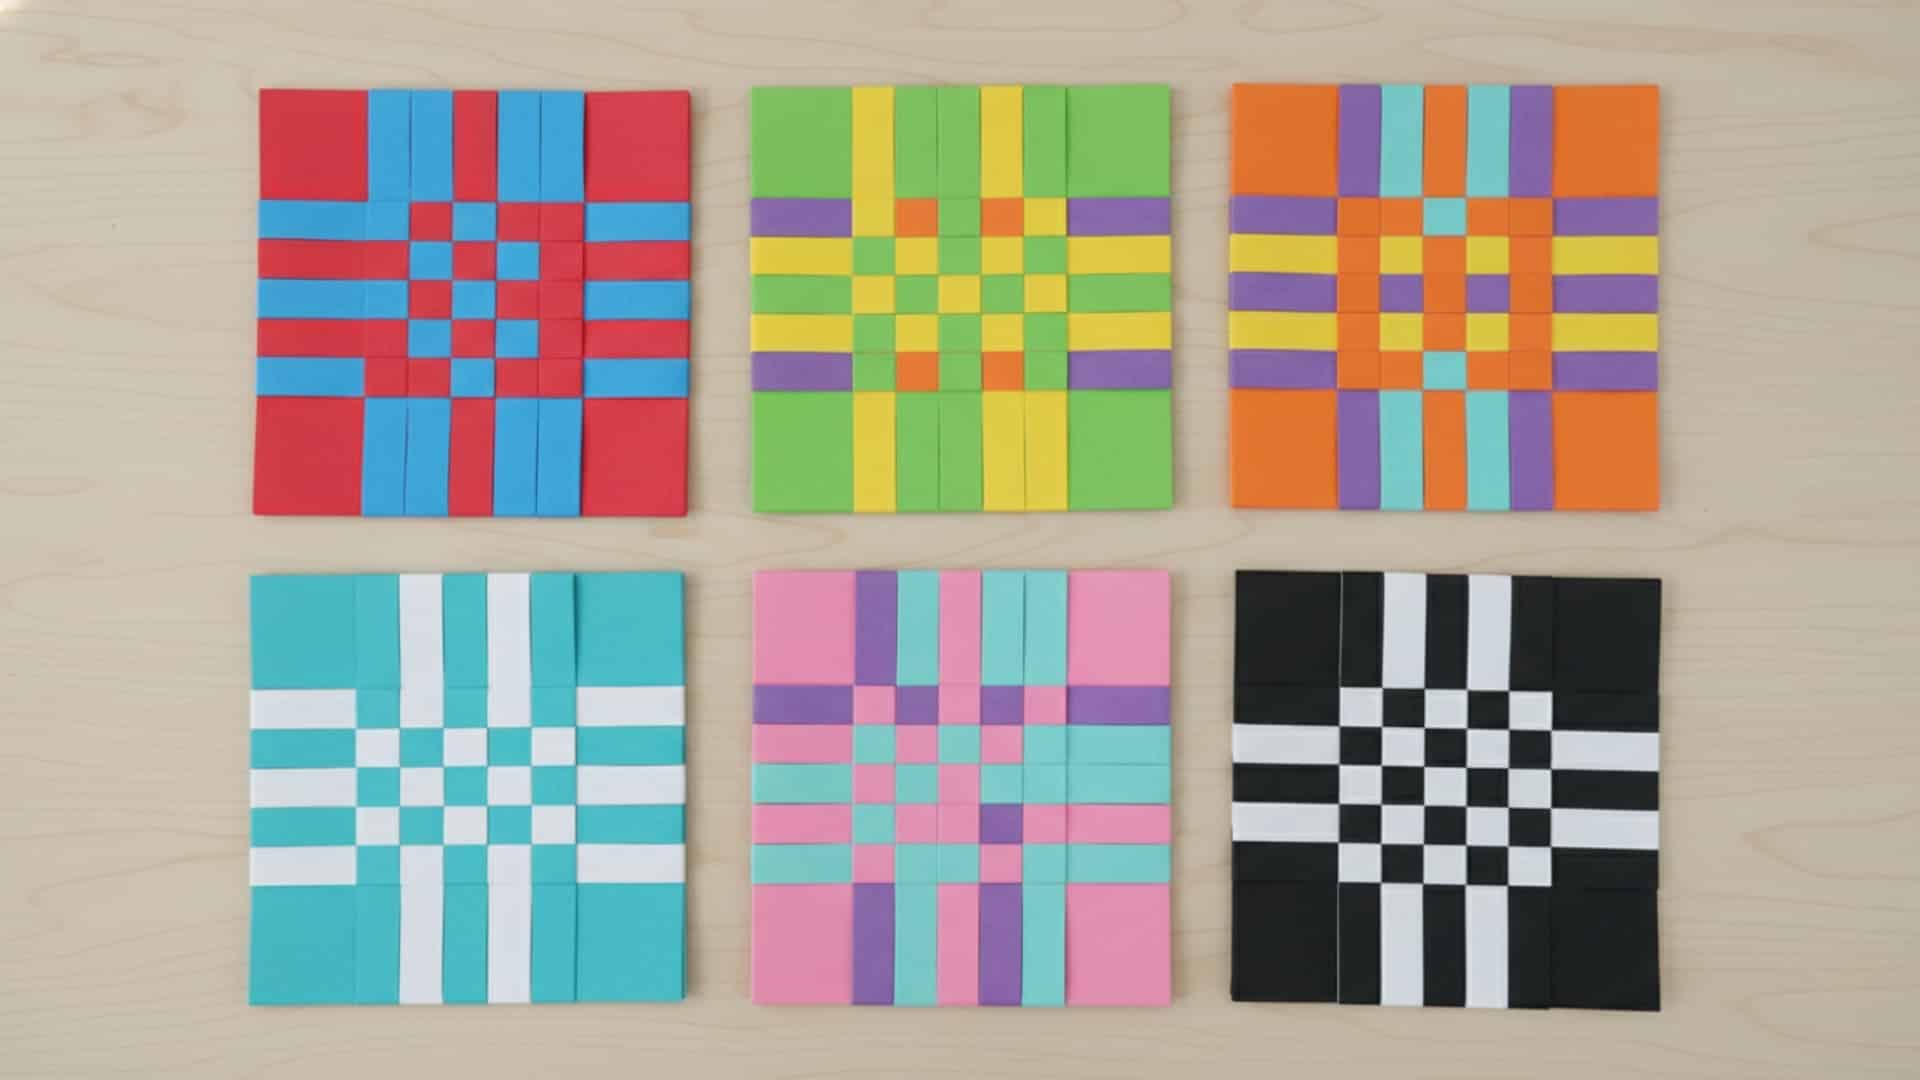
A traditional craft that teaches over-under patterns while creating colorful placemats. This activity builds patience and fine motor skills.
Materials Required:
- Construction paper (2 contrasting colors)
- Scissors
- Ruler
- Tape
Simple Steps:
- Fold one piece of paper in half lengthwise. Cut parallel slits from the folded edge, stopping about one inch from the opposite edge. Space cuts evenly.
- Cut the second piece of paper into strips about one inch wide. These become the weaving strips. Make enough strips to fill the mat.
- Twist strips over and under through the slits. Alternate the pattern with each new row. Push rows close together for a tight weave. Tape ends to secure.
49. Cork Stamp Patterns
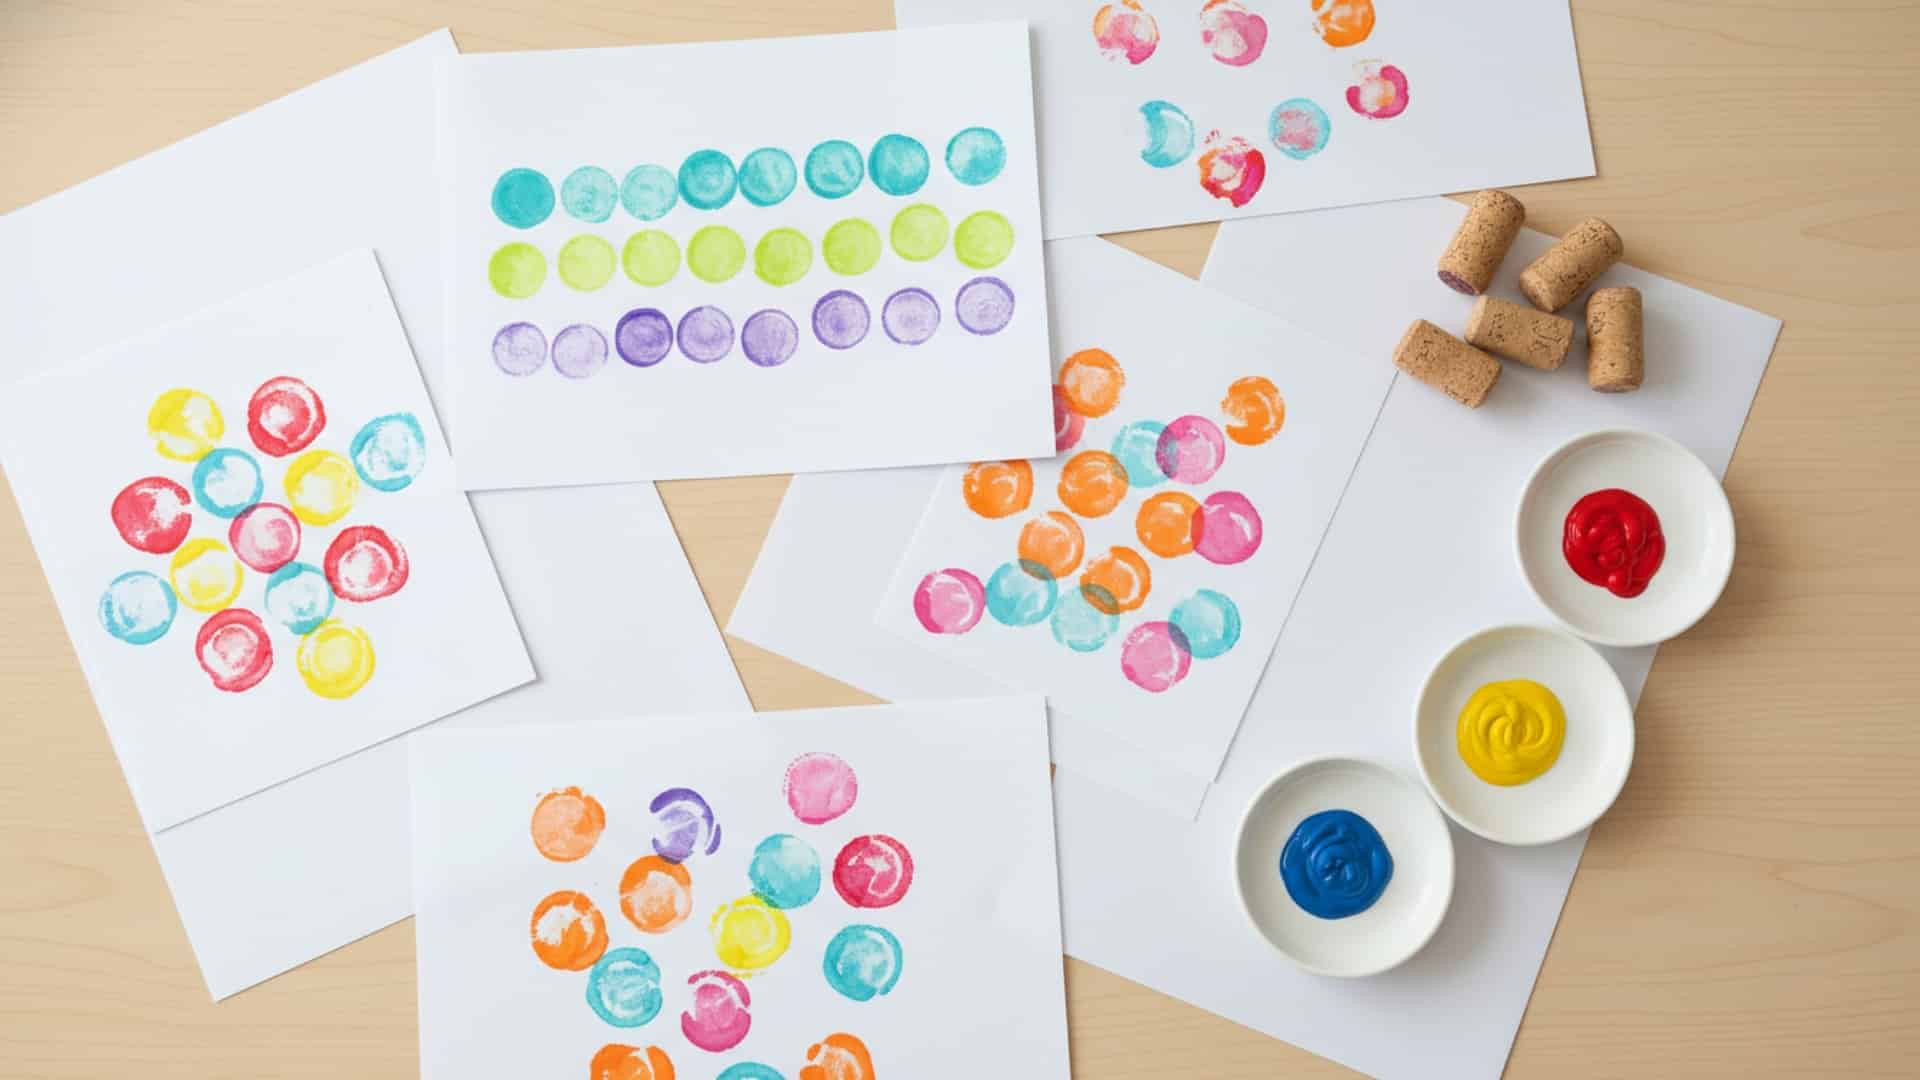
A simple printing project using wine corks as stamps. The circular shapes create interesting repeating patterns and designs.
Materials Required:
- Wine corks
- Paint
- Paper
- Small plates or palettes
Simple Steps:
- Pour paint onto plates in different colors. Use one plate per color. Dip the flat end of a cork into the paint.
- Press the cork onto paper to create circular prints. Make patterns, flowers, or abstract designs. Layer colors for interesting effects.
- Try different arrangements like clusters, lines, or random placement. Let each color dry before adding nearby prints. Display the finished pattern art.
50. Cupcake Liner Flowers
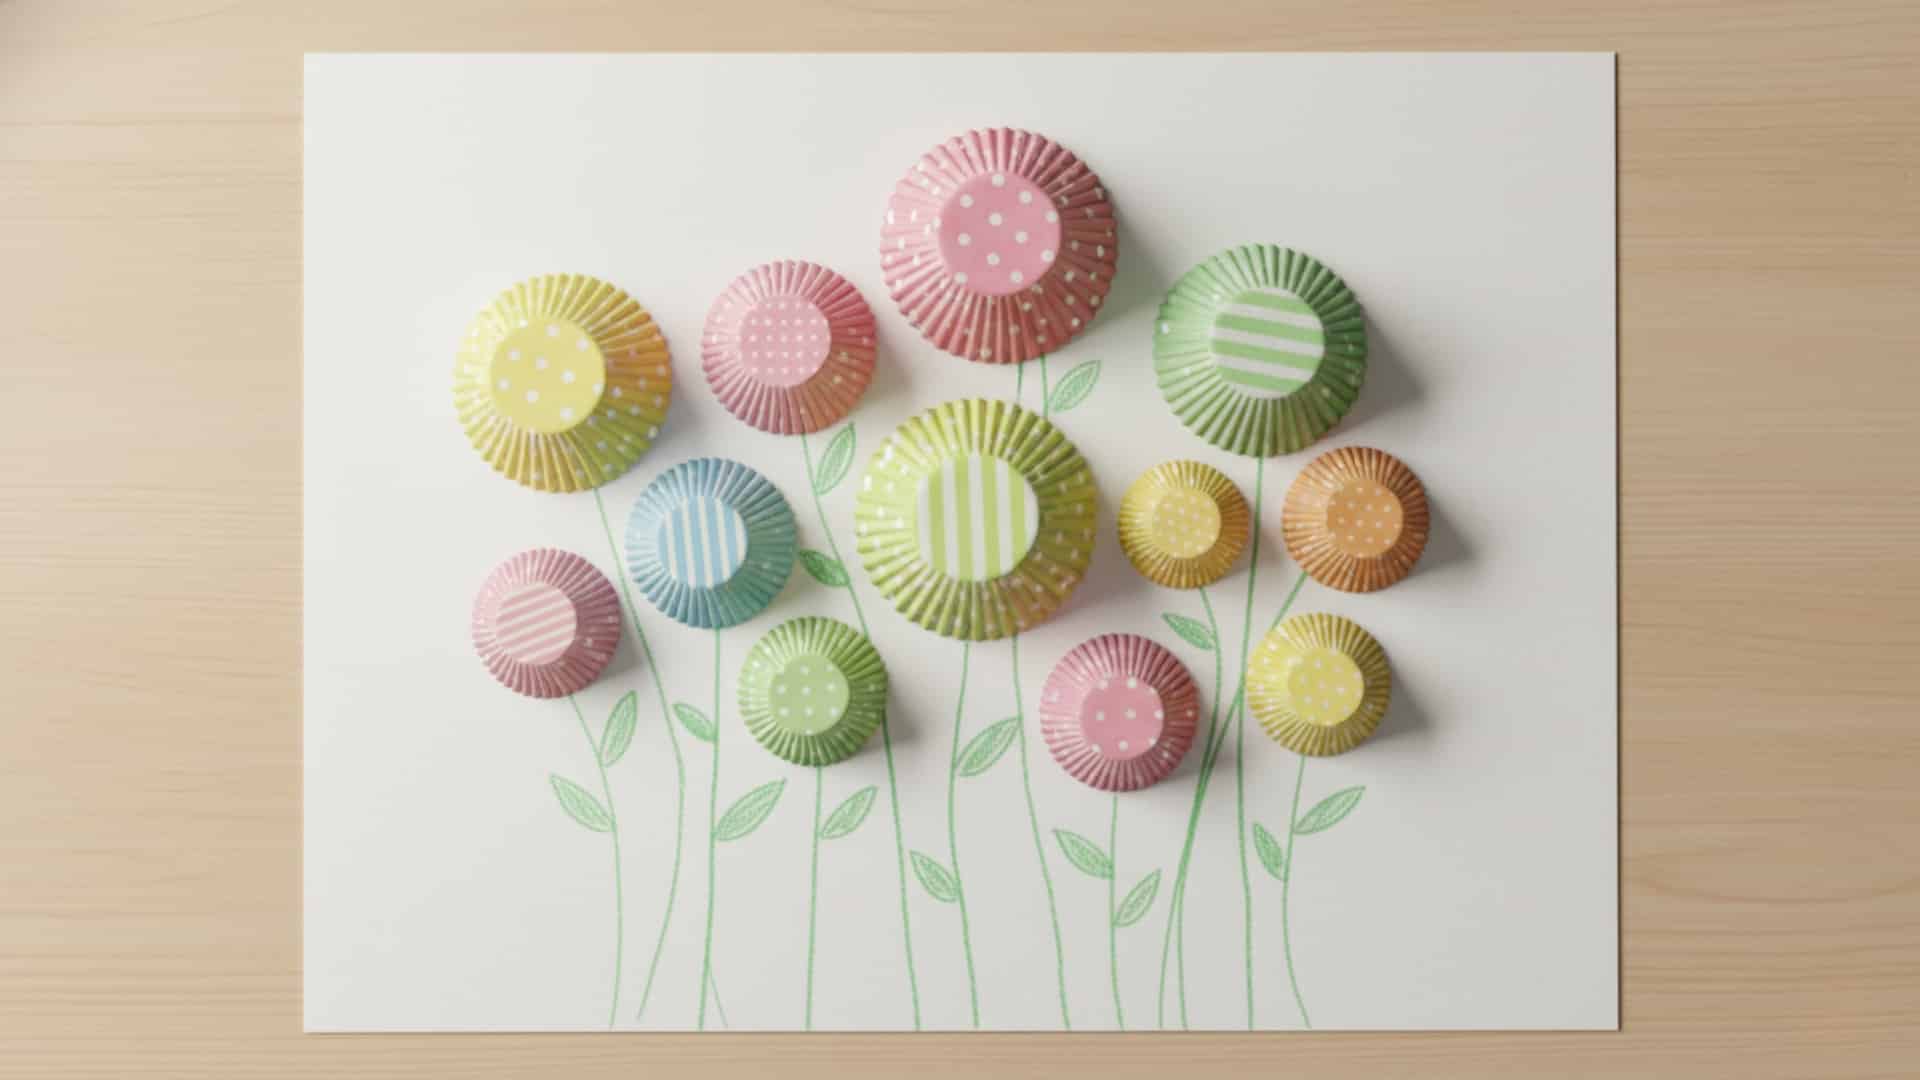
A cheerful craft using colorful cupcake liners to create dimensional flower art. These flowers add texture and color to any display.
Materials Required:
- Cupcake liners (various colors)
- Paper or cardboard
- Glue
- Markers or crayons
Simple Steps:
- Flatten cupcake liners or keep them in their cup shape. Different shapes create different flower styles. Experiment with both options.
- Glue liners onto paper to form flower shapes. Layer multiple liners for fuller blooms. Arrange them in a bouquet or garden scene.
- Draw stems and leaves with markers or crayons. Add details like grass, butterflies, or a sun. The textured flowers create a three-dimensional effect.
51. String Art Cards
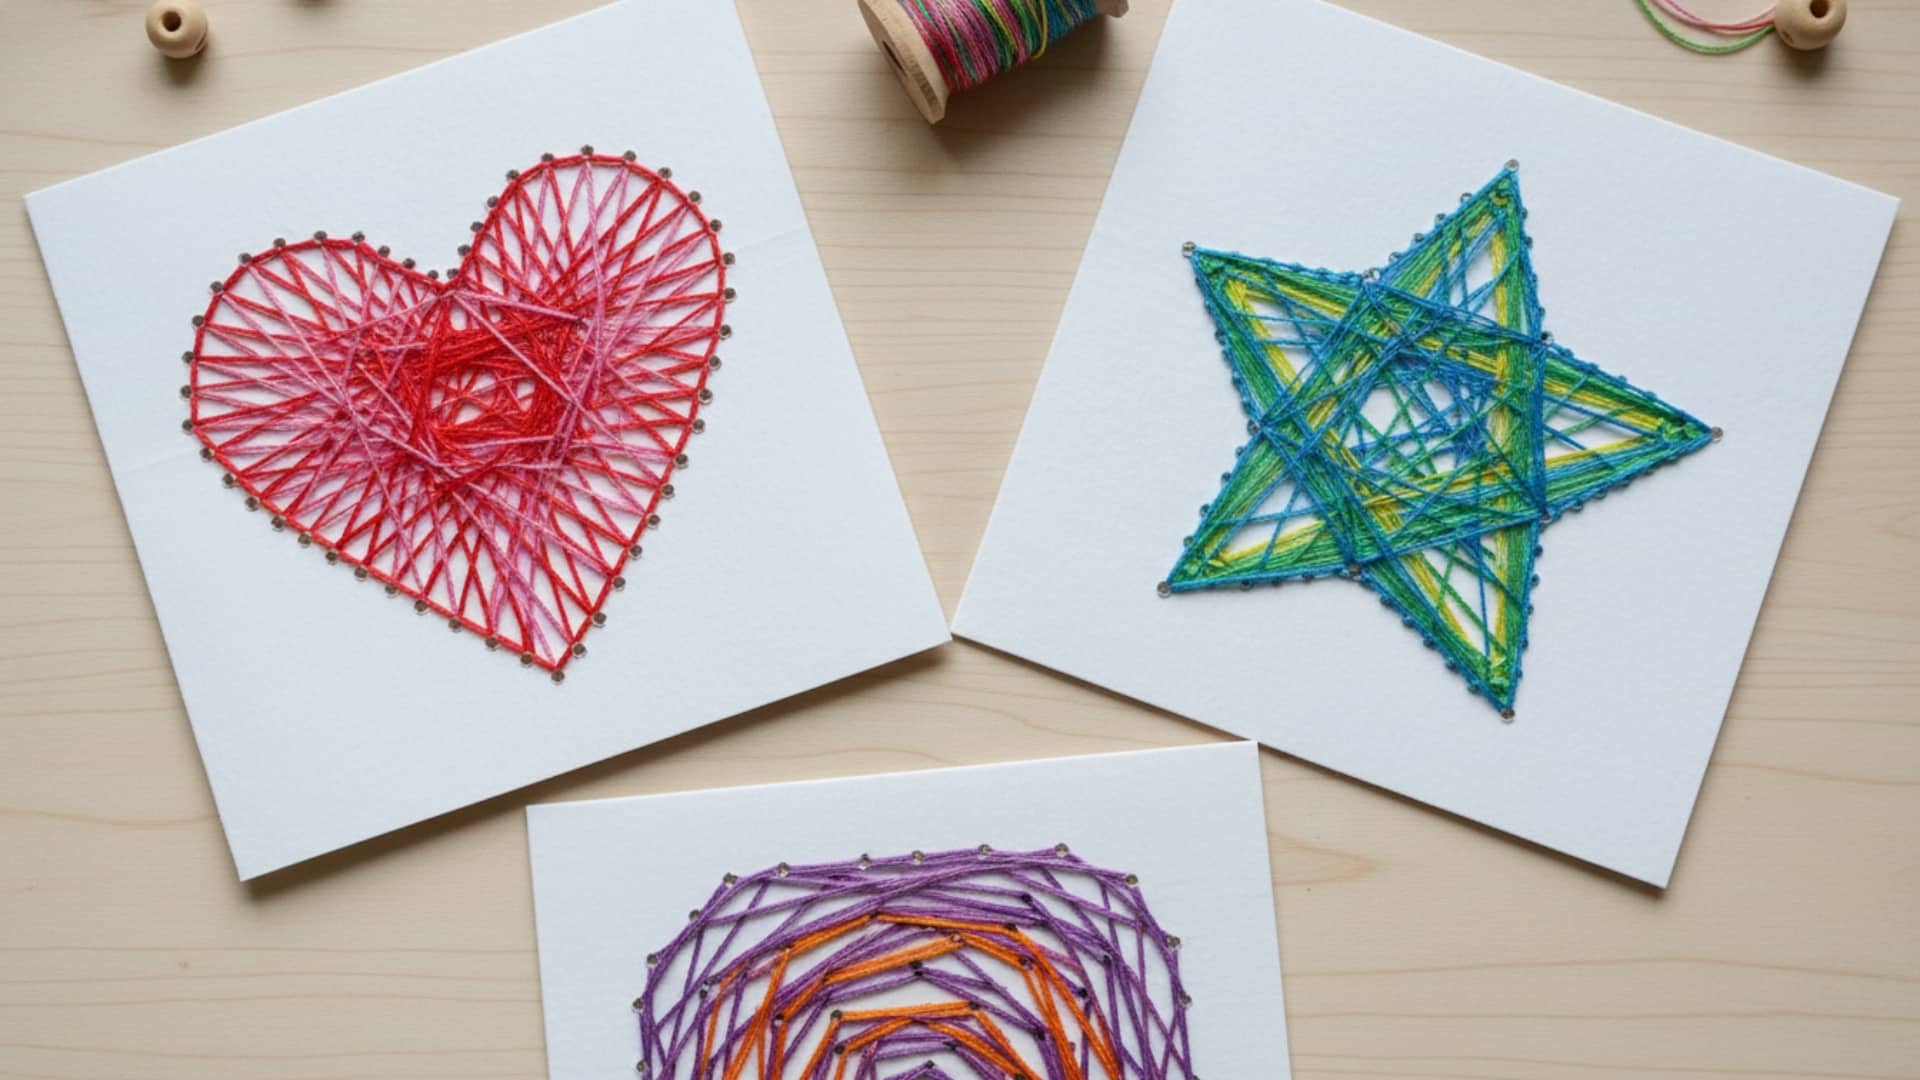
A beginner-friendly introduction to string art that creates handmade greeting cards. The technique produces professional-looking results.
Materials Required:
- Cardstock folded into cards
- Embroidery thread or thin yarn
- Tape
- Pencil
Simple Steps:
- Draw a simple shape like a heart or star on the card front. Poke small holes along the outline using a pencil point. Space holes evenly.
- Tape the thread to the inside of the card. Thread through holes in a pattern, going back and forth across the shape. Keep the thread taut.
- Continue until the shape is filled with thread. Tape the end inside the card. Write a message inside to complete the handmade card.
Conclusion
These 43 easy art projects for kids prove that creativity doesn’t require expensive supplies or advanced skills.
From watercolor resist to mixed media boards, each activity offers children chances to express themselves while developing important abilities.
The projects span quick activities and longer explorations, giving parents options for different schedules and attention spans.
Some activities work better outdoors while others suit quiet indoor time. Remember that the process matters more than the final product when kids create art.
Let children experiment freely without worrying about mistakes or messy results. Encourage them to make each project their own by adding personal touches and favorite colors.
Keep basic art supplies accessible so kids can create whenever inspiration strikes.
These simple activities build confidence, patience, and problem-solving skills that benefit children far beyond the art table.