Kids ask questions constantly. Why is the sky blue? How do plants grow? What makes volcanoes erupt?
These questions show natural curiosity. That curiosity is the foundation of real learning.
Science experiments for kids at home turn everyday wonder into hands-on education. You don’t need a fancy lab or expensive equipment. Your kitchen already has what you need.
This guide provides a comprehensive resource for at-home science. Each experiment uses simple household supplies like baking soda, vinegar, and food coloring. Nothing complicated.
Parents, teachers, and homeschool families will find real value here. These activities build STEM skills while keeping kids engaged. They learn by doing.
Every experiment is safe and tested. Clear instructions help you set up quickly.
Ready to turn your home into a science lab?
Science Experiments for Kids at Home
Kids learn best when they can touch, mix, and see results happen. The experiments below use items you already have. No special trips to the store. Each activity teaches real science concepts while making learning feel like play.
You’ll find experiments for different age groups. Safety tips are included. Start with whichever experiment catches your interest and let your kids lead the way.
1. Baking Soda and Vinegar Volcano
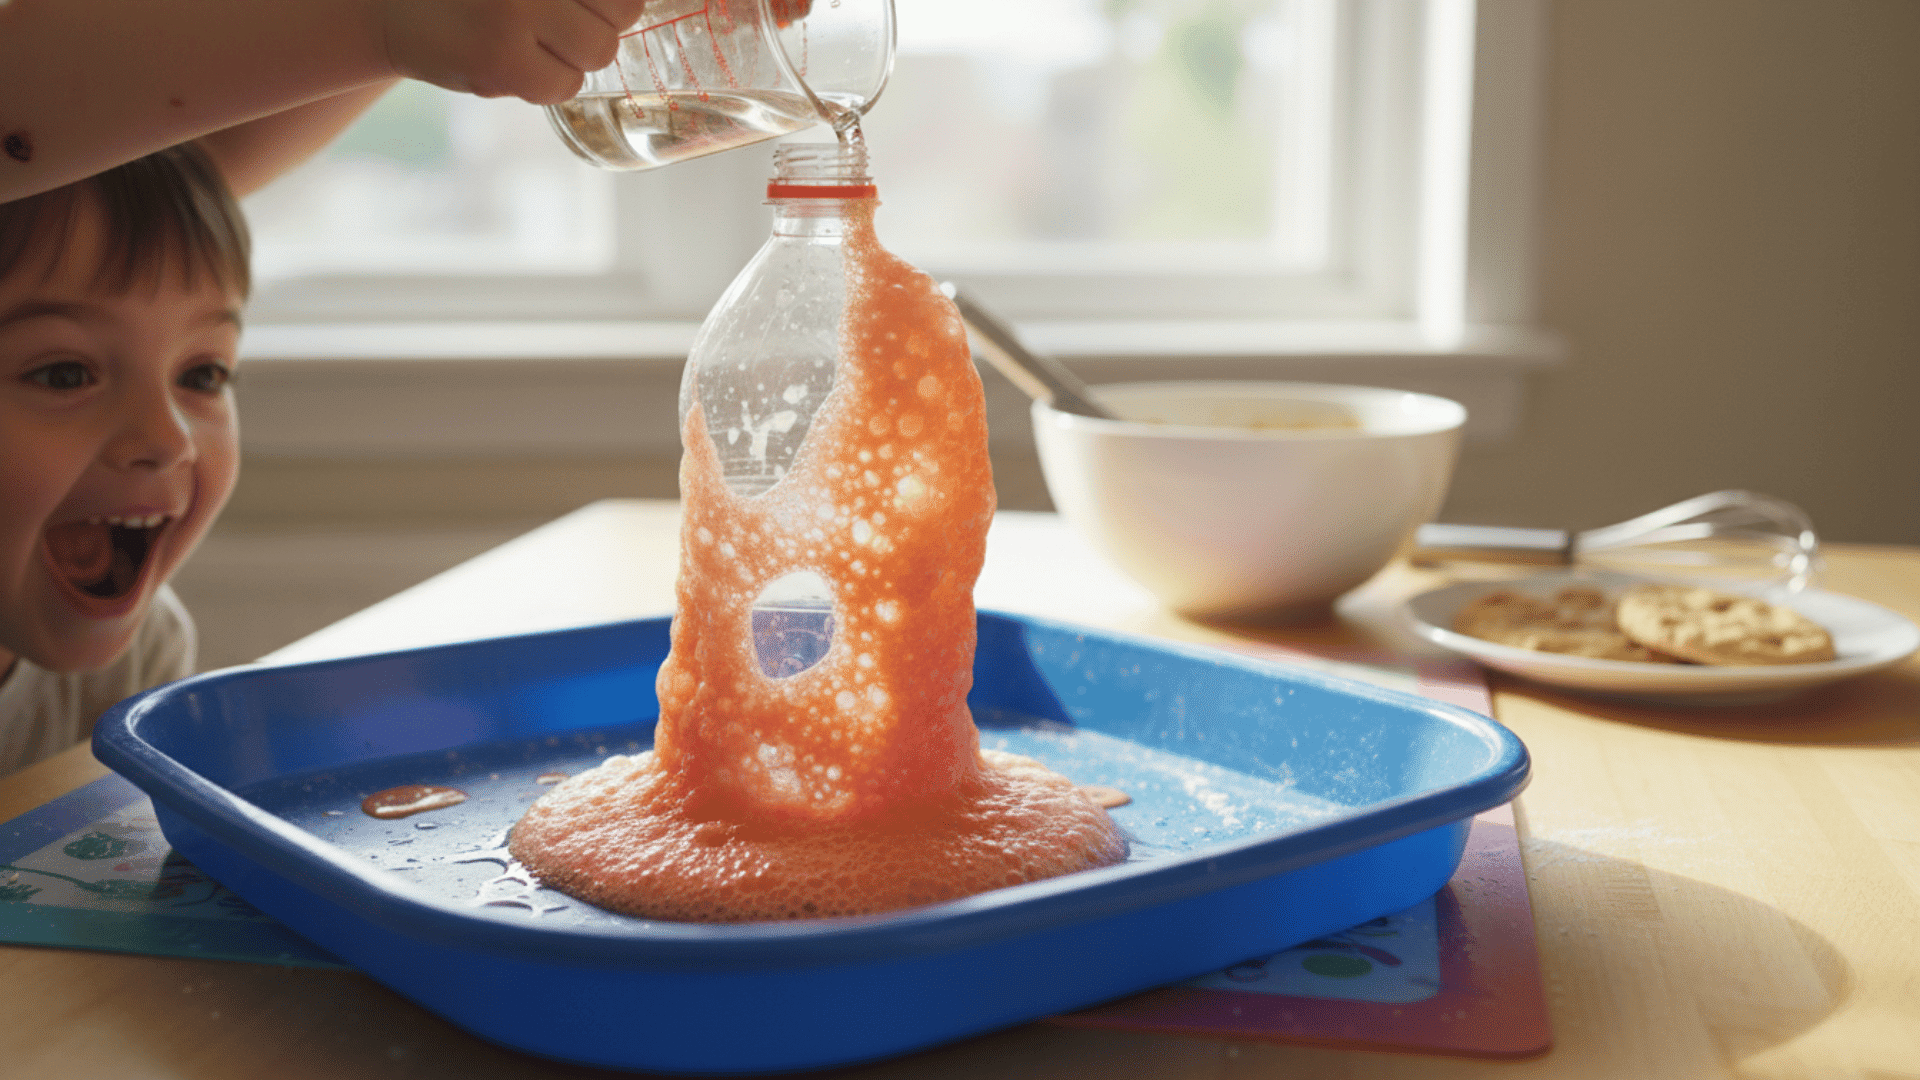
This classic experiment teaches kids about chemical reactions. When baking soda and vinegar mix, they create carbon dioxide gas. That gas makes the foam erupt like a real volcano.
Materials Needed:
- Baking soda
- White vinegar
- Dish soap
- Food coloring
- Small plastic bottle or cup
- Tray or baking pan
Steps:
- Place the bottle in the center of your tray.
- Add two tablespoons of baking soda to the bottle.
- Squeeze in a few drops of dish soap.
- Add food coloring for lava effect.
- Pour vinegar into the bottle and watch it erupt.
What happens: The mixture fizzes and foams up fast. The reaction happens because vinegar is an acid and baking soda is a base. When they combine, they make carbon dioxide bubbles. Kids can repeat this with different amounts for bigger eruptions.
2. Magic Milk Color Explosion
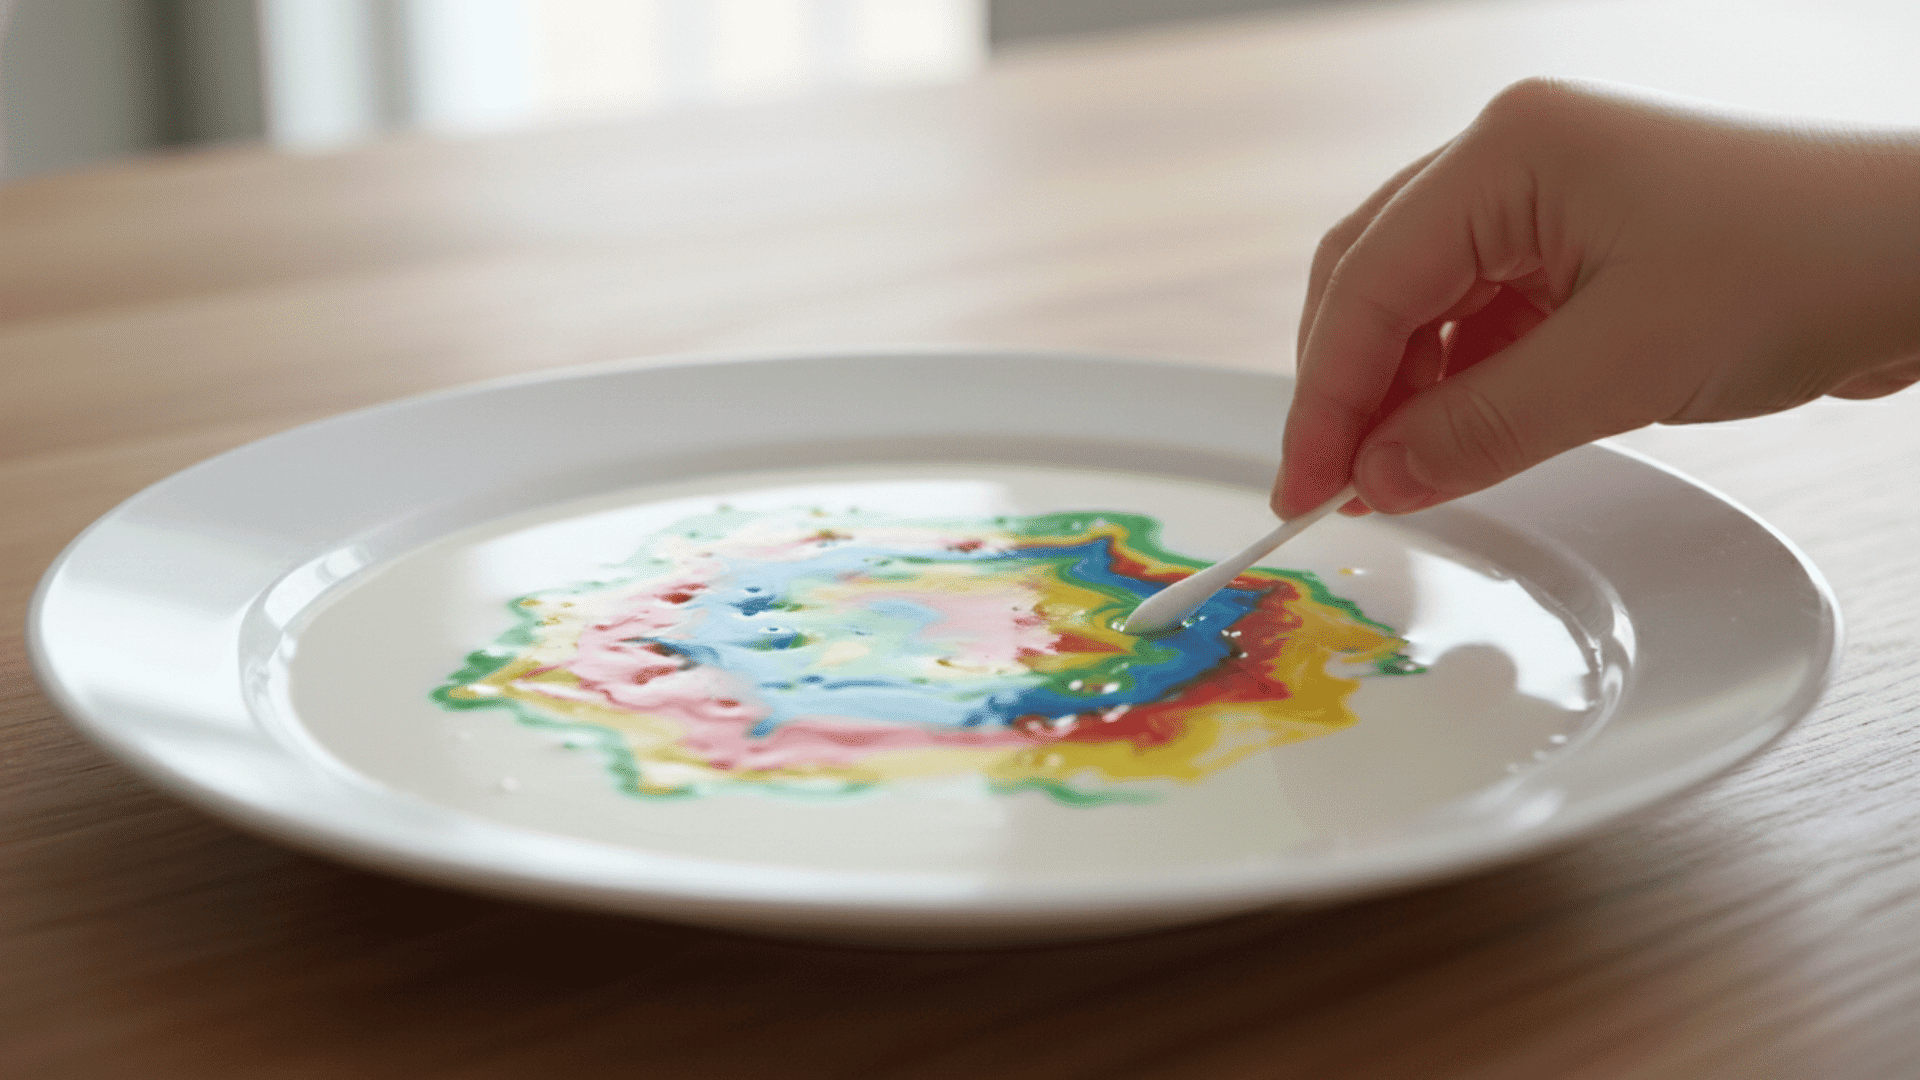
This experiment shows how soap breaks down fat molecules. Kids watch colors swirl and dance across the milk surface.
Materials Needed:
- Whole milk
- Food coloring (multiple colors)
- Dish soap
- Shallow plate or bowl
- Cotton swabs
Steps:
- Pour milk into the plate until it covers the bottom.
- Add drops of different food colors around the milk.
- Dip a cotton swab in dish soap.
- Touch the soapy swab to the milk surface.
- Watch the colors explode and swirl.
What happens: The soap breaks apart fat molecules in the milk. This causes the food coloring to move and mix rapidly. The colors create patterns that look like fireworks. Try touching different spots to see new color bursts.
3. Homemade Lava Lamp Experiment
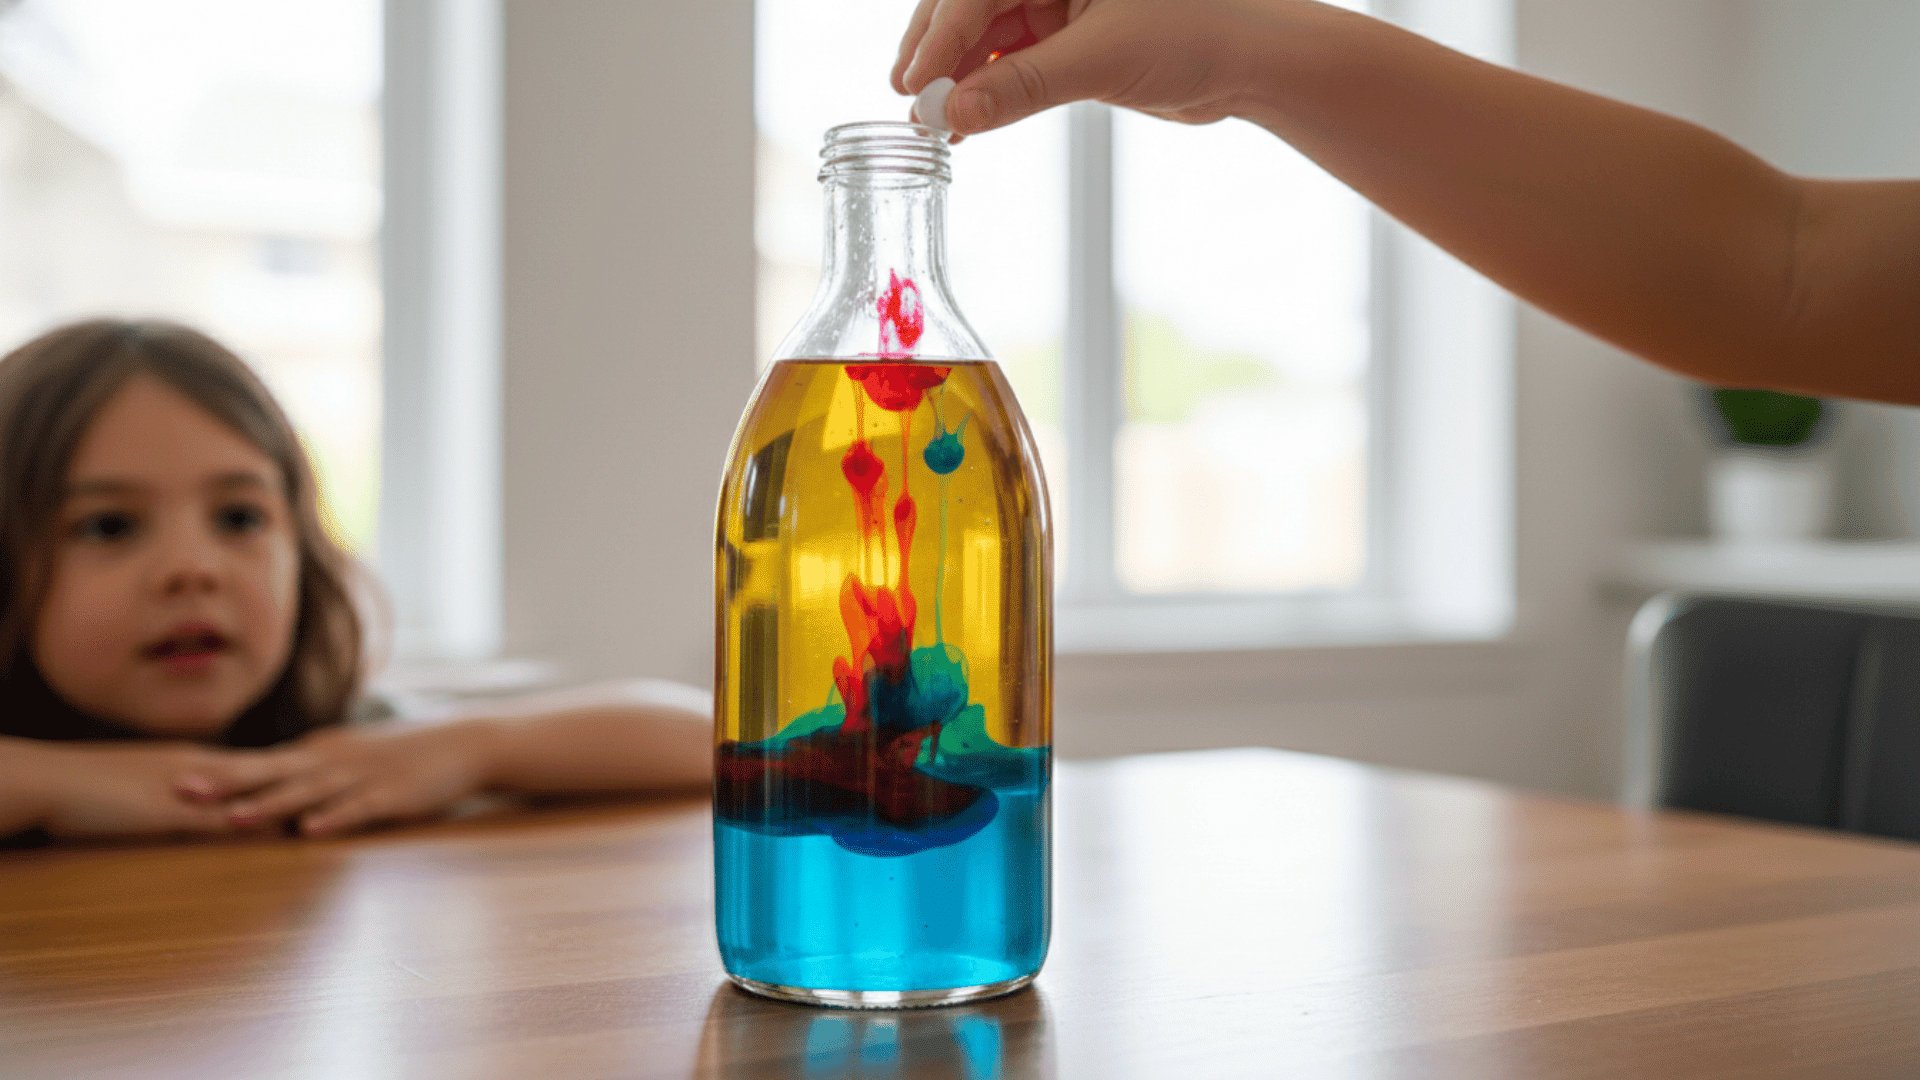
This activity demonstrates density and polarity. Oil and water don’t mix, creating a cool visual effect.
Materials Needed:
- Clear plastic bottle or glass
- Water
- Vegetable oil
- Food coloring
- Fizzing tablets (like Alka-Seltzer)
Steps:
- Fill the bottle three-quarters full with vegetable oil.
- Add water until almost full.
- Wait for the liquids to separate.
- Add drops of food coloring.
- Break a fizzing tablet and drop pieces into the bottle.
What happens: The food coloring sinks through the oil because it mixes only with water. The fizzing tablet creates gas bubbles that carry colored water up through the oil. When bubbles pop at the top, the water drops back down. This creates a lava lamp effect.
4. Oobleck Non-Newtonian Fluid
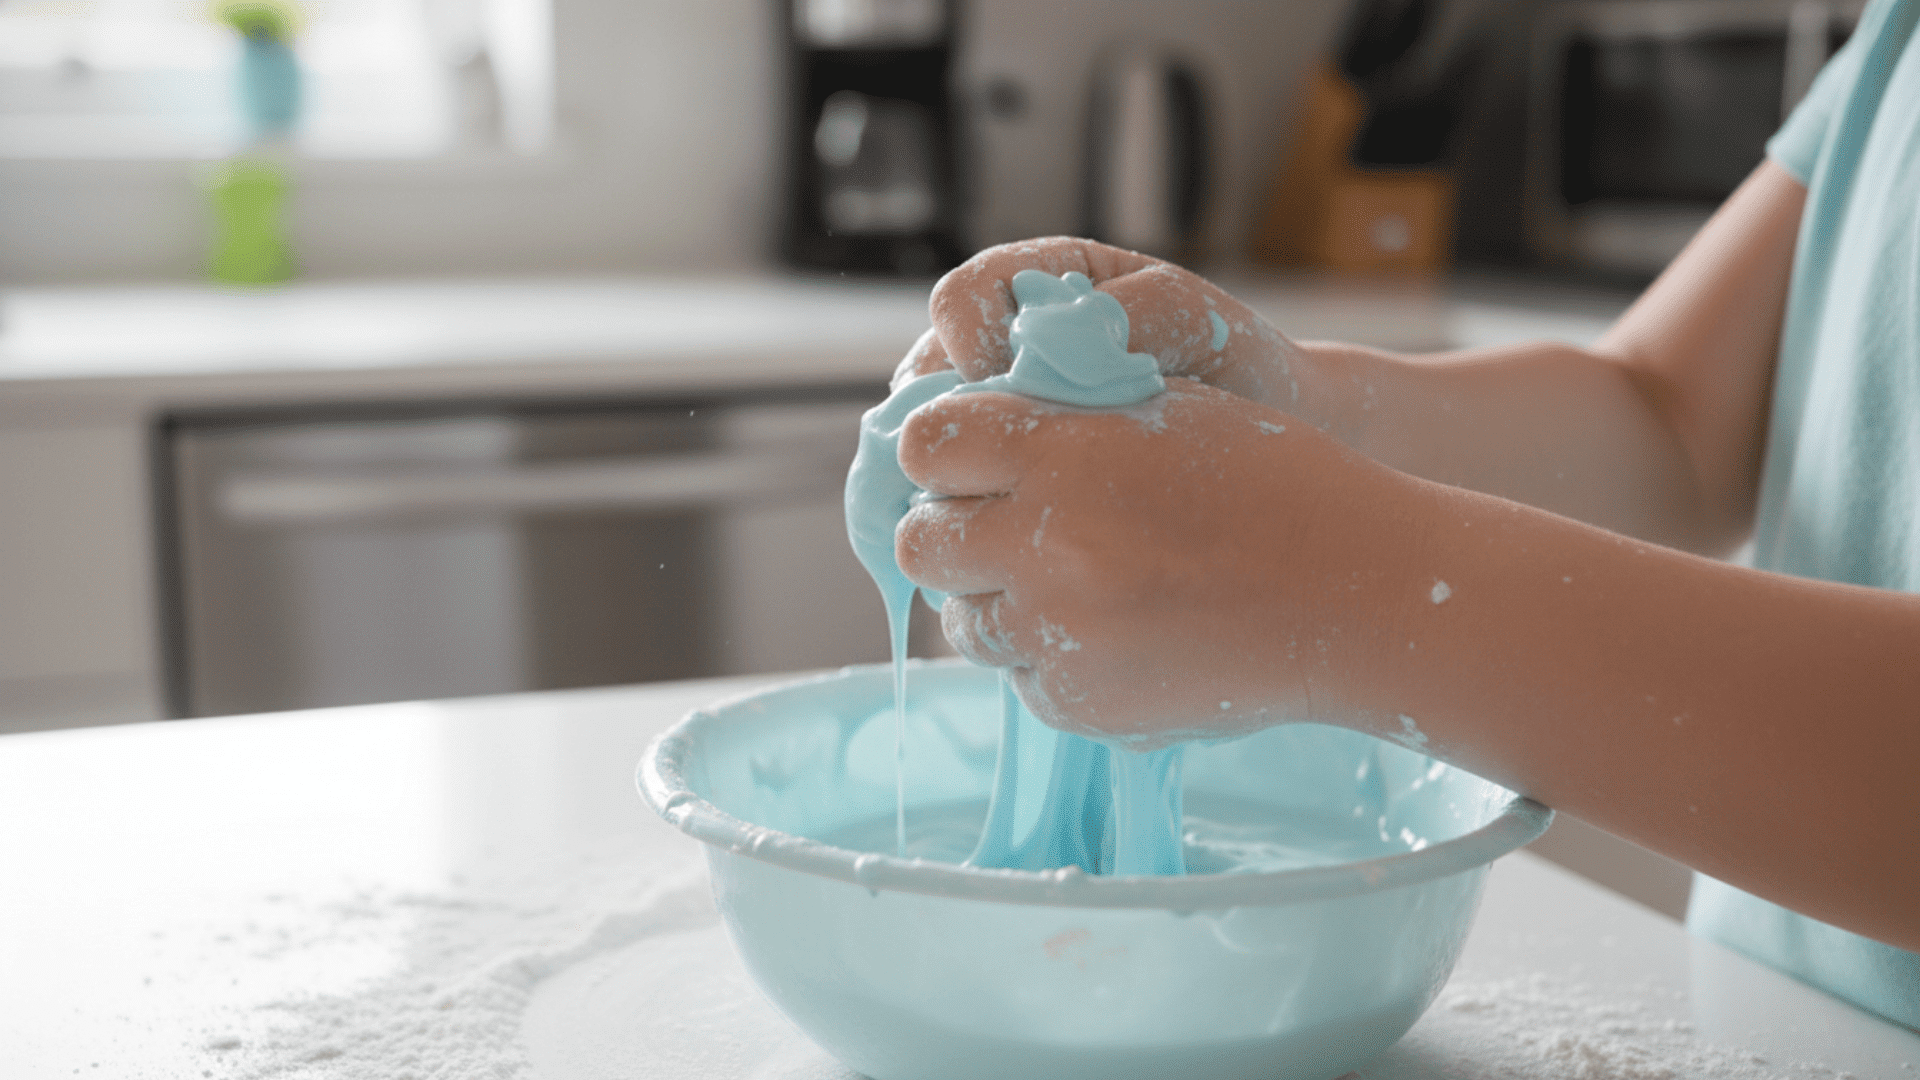
Oobleck teaches kids about states of matter. It acts like both a liquid and a solid depending on pressure.
Materials Needed:
- Cornstarch
- Water
- Mixing bowl
- Food coloring (optional)
Steps:
- Pour two cups of cornstarch into the bowl.
- Add one cup of water slowly.
- Mix with your hands until combined.
- Add food coloring if desired.
- Try poking it fast, then touching it slowly.
What happens: When you hit Obleck hard, it feels solid. When you touch it gently, your finger sinks through like liquid. This happens because cornstarch particles resist quick movements but flow under slow pressure. Scientists call this a non-Newtonian fluid.
5. Rubber Egg Science Experiment
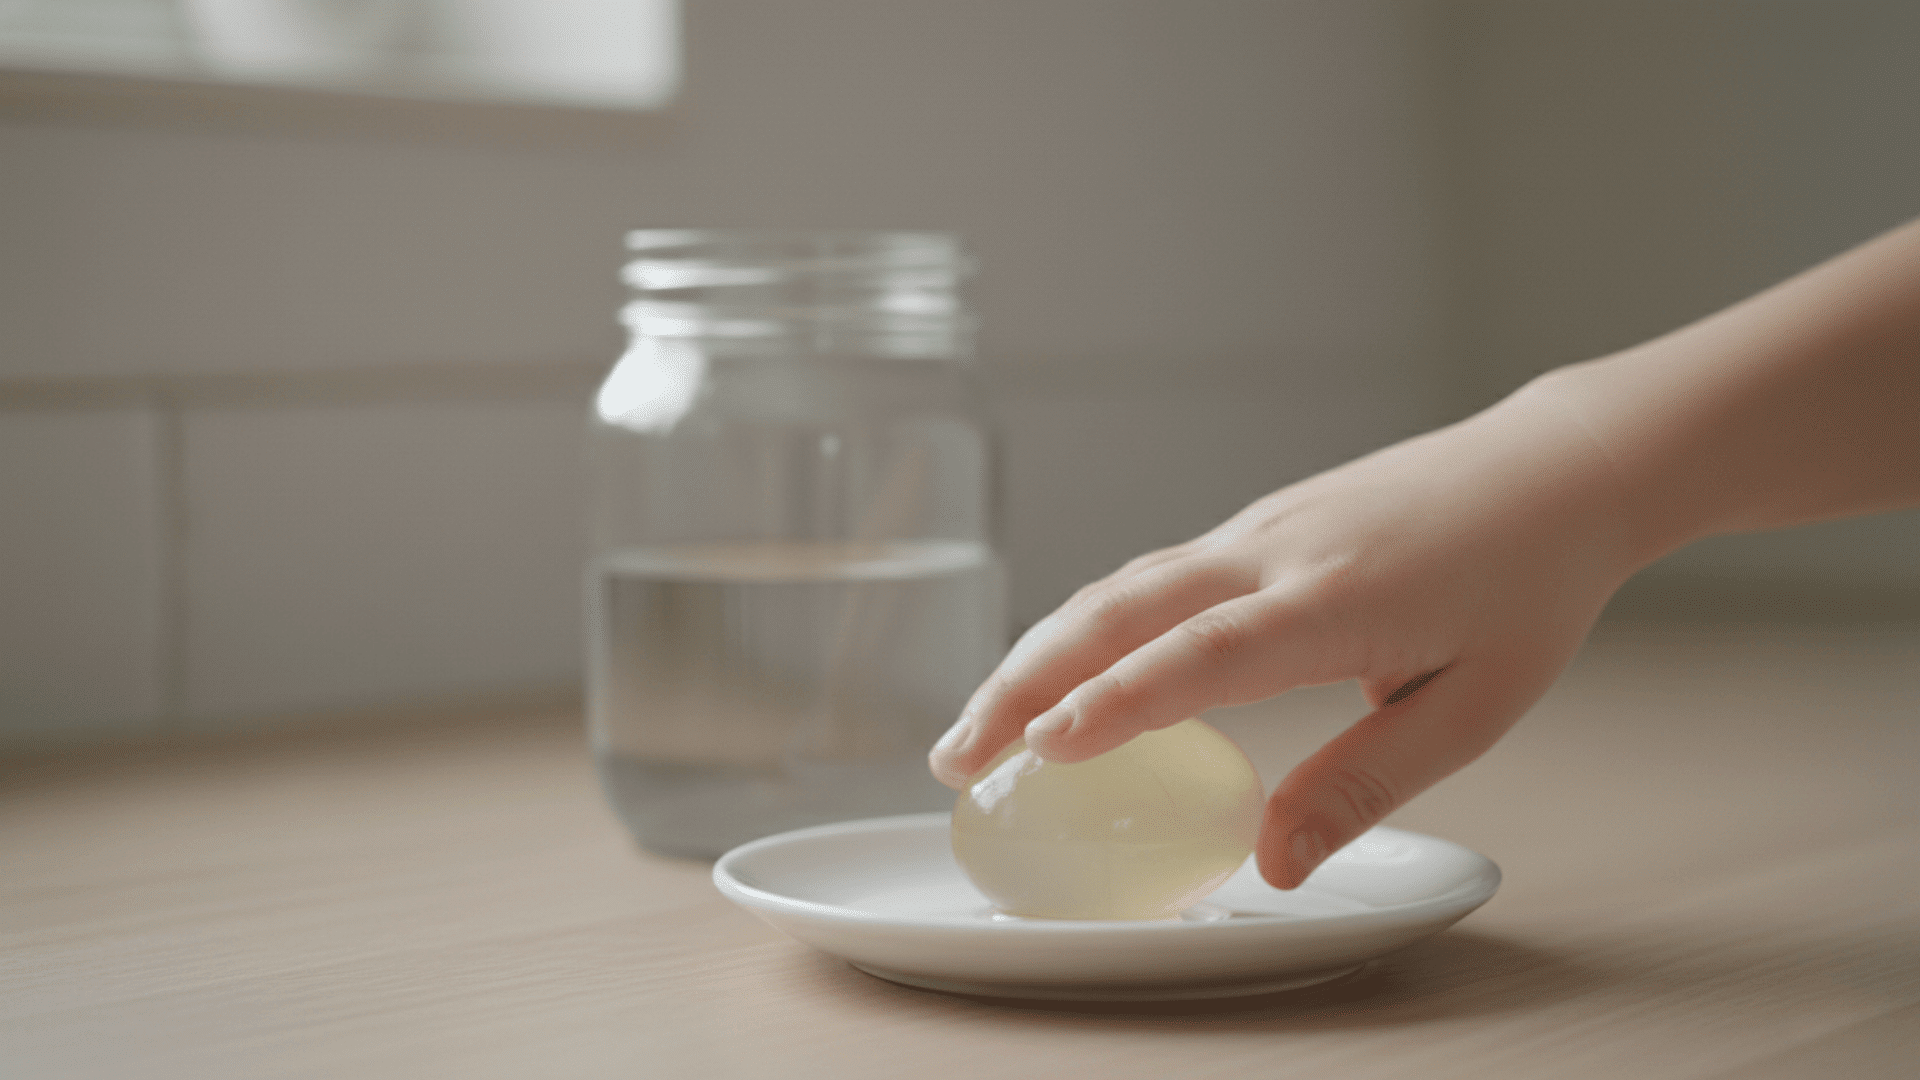
This experiment shows how acids dissolve calcium. Kids watch an eggshell disappear over time.
Materials Needed:
- Raw egg
- White vinegar
- Clear glass or jar
- Spoon
Steps:
- Place the egg carefully in the glass.
- Pour vinegar until the egg is fully covered.
- Watch bubbles form on the shell.
- Leave it for 24 hours.
- Remove the egg gently with a spoon.
What happens: The vinegar dissolves the hard calcium shell. After one day, the egg feels rubbery and bouncy. The membrane underneath stays intact and holds the egg together. You can see through it to the yolk inside. Handle carefully because it can still break.
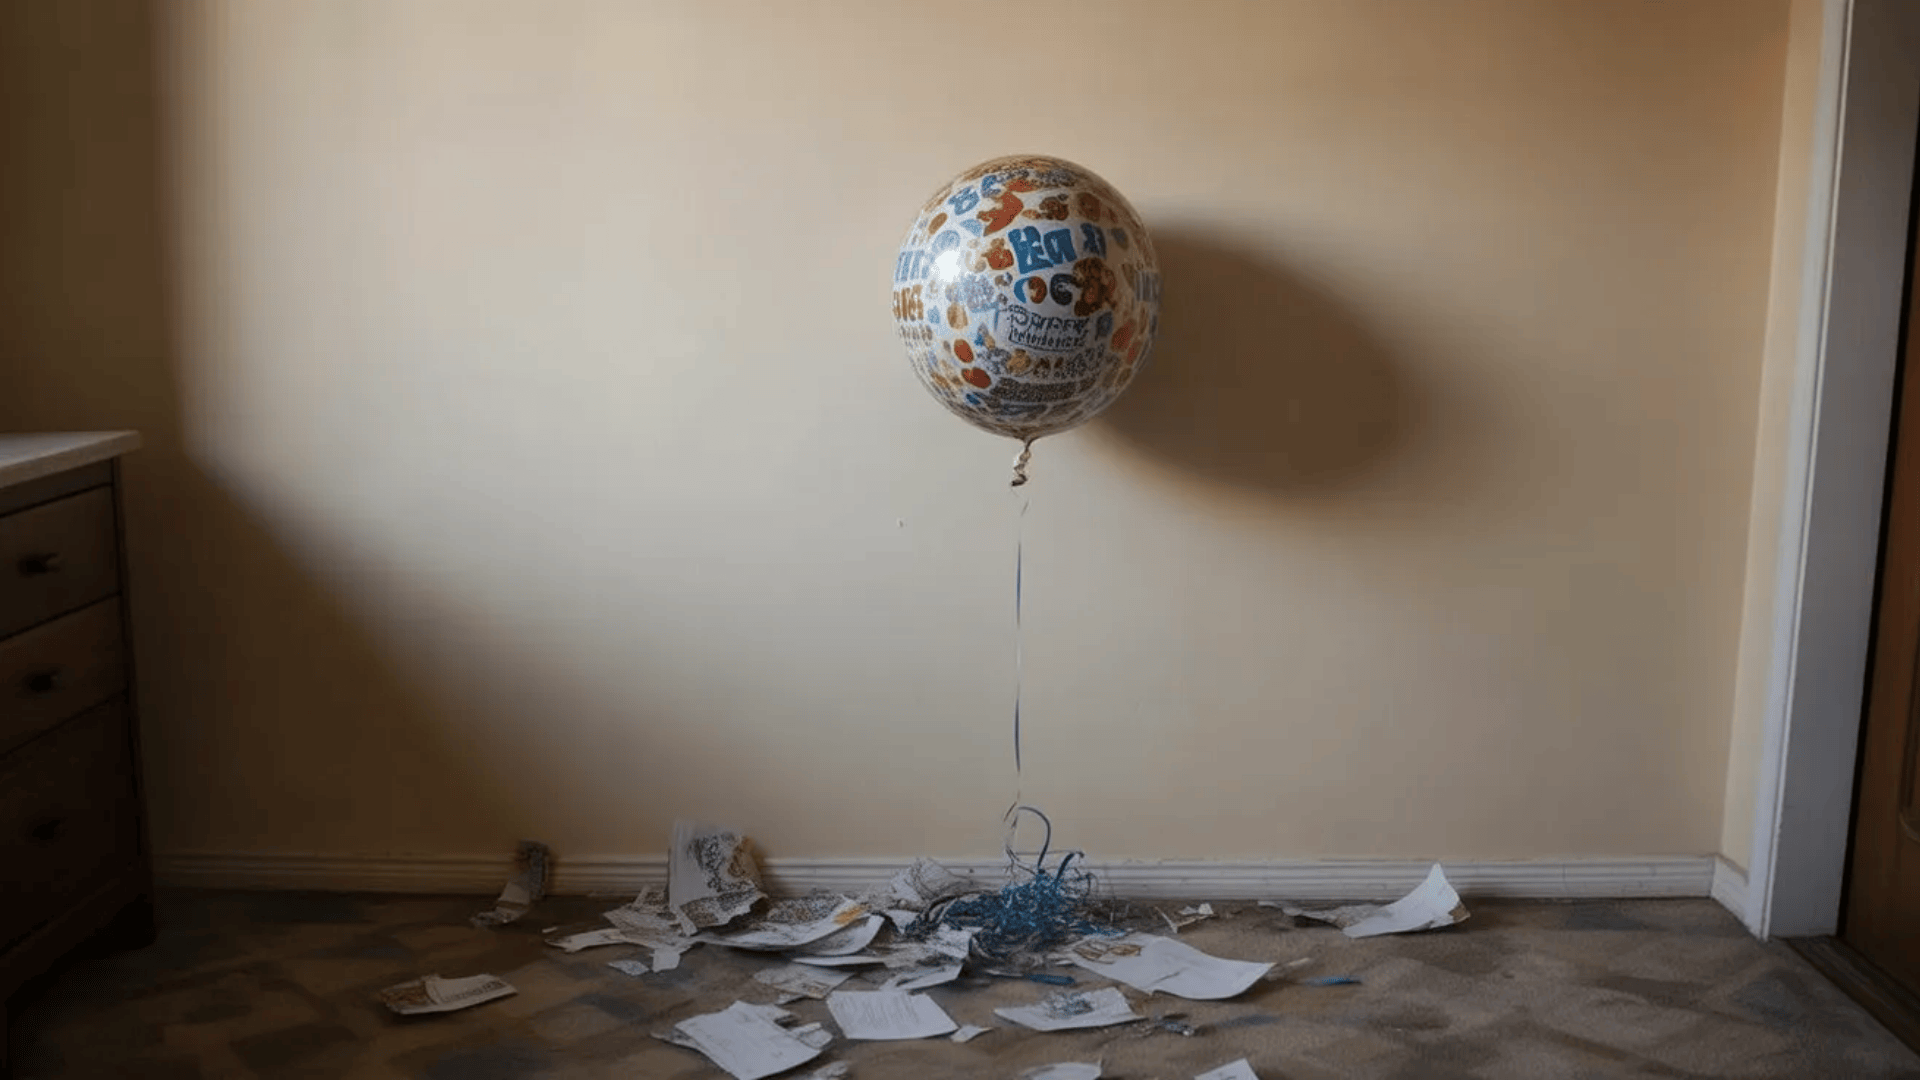
6. Fizzy Balloon Inflation Test
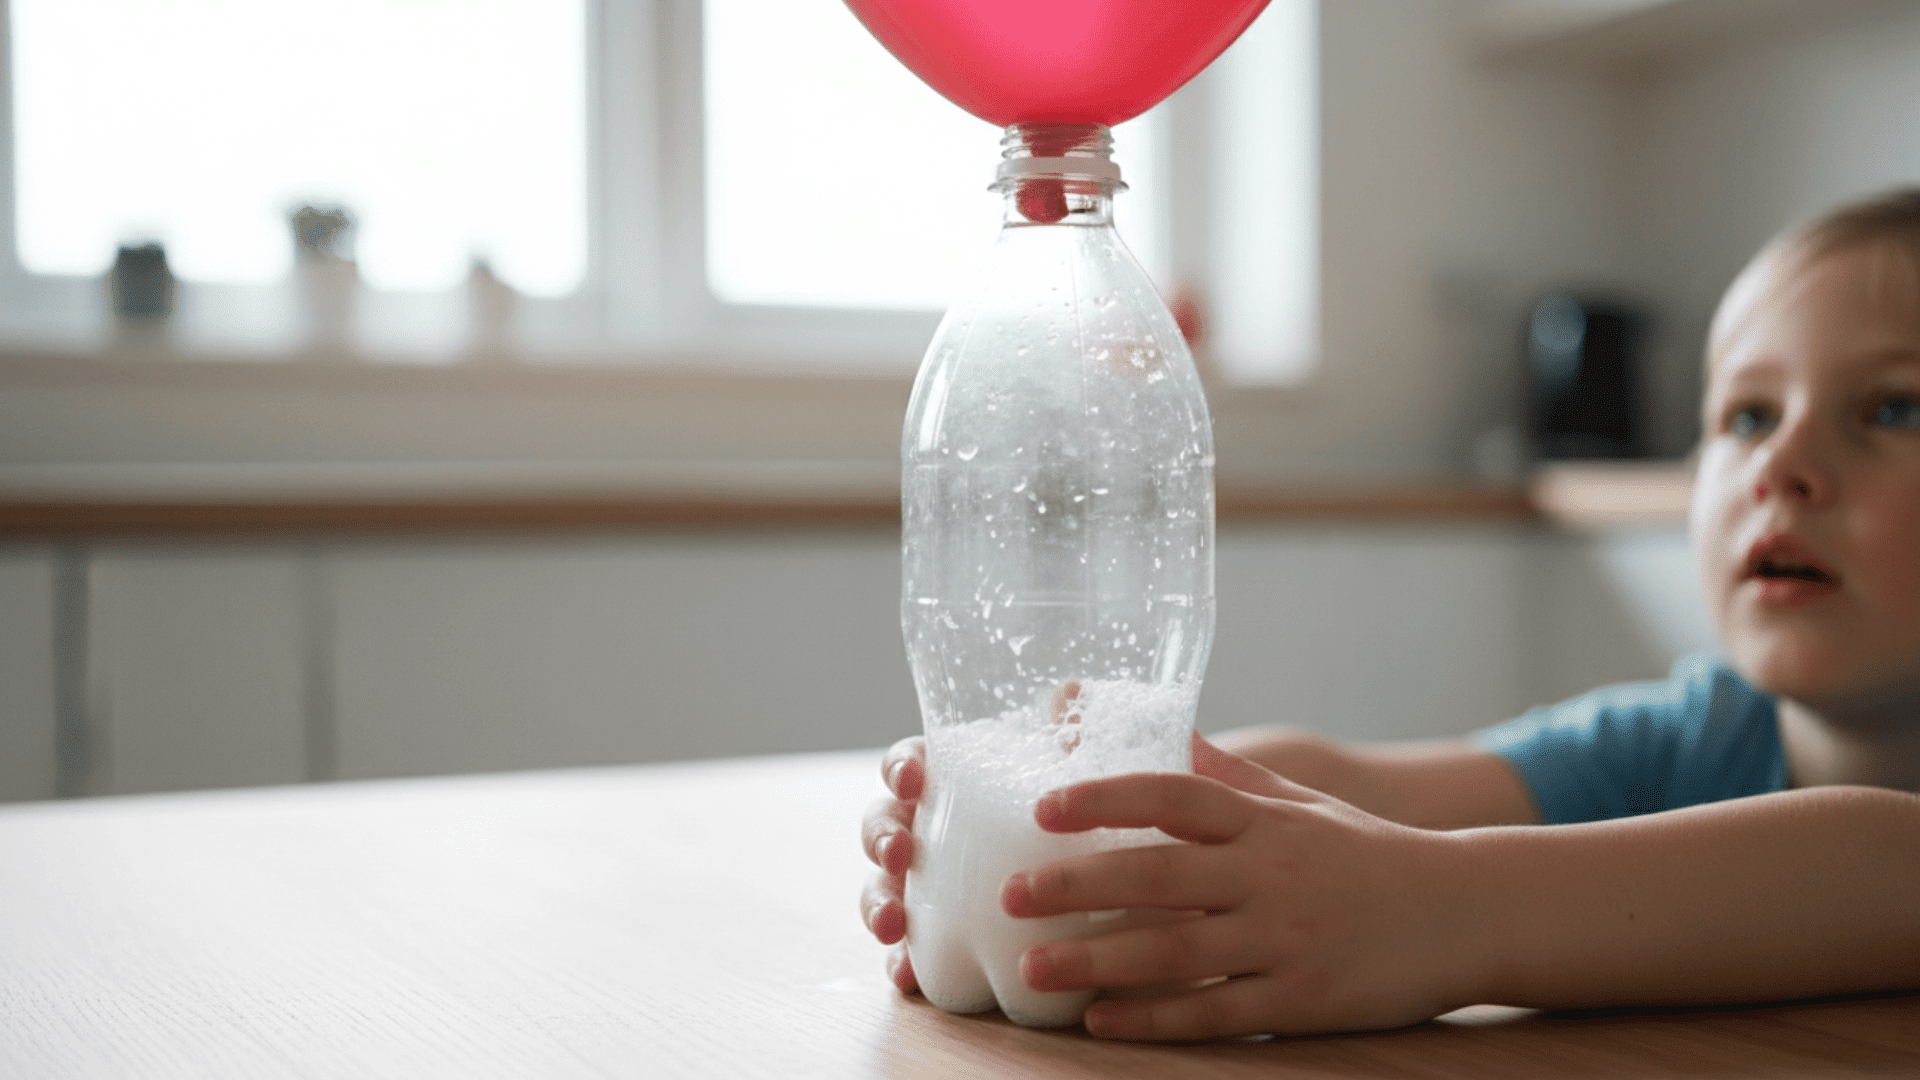
This activity demonstrates gas expansion. Kids see carbon dioxide inflate a balloon without blowing.
Materials Needed:
- Empty plastic bottle
- Balloon
- Baking soda
- White vinegar
- Funnel
Steps:
- Pour vinegar into the bottle until one-third full.
- Use the funnel to add baking soda into the balloon.
- Stretch the balloon opening over the bottle neck.
- Lift the balloon up so the baking soda falls into the vinegar.
- Watch the balloon inflate.
What happens: The baking soda and vinegar react to create carbon dioxide gas. The gas needs space to expand, so it fills up the balloon. Kids can test different amounts of ingredients to see which combination inflates the balloon the most.
7. Walking Water Rainbow
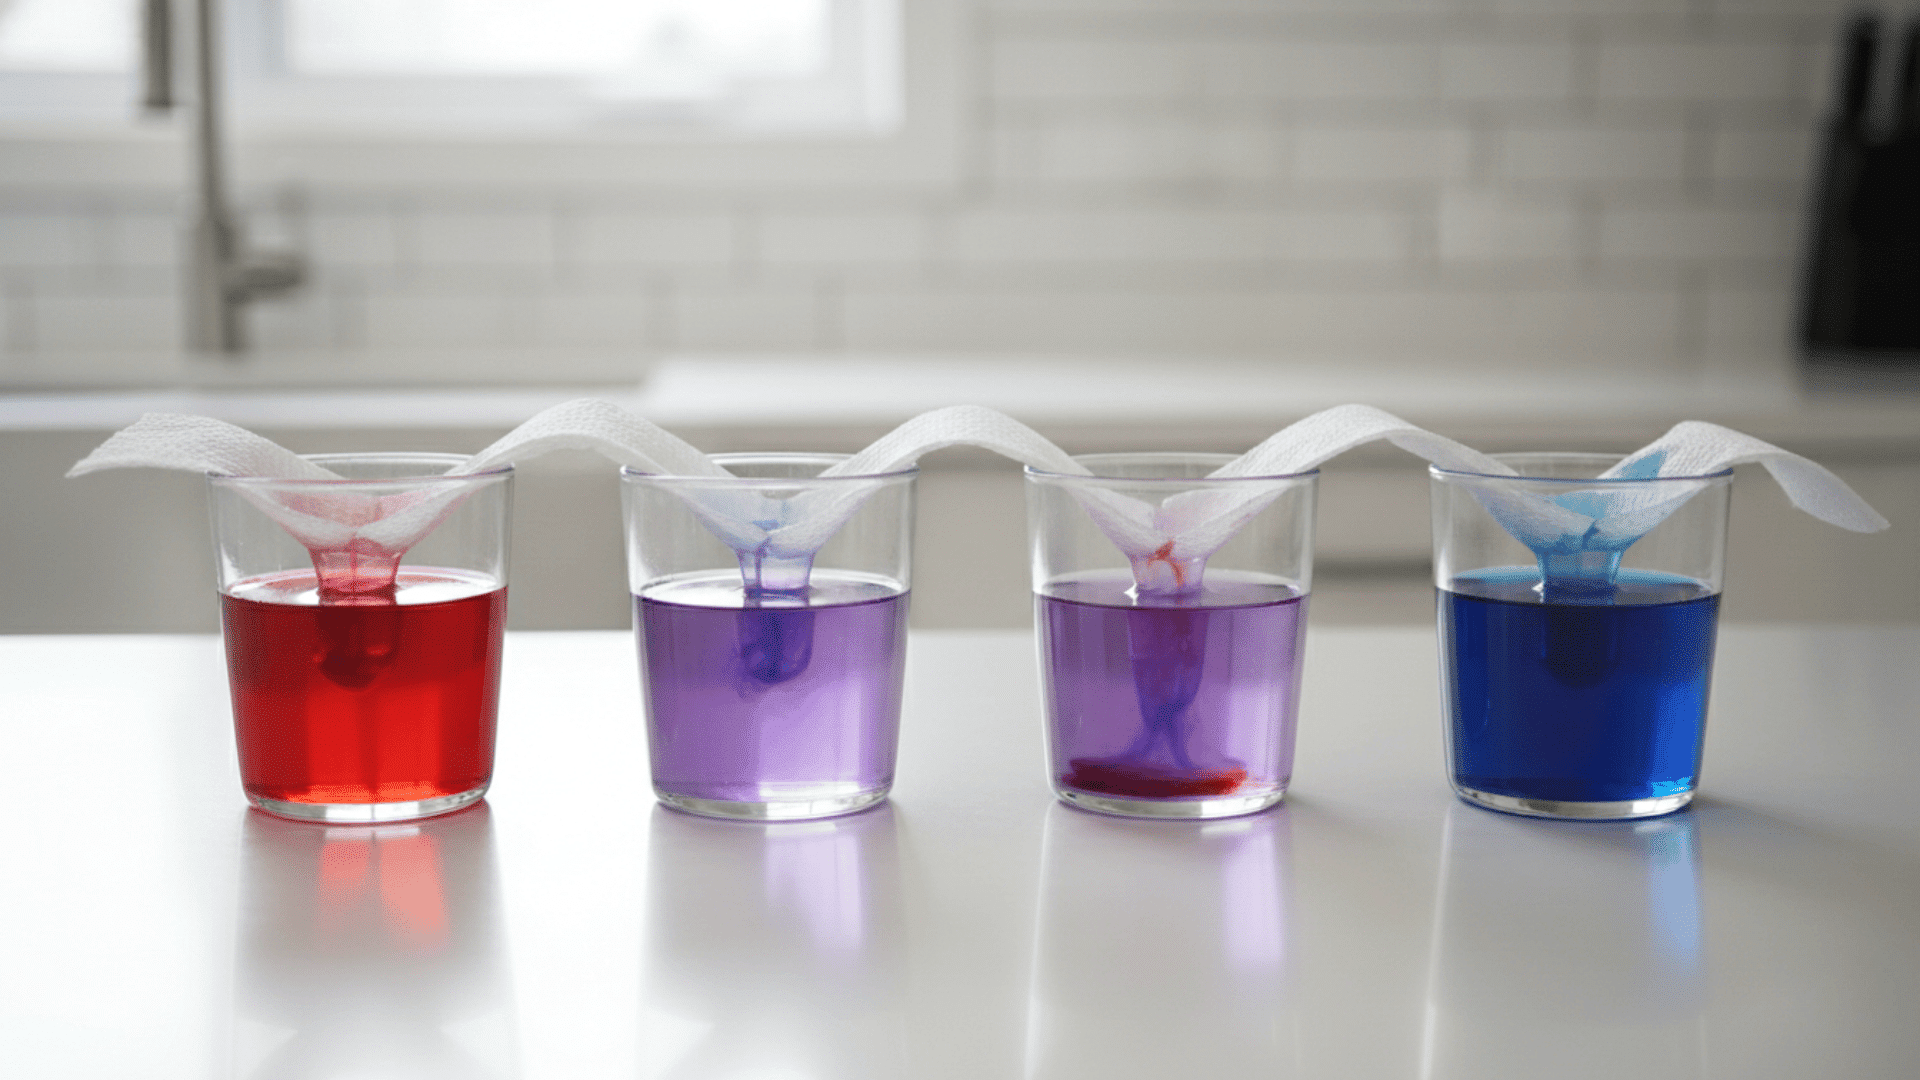
This experiment teaches capillary action. Water moves up paper towels and creates a rainbow effect.
Materials Needed:
- Six clear cups or glasses
- Paper towels
- Food coloring (red, yellow, blue)
- Water
Steps:
- Line up the six cups in a row.
- Fill cups one, three, and five with water.
- Add red coloring to cup one, yellow to cup three, and blue to cup five.
- Fold paper towels into strips.
- Place one end in colored water and the other in an empty cup.
- Wait several hours and watch the colors walk across.
What happens: Water climbs up the paper towel through tiny fibers. This process is called capillary action. The colored water moves into empty cups and mixes with other colors. Red and yellow make orange. Yellow and blue make green. Blue and red make purple.
8. Rainbow in a Jar Density Test
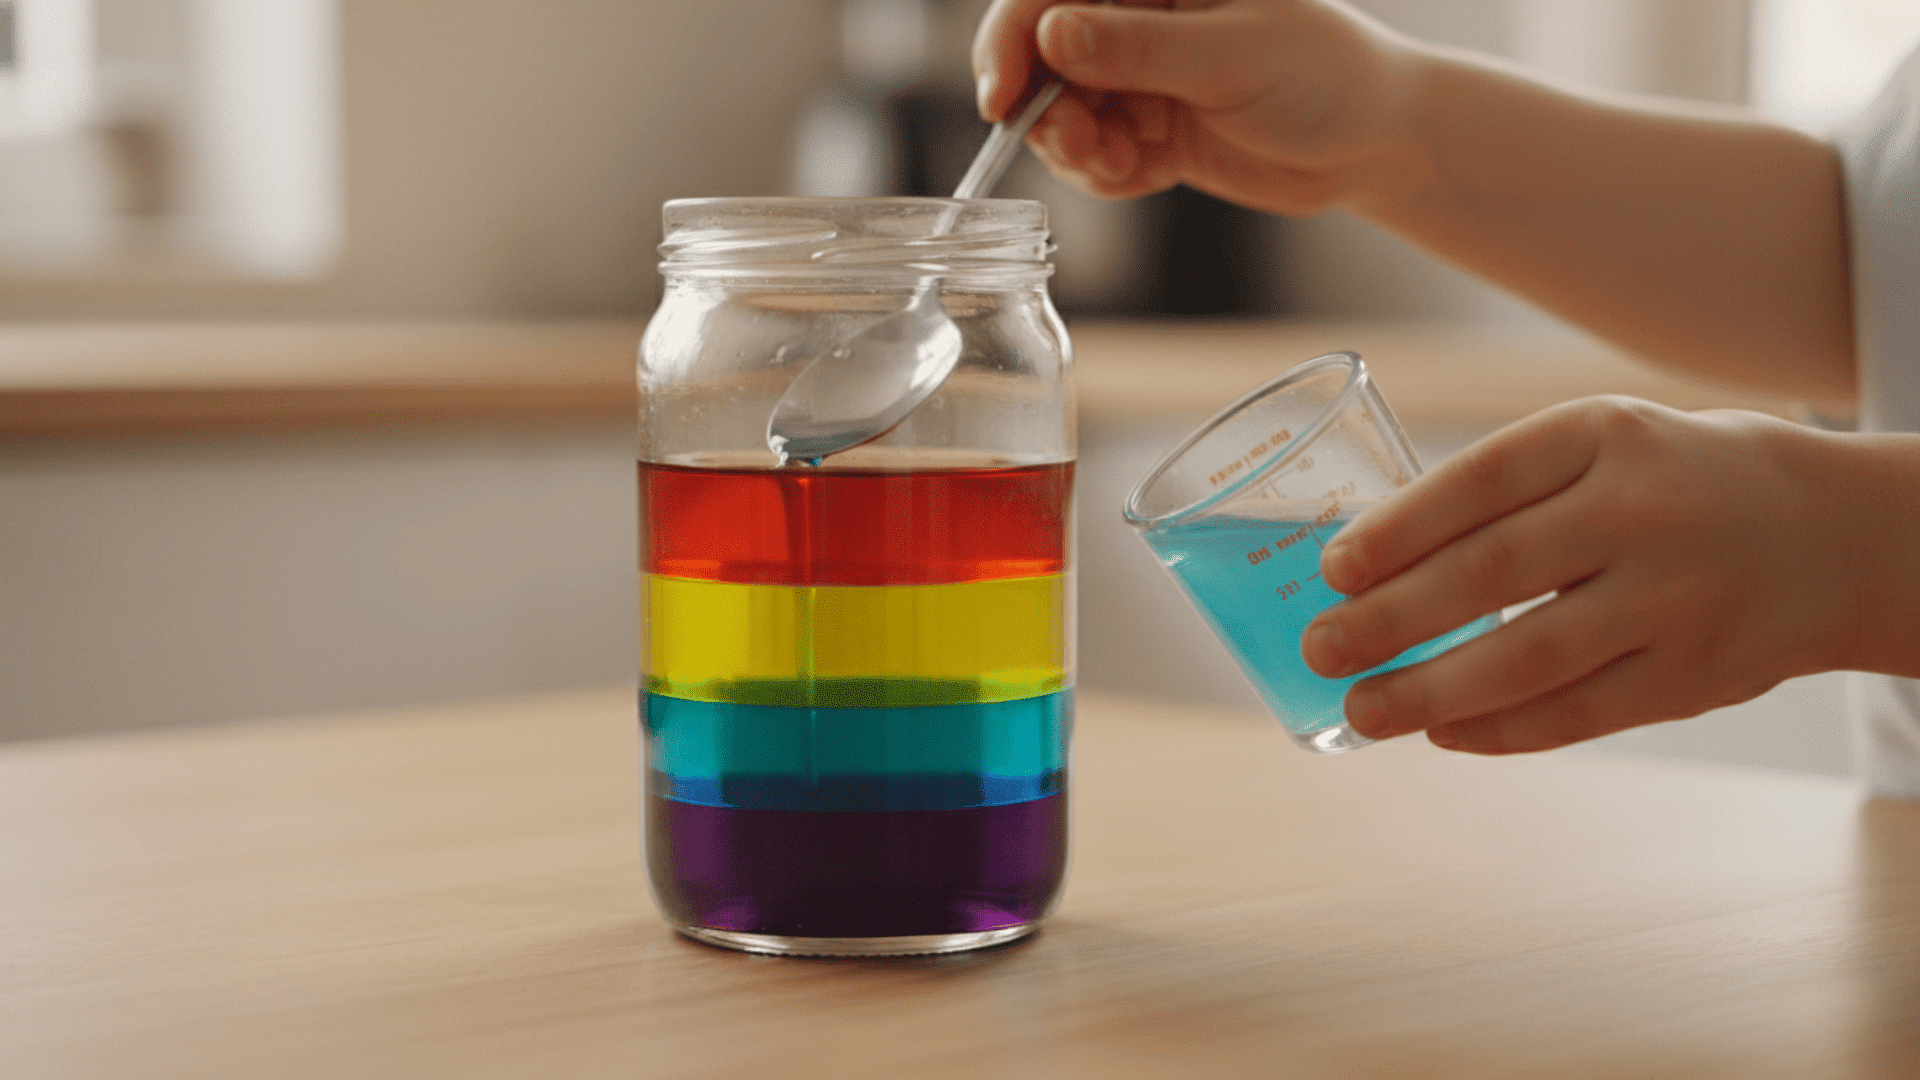
This experiment demonstrates liquid density. Different sugar concentrations create colorful layers.
Materials Needed:
- Five small cups
- Sugar
- Water
- Food coloring (different colors)
- Clear glass or jar
- Spoon
Steps:
- Label cups one through five.
- Add one tablespoon sugar to cup one, two to cup two, and so on.
- Add three tablespoons of water to each cup and stir.
- Add different food coloring to each cup.
- Pour the heaviest solution (cup five) into the glass first.
- Slowly add each layer, starting with the most sugar.
What happens: The liquids stack in layers instead of mixing. Solutions with more sugar are denser and heavier. They sink to the bottom. Lighter solutions float on top. This creates a rainbow effect in the jar.
9. Floating Paper Clip Experiment
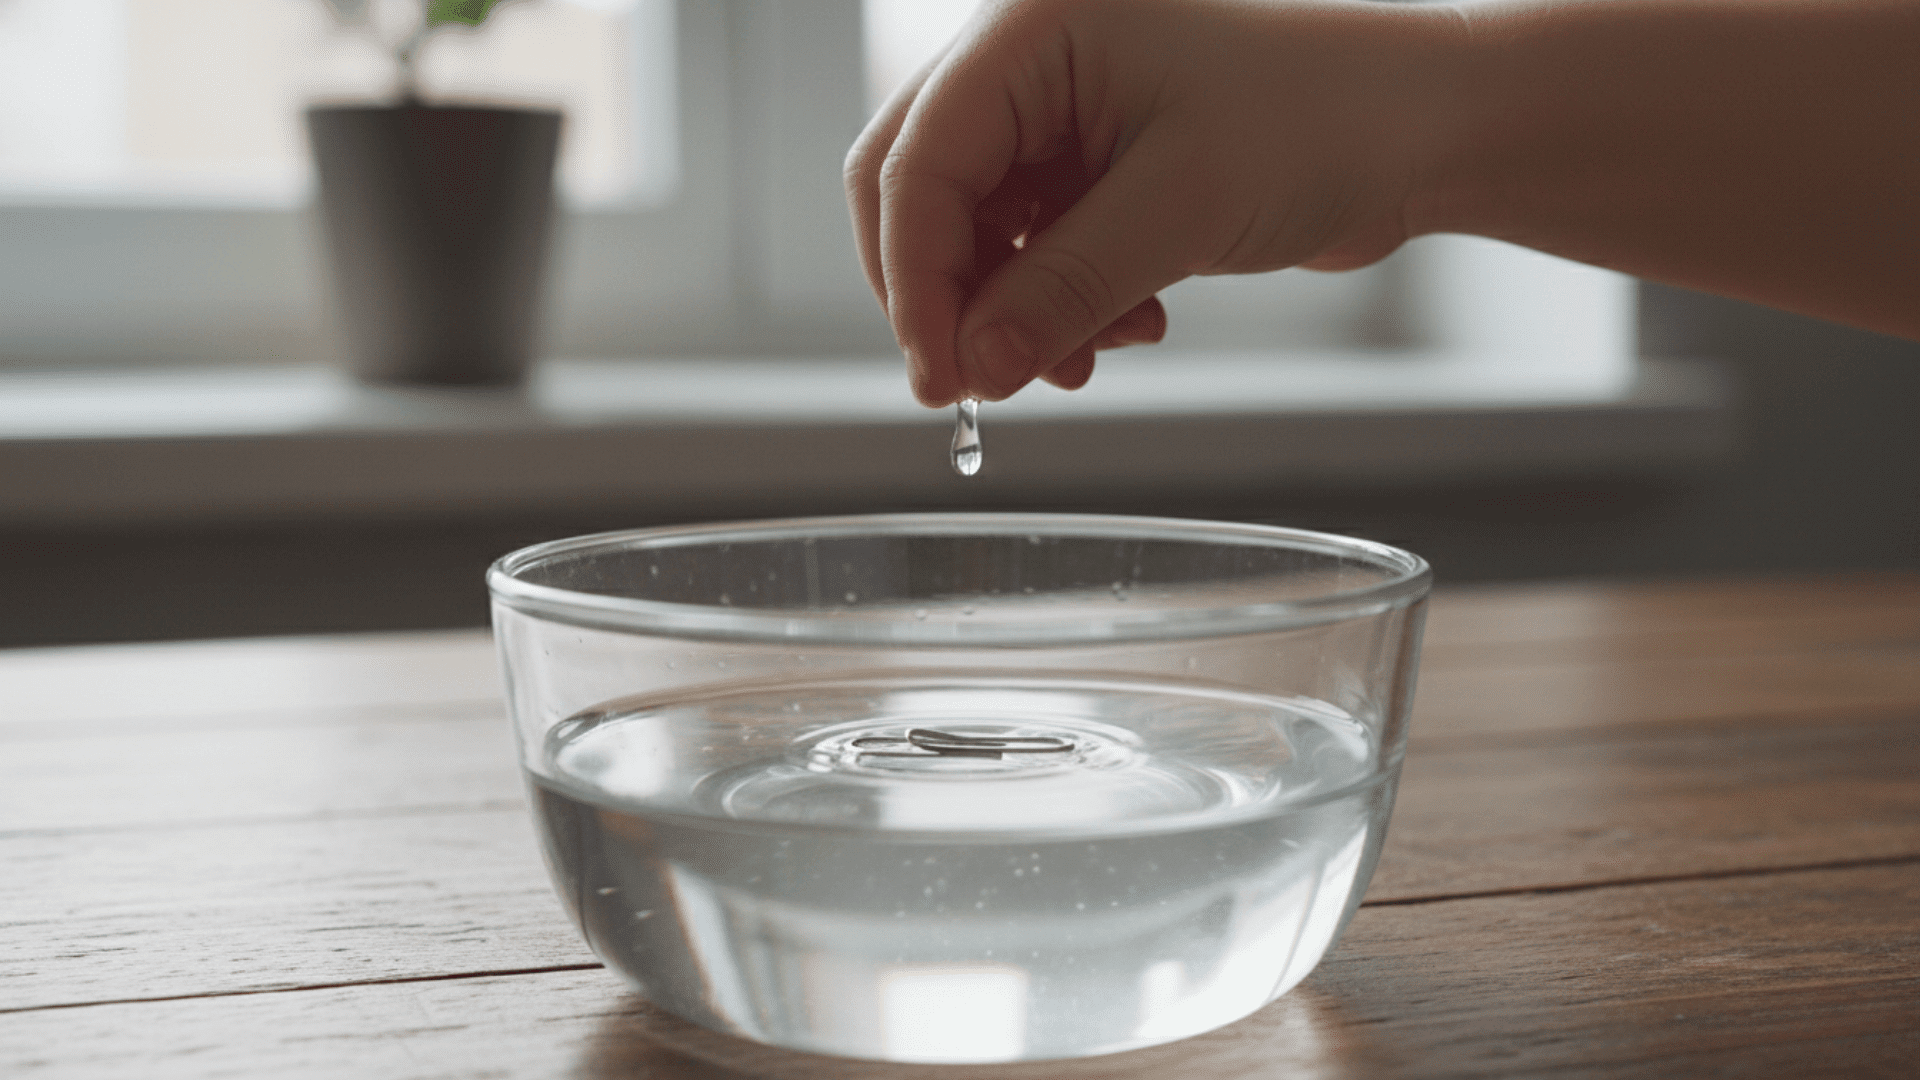
This activity shows surface tension. Water molecules stick together and can hold lightweight objects.
Materials Needed:
- Paper clips
- Bowl of water
- Tissue paper
- Dish soap
Steps:
- Fill the bowl with water.
- Place a paper clip on a small piece of tissue.
- Gently lower the tissue onto the water surface.
- Wait for the tissue to sink, leaving the clip floating.
- Add one drop of dish soap to break the surface.
What happens: Water molecules create a thin film on the surface. This film is strong enough to hold the paper clip up. When soap touches the water, it breaks the surface tension. The paper clip sinks immediately.
10. Sink or Float Prediction Test
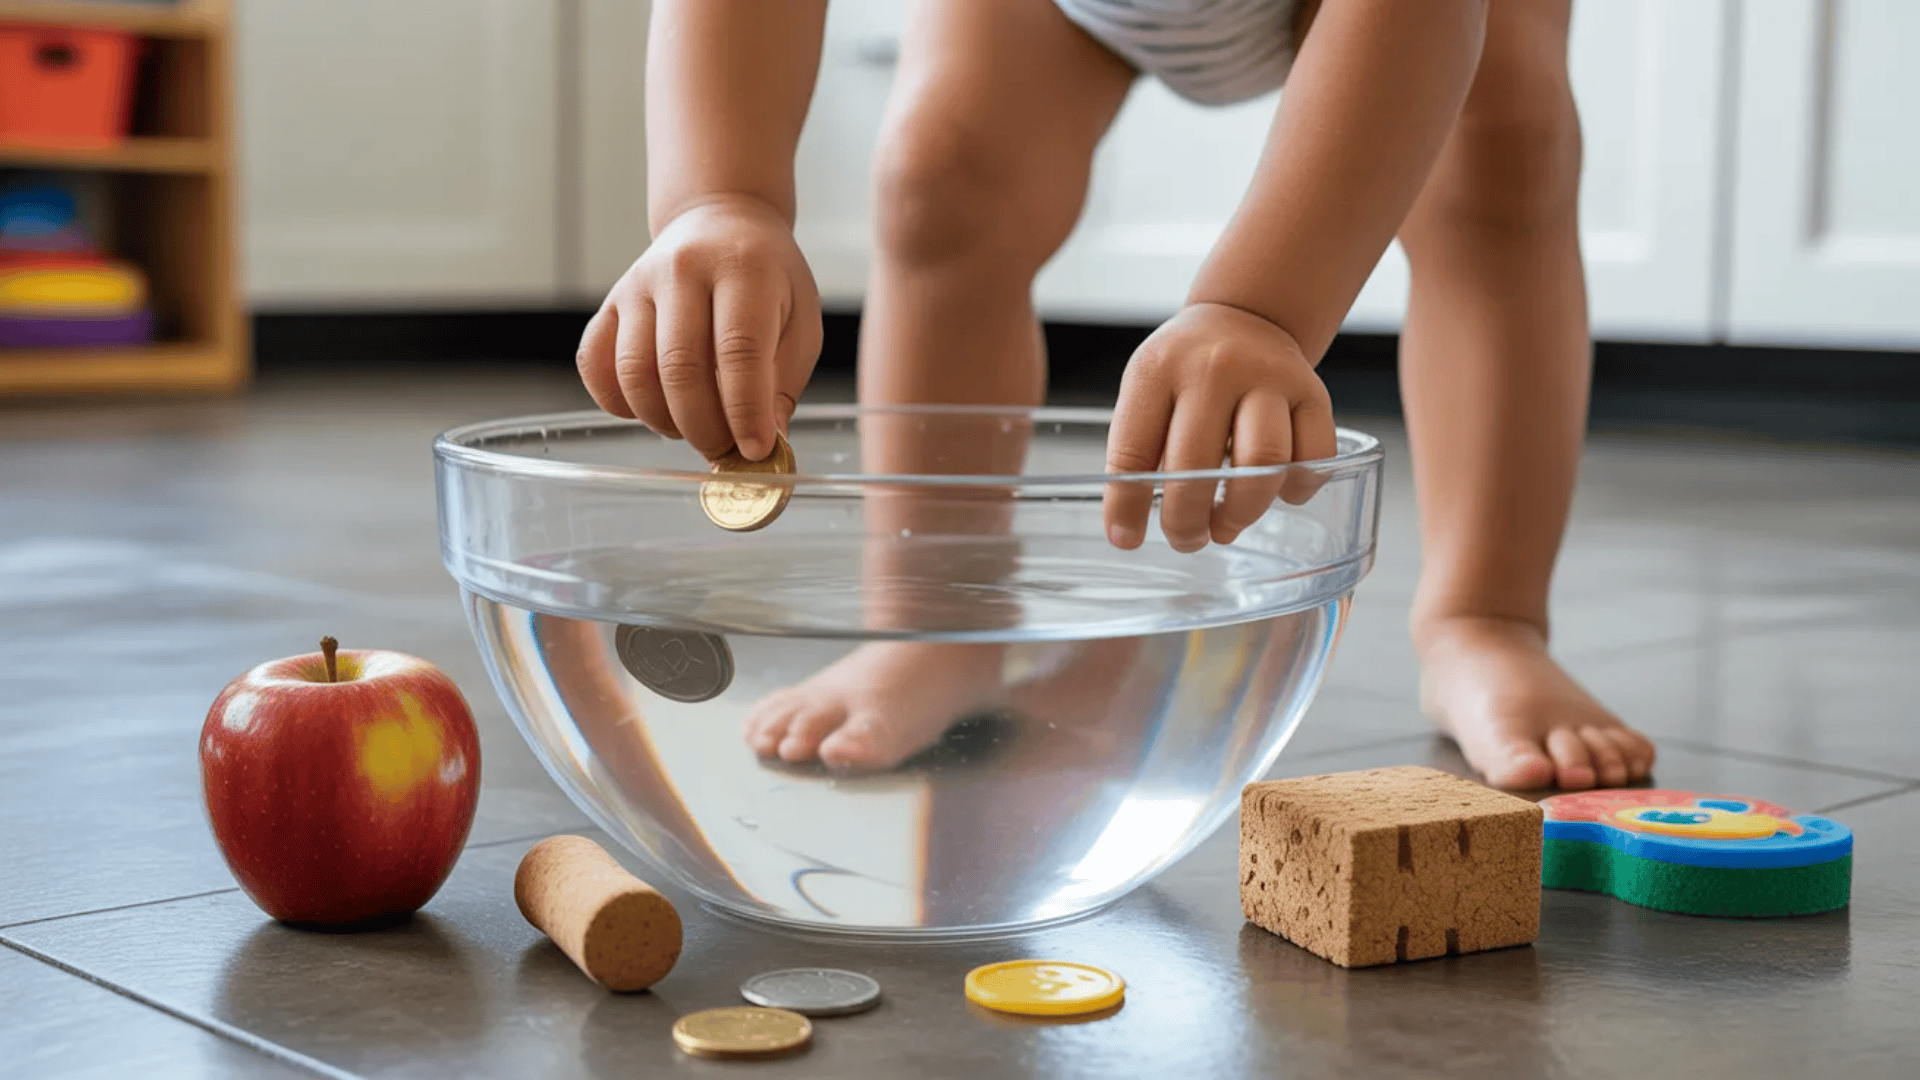
This experiment teaches density and buoyancy. Kids predict which objects will sink or float.
Materials Needed:
- Large bowl or tub of water
- Various household items (coin, cork, apple, grape, toy, sponge)
- Towel
- Paper for predictions
Steps:
- Gather different objects from around your home.
- Have kids predict which will sink and which will float.
- Write down their predictions.
- Test each object one by one.
- Compare results with predictions.
What happens: Objects less dense than water will float. Objects denser than water will sink. Some surprises happen. A grape might sink while an apple floats. This happens because of size, weight, and how much water each object pushes aside.
11. Balloon-Powered Car Challenge
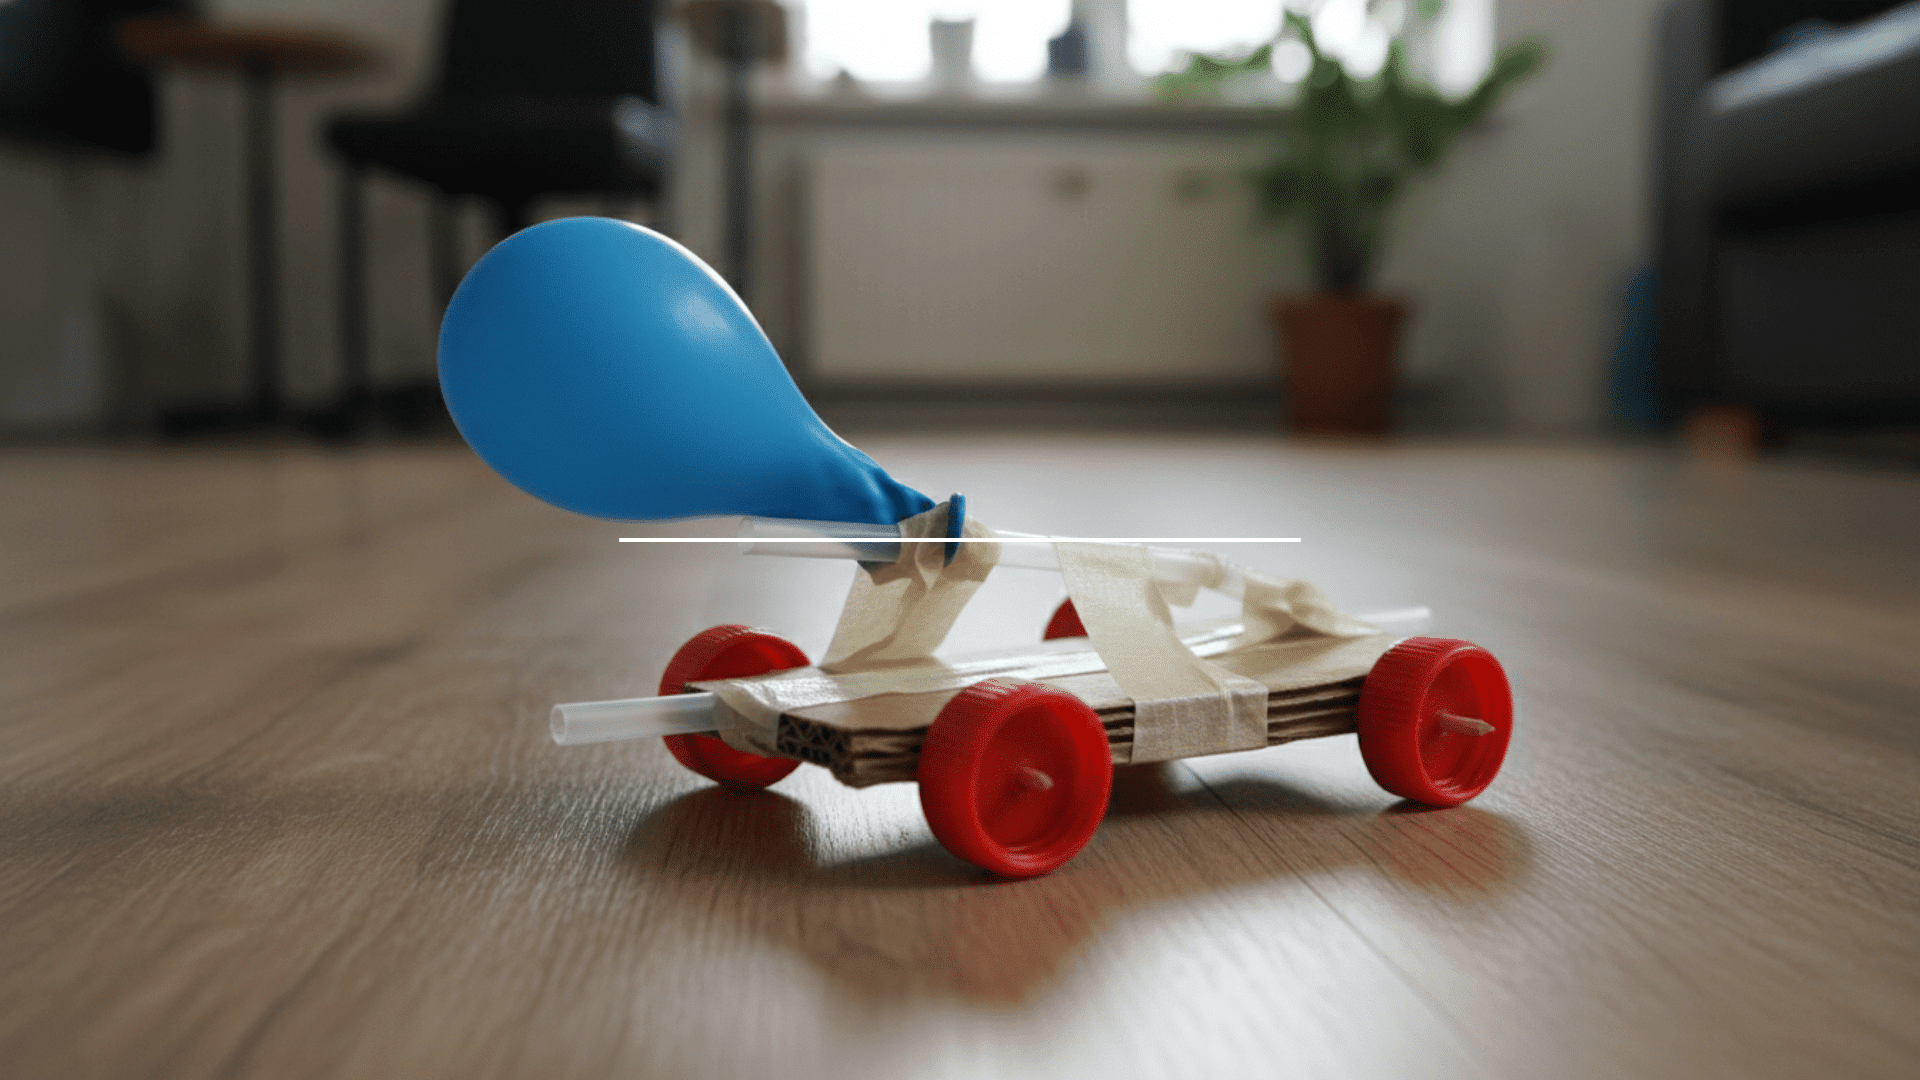
This experiment demonstrates Newton’s third law of motion. Air pushing backward makes the car move forward.
Materials Needed:
- Cardboard or plastic bottle
- Four bottle caps for wheels
- Two straws
- Balloon
- Tape
- Scissors
Steps:
- Cut the cardboard into a rectangular base.
- Tape bottle caps to the ends of straws for axles.
- Attach axles under the cardboard base.
- Tape one straw to the top of the car.
- Attach the balloon to the straw opening.
- Blow up the balloon and let it go.
What happens: Air rushes out of the balloon in one direction. This pushes the car forward in the opposite direction. The more air you add, the farther the car travels. Kids can test different balloon sizes to see which works best.
12. Paper Helicopter Gravity Test
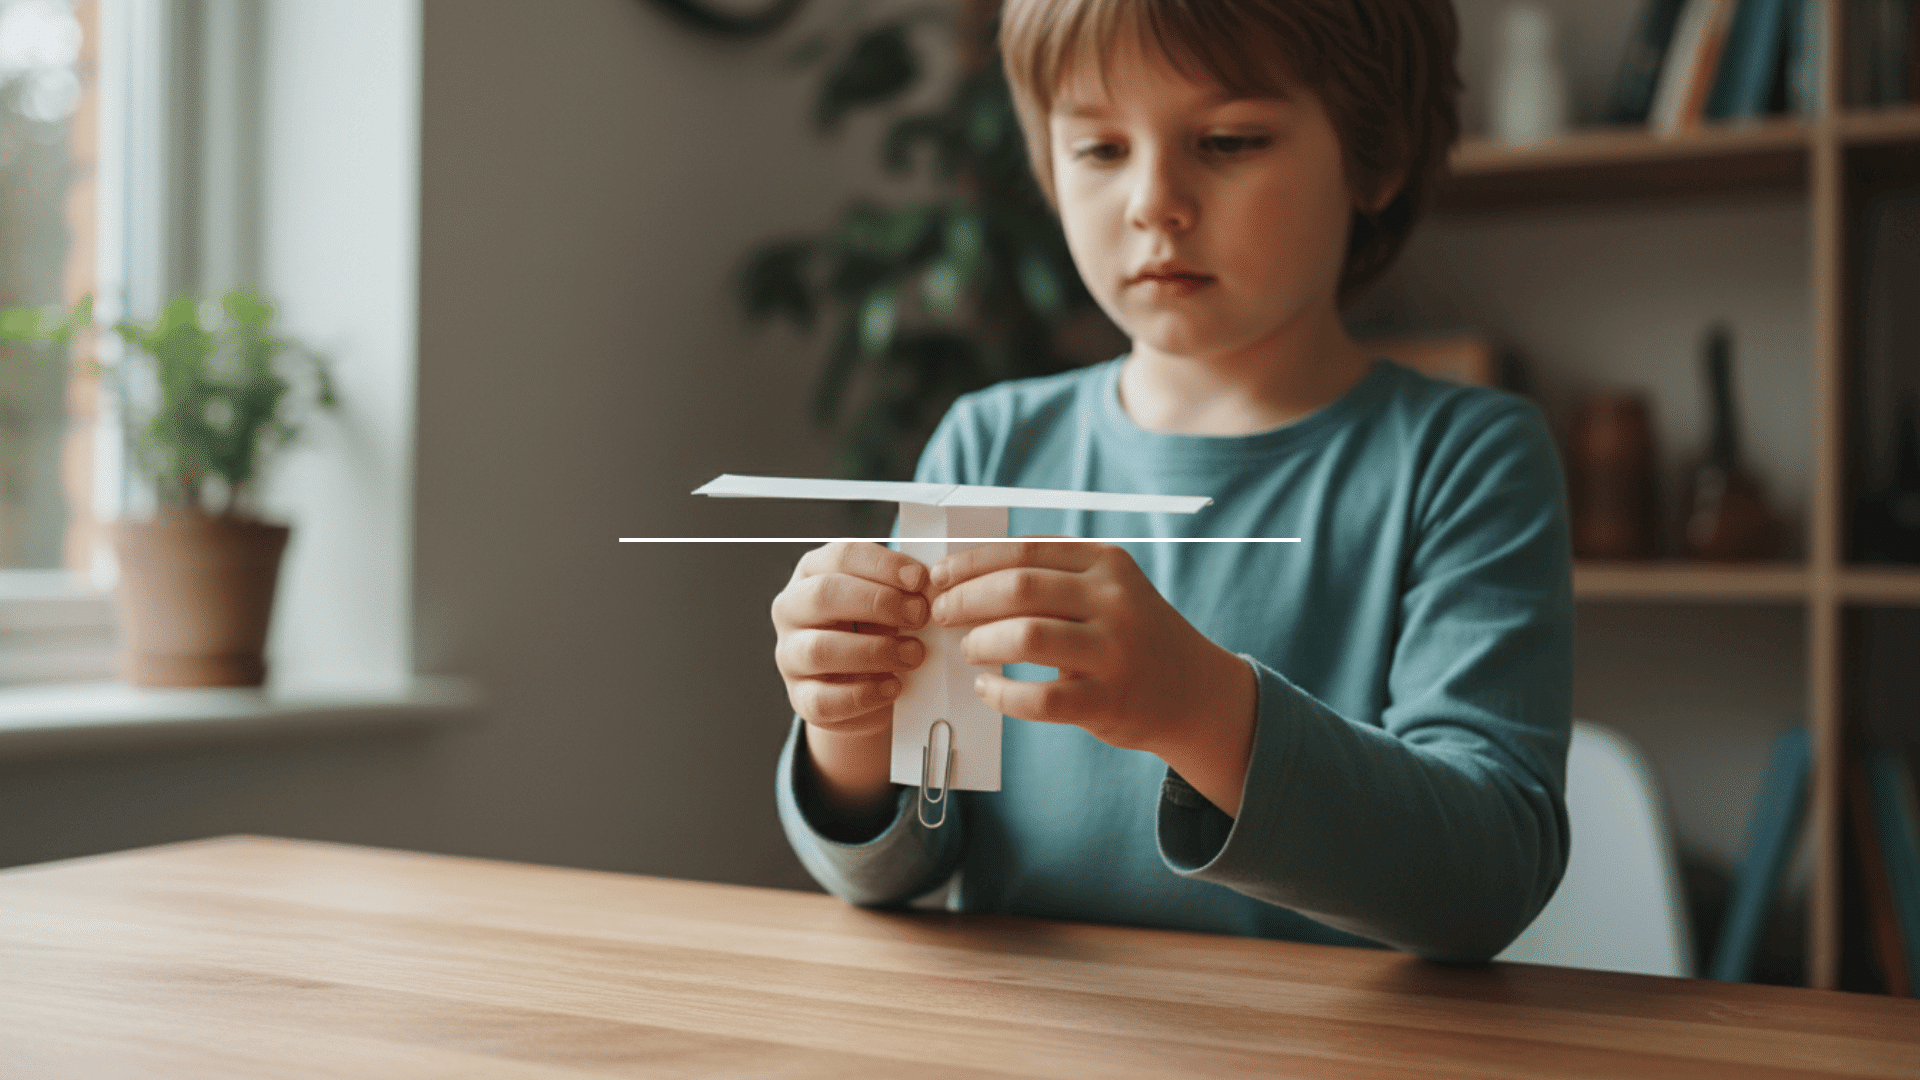
This activity teaches how air resistance slows falling objects. The spinning motion creates lift.
Materials Needed:
- Paper
- Scissors
- Paper clips
- Ruler
Steps:
- Cut paper into a strip about eight inches long and two inches wide.
- Cut a slit down the middle, stopping halfway.
- Fold one side forward and one side back to make blades.
- Fold the bottom up and add a paper clip for weight.
- Drop from a height and watch it spin.
What happens: The paper helicopter spins as it falls. Air pushes against the blades and slows the fall. This spinning creates lift, just like real helicopter blades. Try different paper weights or blade sizes to change how fast it drops.
13. Parachute Drop Experiment
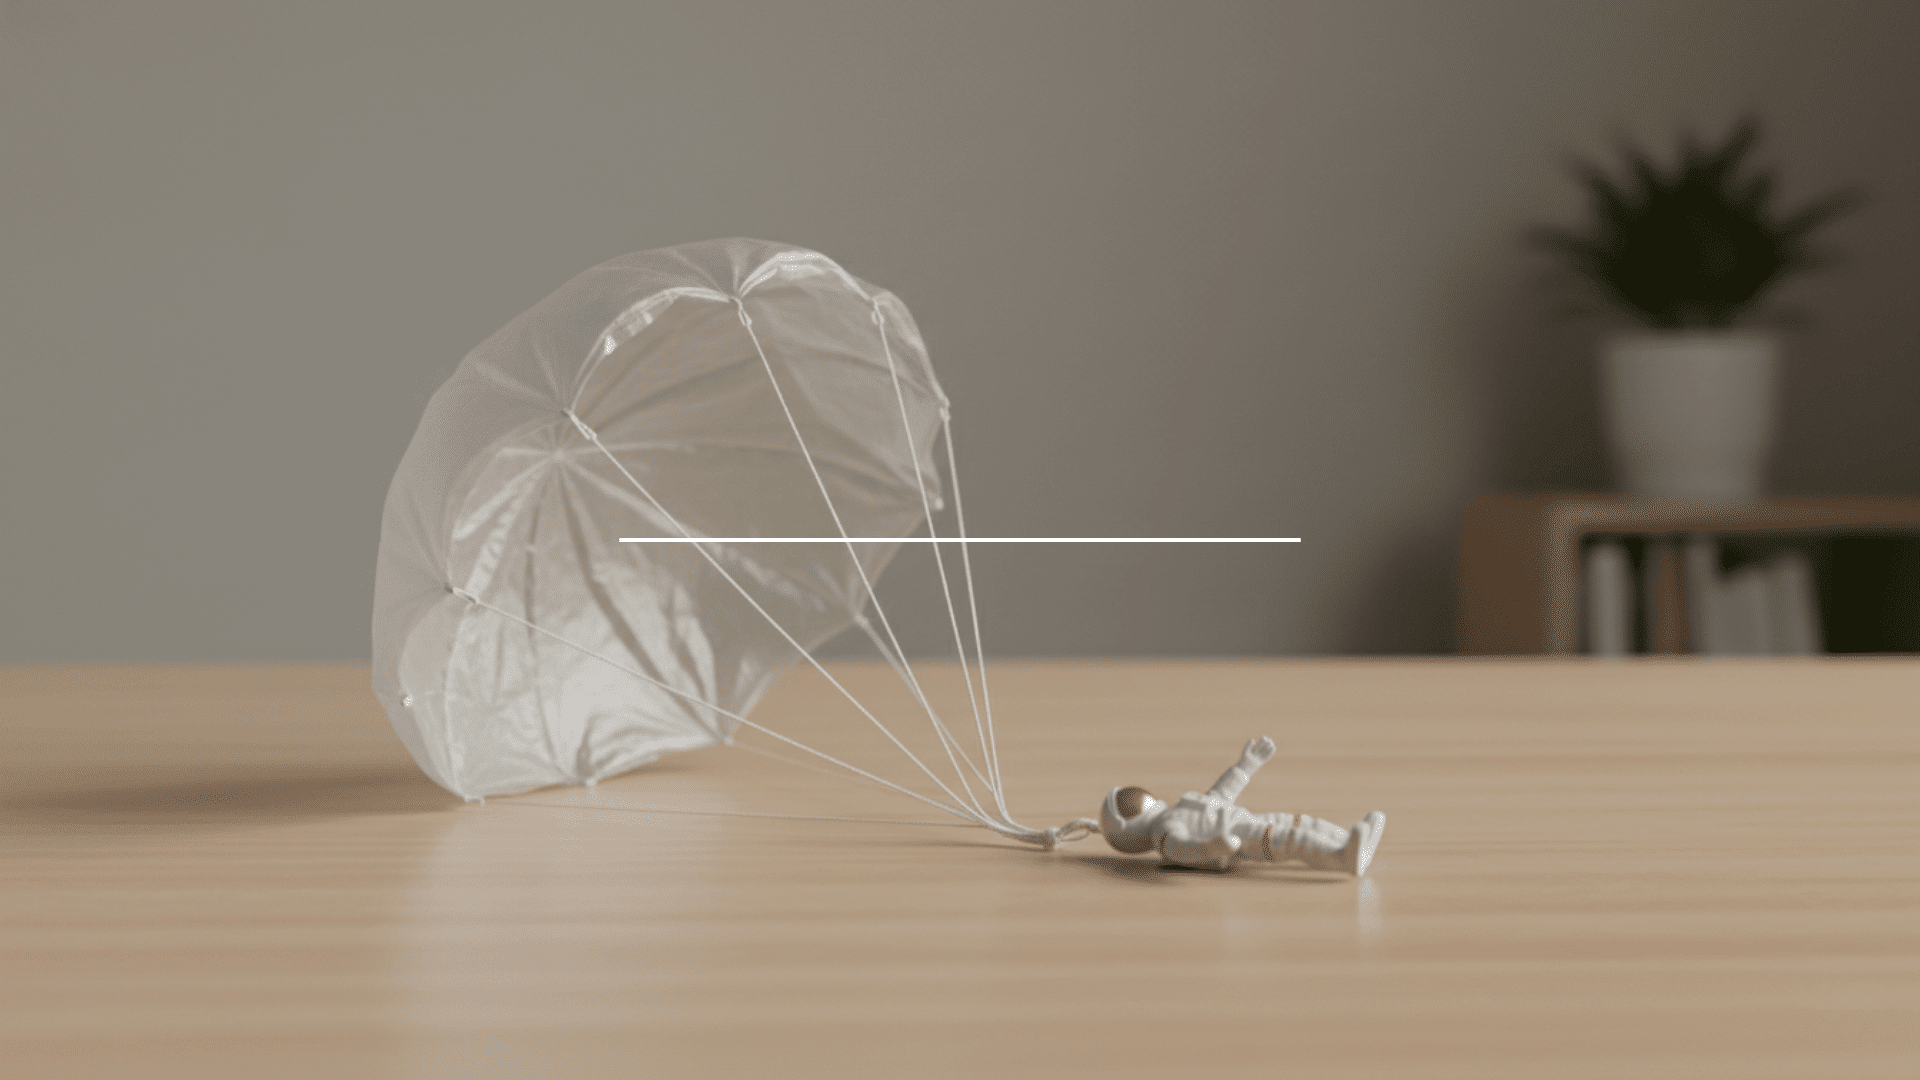
This experiment shows air resistance in action. Larger parachutes fall slower than smaller ones.
Materials Needed:
- Plastic bag or lightweight fabric
- String
- Small toy or weight
- Scissors
- Tape
Steps:
- Cut a square from the plastic bag.
- Cut four equal pieces of string.
- Tape one string to each corner of the square.
- Tie the strings together at the bottom.
- Attach a small toy to the strings.
- Drop from a high place and watch it float down.
What happens: The parachute catches air as it falls. This creates drag that slows down the descent. A larger parachute traps more air and falls more slowly. Kids can test different sizes to see which works best for their toy.
14. Ice Melting Speed Race
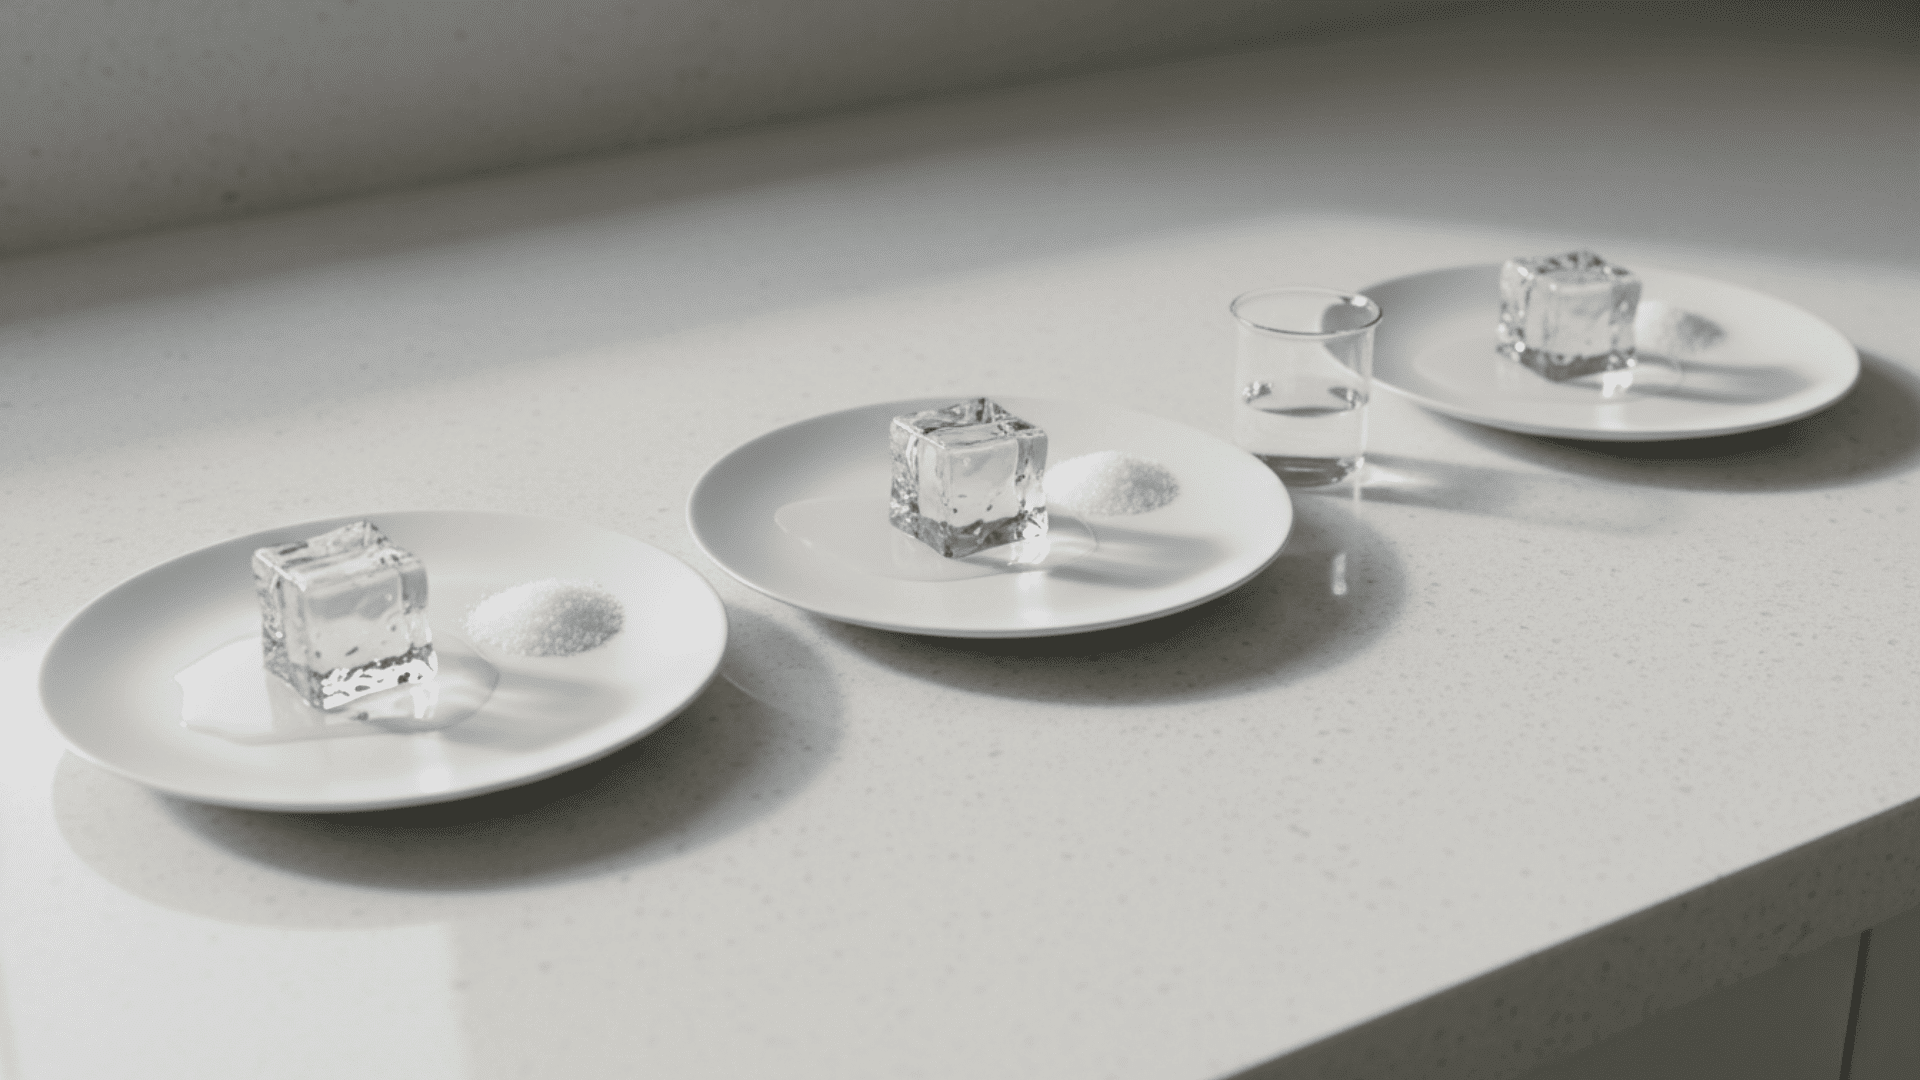
This activity demonstrates heat transfer. Different materials melt ice at different rates.
Materials Needed:
- Ice cubes (same size)
- Plates or bowls
- Salt
- Sugar
- Water
- Timer
Steps:
- Place one ice cube on each plate.
- Sprinkle salt on the first cube.
- Sprinkle sugar on the second cube.
- Pour water on the third cube.
- Leave the fourth cube plain as a control.
- Watch which melts fastest.
What happens: Salt melts ice fastest because it lowers the freezing point of water. Sugar also speeds up melting, but not as much as salt. Plain water helps ice melt faster than air alone. The control cube melts slowly because only room temperature air touches it.
15. Static Electricity Butterfly Experiment
This experiment shows how static charges attract objects. Rubbing creates an electrical charge.
Materials Needed:
- Tissue paper
- Balloon
- Scissors
- Wool cloth or hair
Steps:
- Cut a butterfly shape from tissue paper.
- Place the butterfly on a flat surface.
- Blow up the balloon and tie it.
- Rub the balloon on wool fabric or your hair.
- Hold the balloon above the butterfly.
What happens: The butterfly lifts toward the balloon. Rubbing transfers electrons to the balloon, giving it a negative charge. The butterfly has a positive charge. Opposite charges attract, so the butterfly moves up. The effect works best on dry days.
16. Bending Water With Static Electricity
This experiment demonstrates how static charges affect water flow. Electrons create an invisible force.
Materials Needed:
- Balloon
- Wool cloth or hair
- Running water from the faucet
Steps:
- Turn on the faucet to create a thin stream of water.
- Blow up the balloon and tie it closed.
- Rub the balloon on wool or your hair for 30 seconds.
- Hold the balloon close to the water stream without touching.
- Watch the water bend toward the balloon.
What happens: Rubbing creates a negative charge on the balloon. Water molecules have positive and negative ends. The charged balloon attracts the positive side of water molecules. This pulls the stream toward the balloon. The effect stops when the charge wears off.
17. Simple Electromagnet Build
This activity shows how electricity creates magnetism. Current flowing through a wire produces a magnetic field.
Materials Needed:
- Large iron nail
- Copper wire
- Battery (D-cell)
- Paper clips
- Tape
Steps:
- Wrap copper wire tightly around the nail 50 times.
- Leave the wire ends free at both ends.
- Tape one wire end to the battery’s positive terminal.
- Touch the other wire to the negative terminal.
- Bring the nail near the paper clips.
What happens: The nail picks up paper clips like a magnet. Electricity flowing through the wire creates a magnetic field around the nail. The nail becomes temporarily magnetic. When you disconnect the wire, the magnetism stops, and the clips fall off.
18. DIY Compass Experiment
This experiment teaches about Earth’s magnetic field. A magnetized needle points north.
Materials Needed:
- Sewing needle
- Magnet
- Cork slice or foam
- Bowl of water
- Compass (to verify)
Steps:
- Rub the needle on the magnet 50 times in one direction.
- Push the needle through the cork slice.
- Fill the bowl with water.
- Place the cork with the needle on the water surface.
- Watch it spin and point north.
What happens: Rubbing magnetizes the needle. Earth acts like a giant magnet with north and south poles. The magnetized needle aligns with Earth’s magnetic field. One endpoint is north and the other is south. The cork keeps the needle floating freely.
19. Sound Vibration Test With Rice
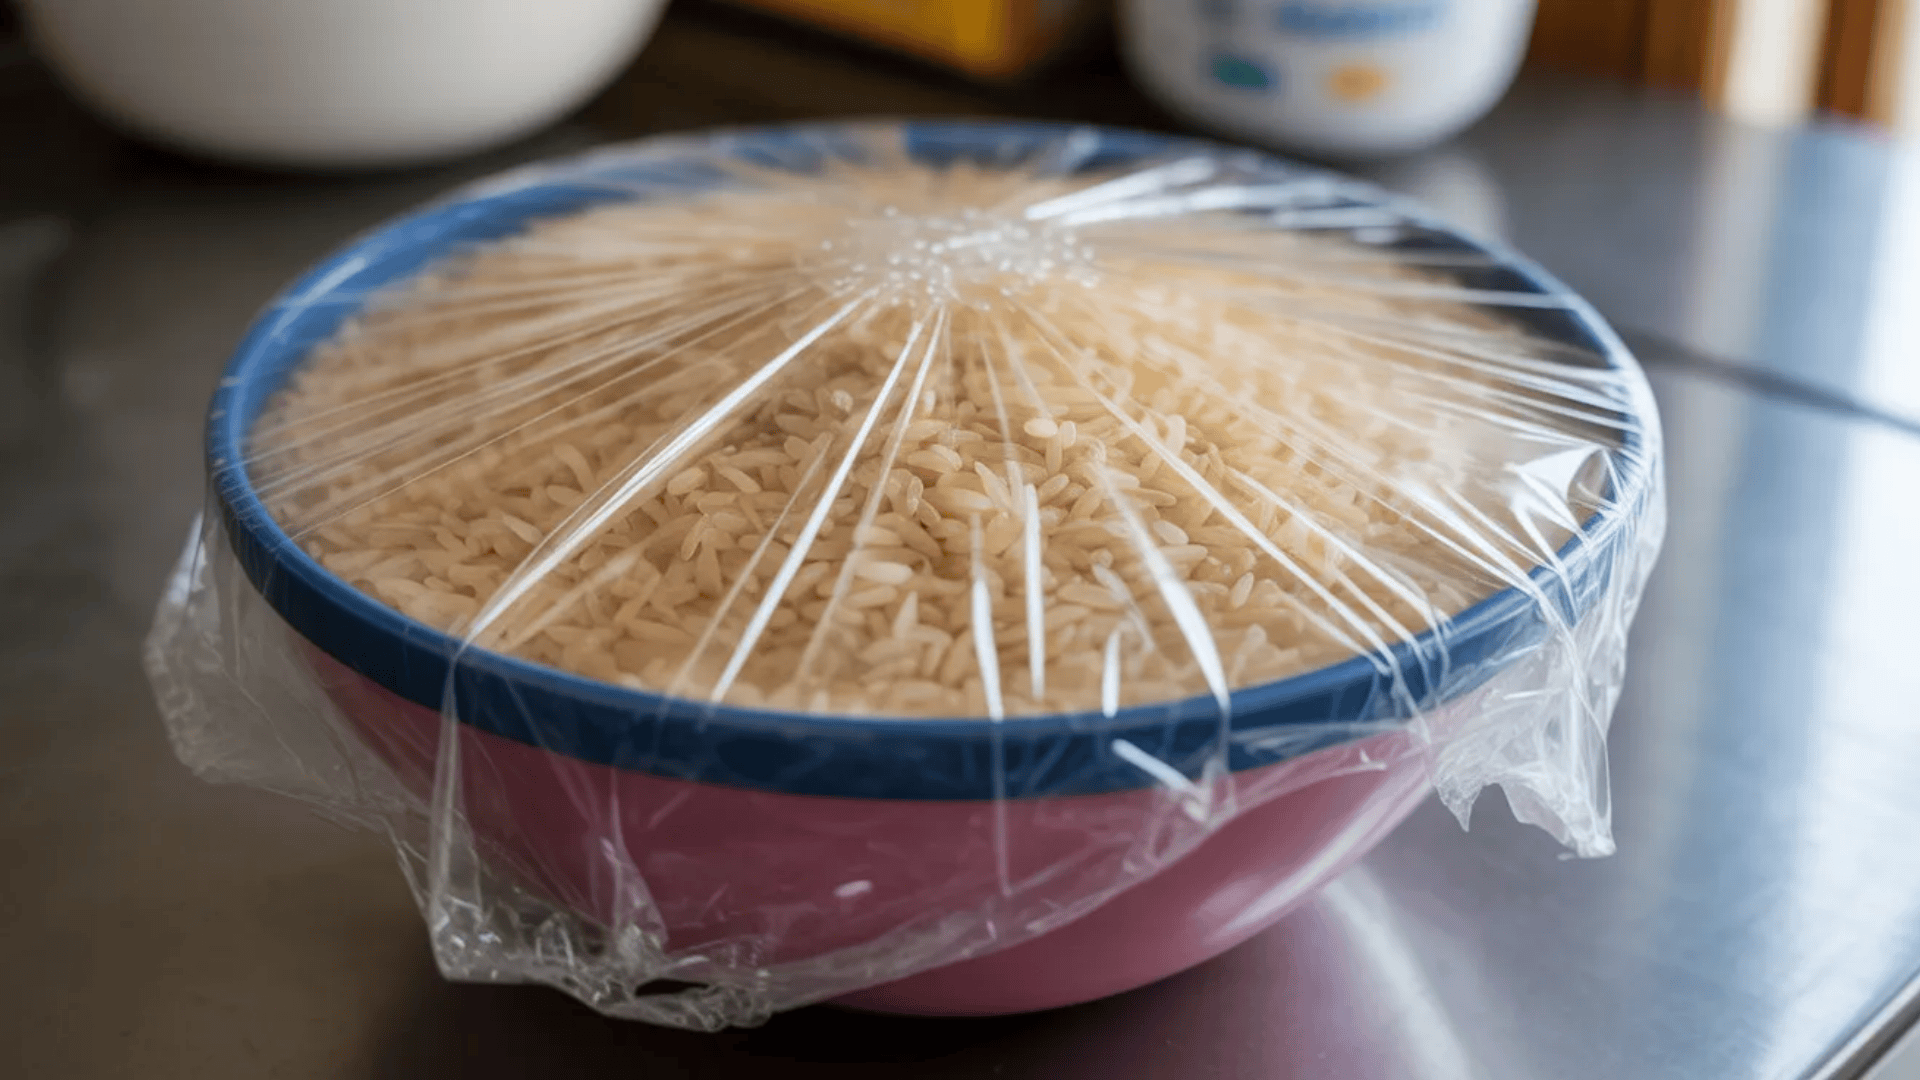
This activity demonstrates that sound creates vibrations. Kids see music make rice dance.
Materials Needed:
- Plastic bowl
- Plastic wrap
- Rice grains
- Rubber band
- Pot and wooden spoon
Steps:
- Stretch plastic wrap tightly over the bowl opening.
- Secure it with a rubber band.
- Sprinkle rice grains on top of the plastic.
- Hold a pot close to the bowl.
- Bang the pot loudly with the spoon.
What happens: The rice jumps and bounces on the plastic. Sound travels as vibrations through air. These vibrations hit the plastic wrap and make it shake. The shaking plastic tosses the rice around. Louder sounds create bigger movements.
20. Straw Flute Sound Experiment
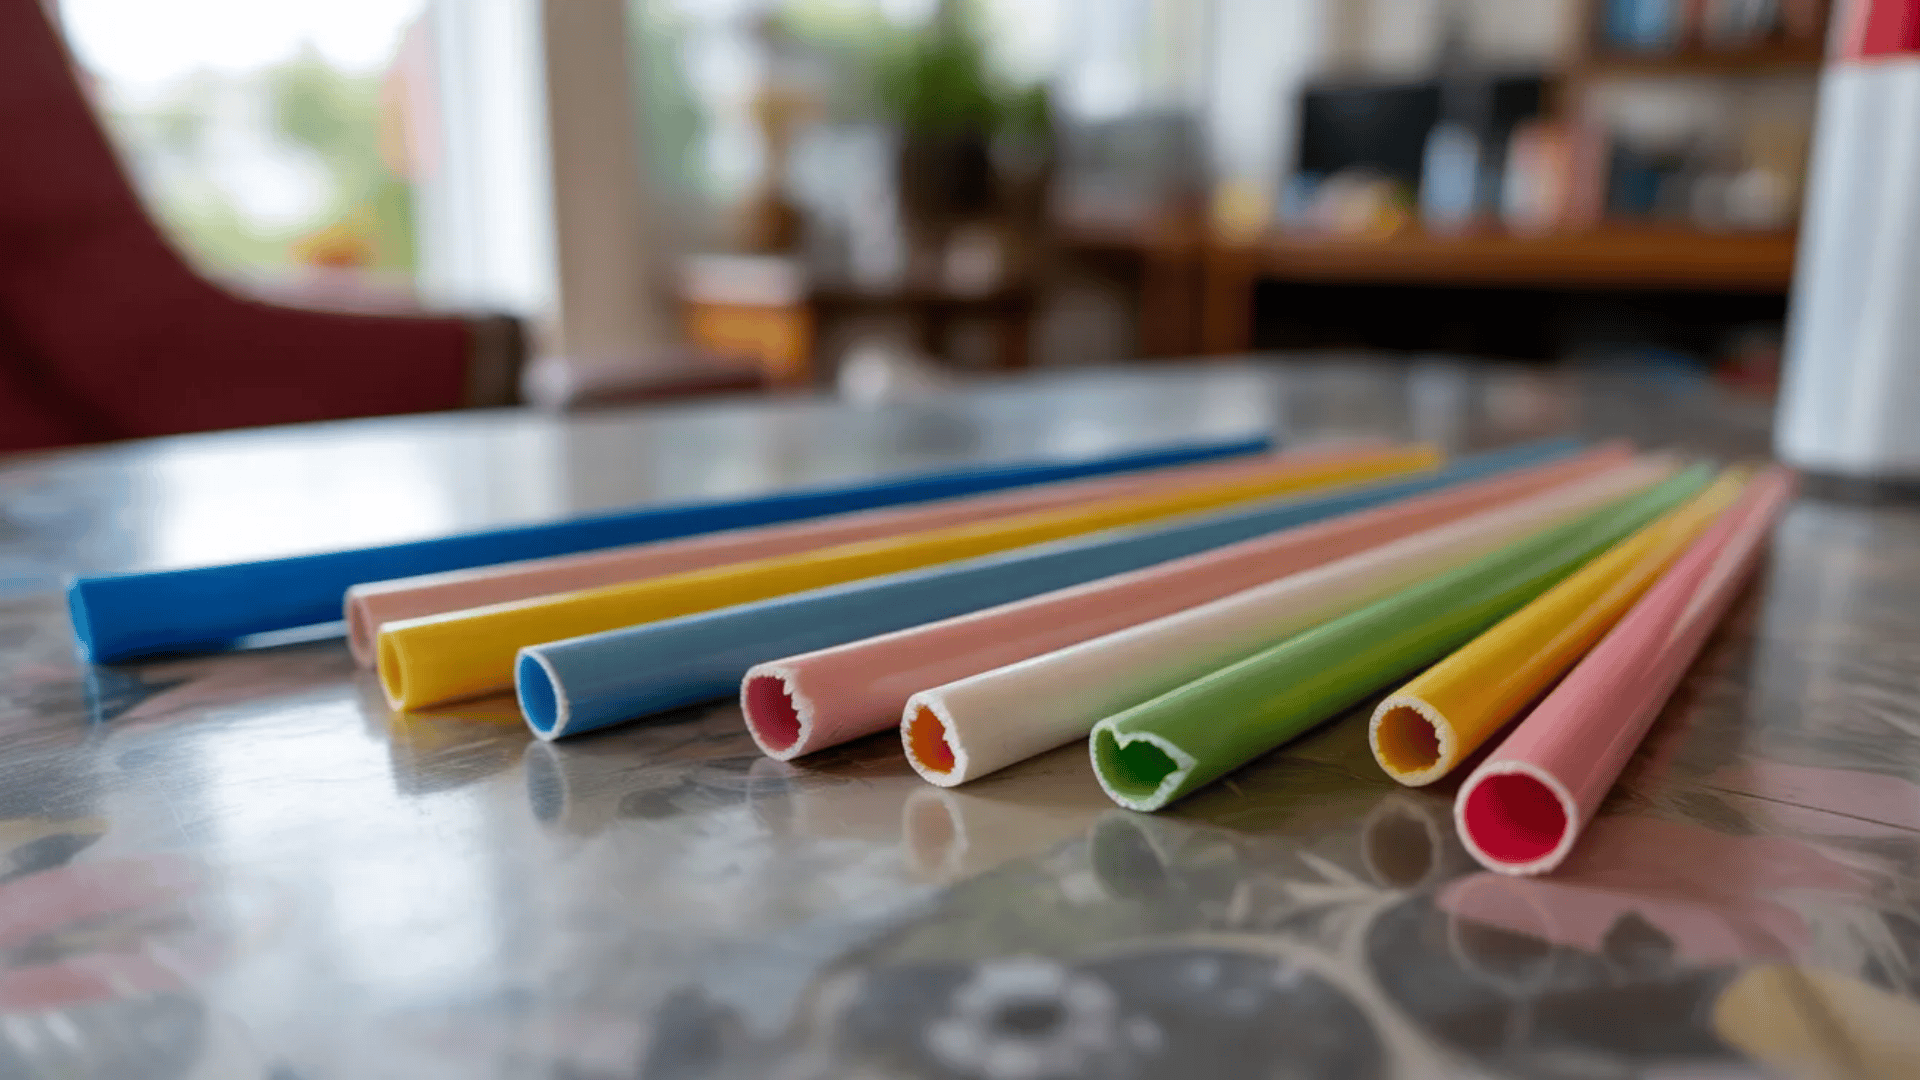
This experiment shows how vibrations create different sounds. Cutting the straw changes the pitch.
Materials Needed:
- Plastic straws
- Scissors
- Ruler
Steps:
- Flatten one end of the straw with your fingers.
- Cut the flattened end into a V shape to make a reed.
- Put the V end in your mouth and blow hard.
- Cut the straw shorter and blow again.
- Compare the sounds from different lengths.
What happens: Blowing makes the reed vibrate and create sound. Air vibrates inside the straw tube. Shorter straws make higher-pitched sounds. Longer straws make lower-pitched sounds. This happens because air vibrates faster in short spaces and slower in long spaces.
21. Water Cycle in a Bag
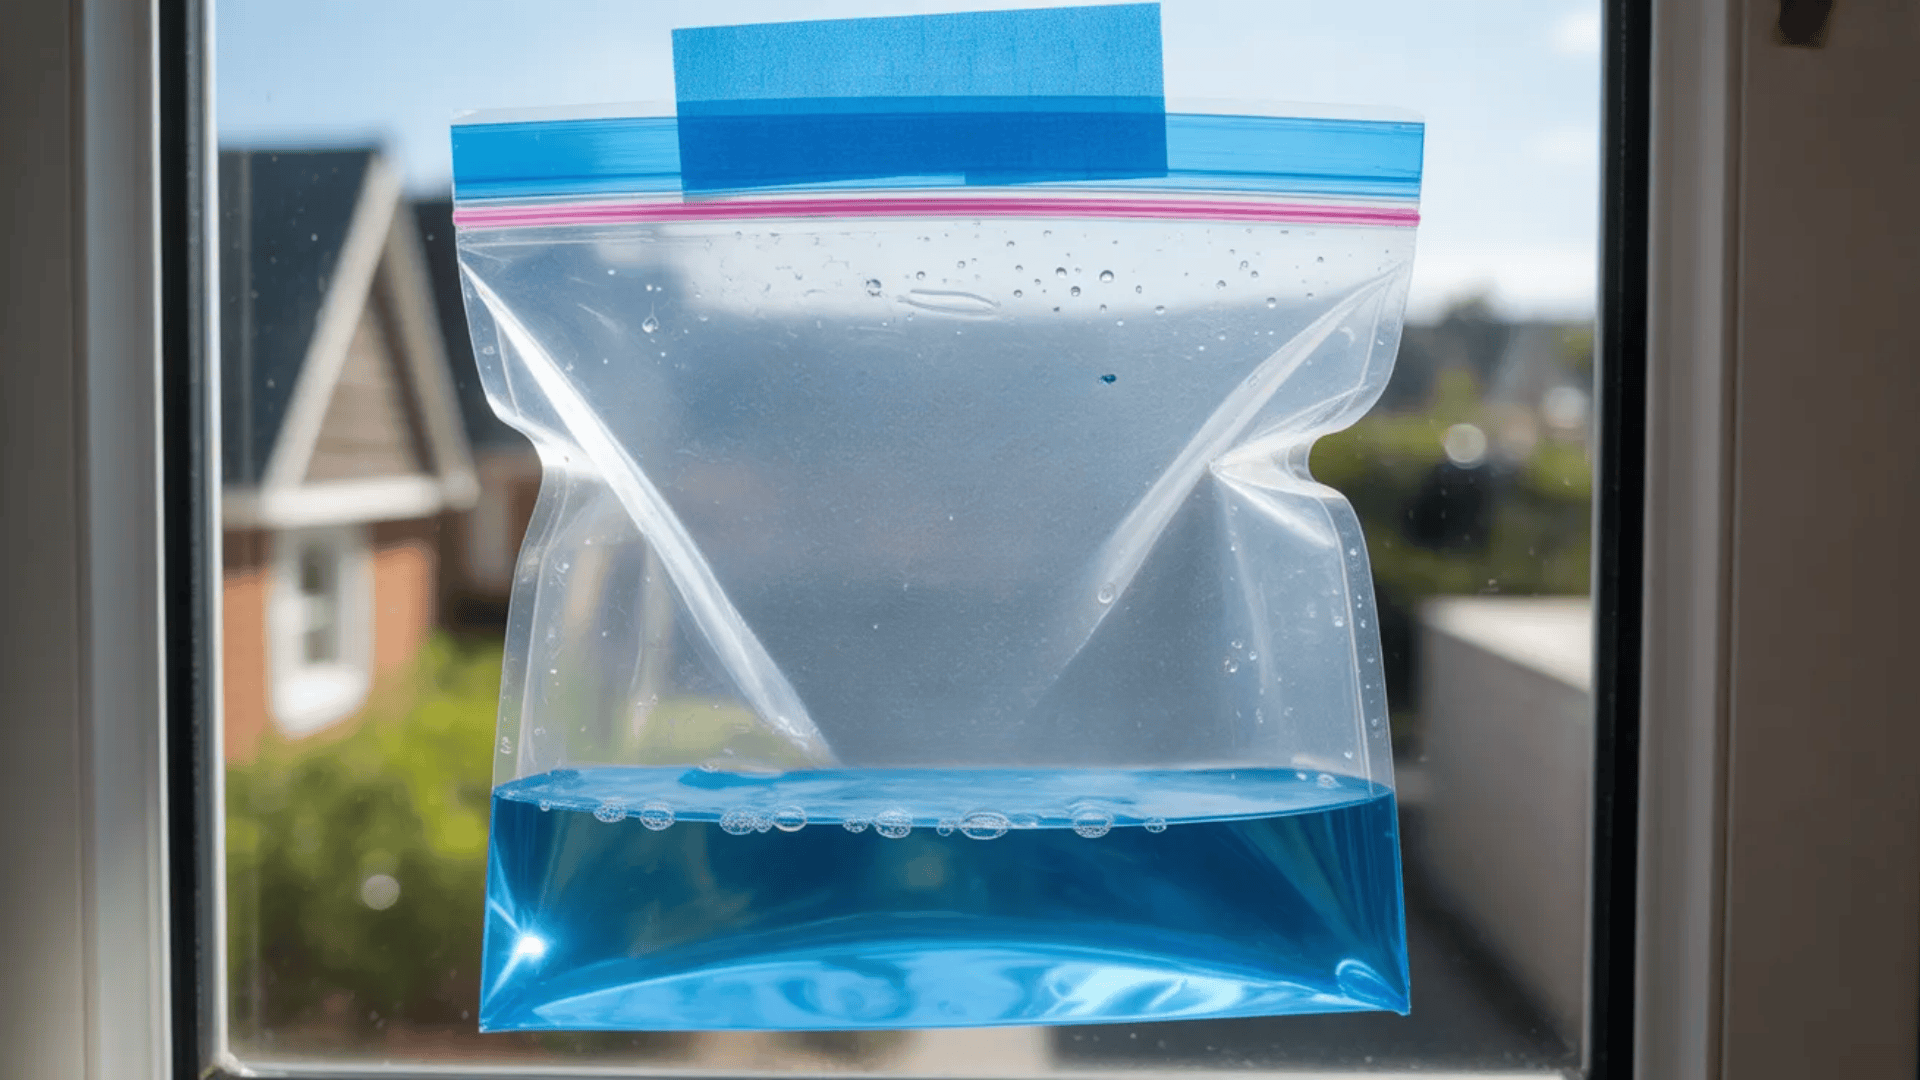
This experiment models the complete water cycle. Kids watch evaporation, condensation, and precipitation happen.
Materials Needed:
- Ziplock bag
- Water
- Blue food coloring
- Permanent marker
- Tape
- Sunny window
Steps:
- Draw a sun, clouds, and waves on the bag with a marker.
- Pour water into the bag until one inch deep.
- Add drops of blue food coloring.
- Seal the bag tightly.
- Tape it to a sunny window.
- Check after a few hours.
What happens: The sun heats the water and makes it evaporate into gas. Water vapor rises and sticks to the top of the bag as droplets. This is condensation. When enough droplets collect, they get heavy and fall back down like rain. This miniature water cycle repeats throughout the day.
22. Rain Cloud in a Jar

This activity demonstrates how rain forms in clouds. Water droplets become too heavy and fall.
Materials Needed:
- Clear jar
- Water
- Shaving cream
- Food coloring
- Dropper or spoon
Steps:
- Fill the jar three-quarters full with water.
- Spray shaving cream on top to form a thick cloud layer.
- Mix food coloring with a little water in a cup.
- Use the dropper to add colored water on top of the cream.
- Watch the color sink through the cloud.
What happens: The shaving cream represents a cloud. As you add colored water, the cream gets heavy and saturated. Eventually, the colored water breaks through and falls like rain. Real clouds work the same way. They hold water until droplets get too heavy to stay up.
23. Celery Water Transport Experiment
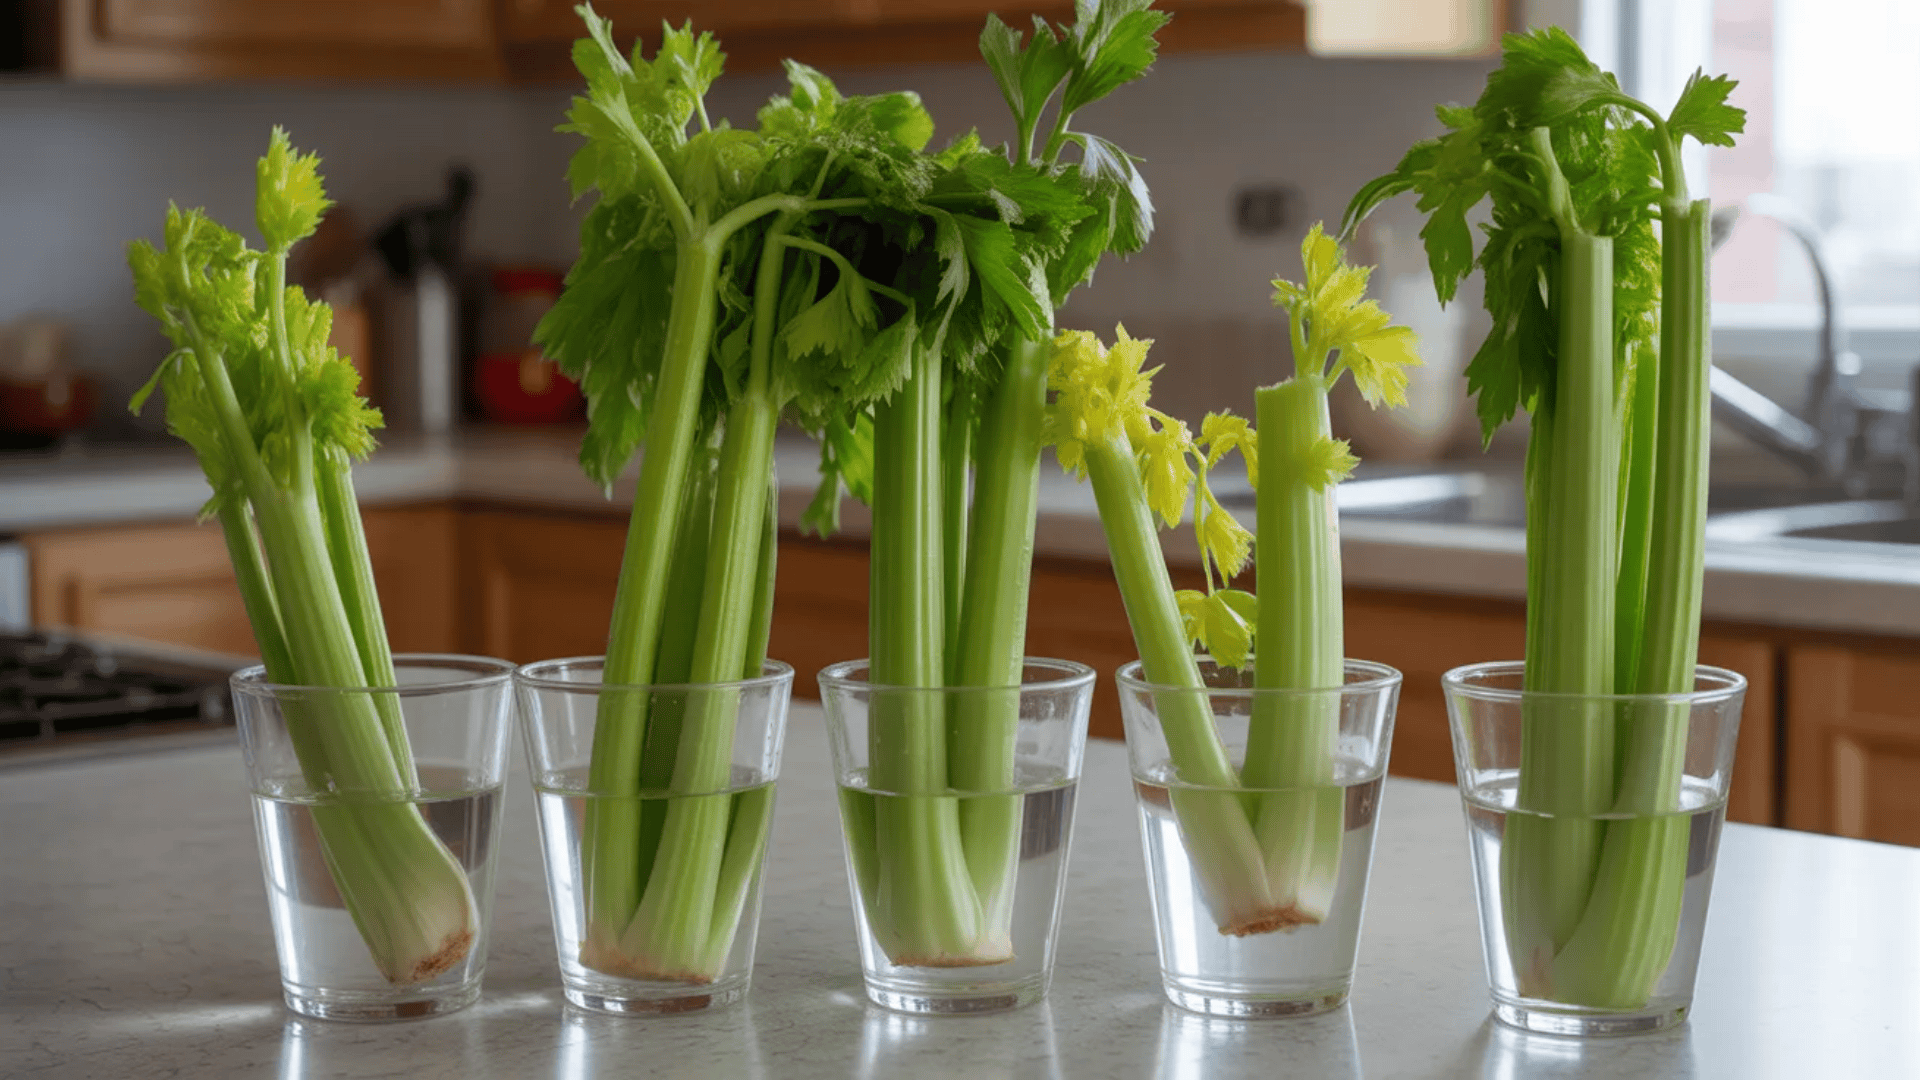
This experiment shows how plants drink water. Xylem tubes carry water from roots to leaves.
Materials Needed:
- Fresh celery stalks with leaves
- Cups or jars
- Water
- Food coloring
- Knife
Steps:
- Fill cups with water.
- Add different food coloring to each cup.
- Cut the bottom of each celery stalk.
- Place stalks in colored water.
- Wait overnight.
- Cut the stalk to see colored tubes inside.
What happens: The celery draws colored water up through tiny tubes called xylem. These tubes run from the bottom to the leaves. After several hours, the leaves turn the color of the water. Cutting the stalk shows colored lines inside. This is how all plants transport water and nutrients.
24. Flower Color Absorption Test

This activity demonstrates capillary action in flowers. White flowers change colors as they drink.
Materials Needed:
- White flowers (carnations work best)
- Vases or jars
- Water
- Food coloring
- Scissors
Steps:
- Fill jars with water.
- Add different food coloring to each jar.
- Cut flower stems at an angle.
- Place each flower in colored water.
- Check after a few hours.
- Watch petals change color over the next day.
What happens: Flowers pull water up through their stems using capillary action. The colored water travels to the petals and changes their color. White flowers work best because the color shows clearly. You can split one stem and put the halves in different colors to make a rainbow flower.
25. Seed Sprouting Comparison
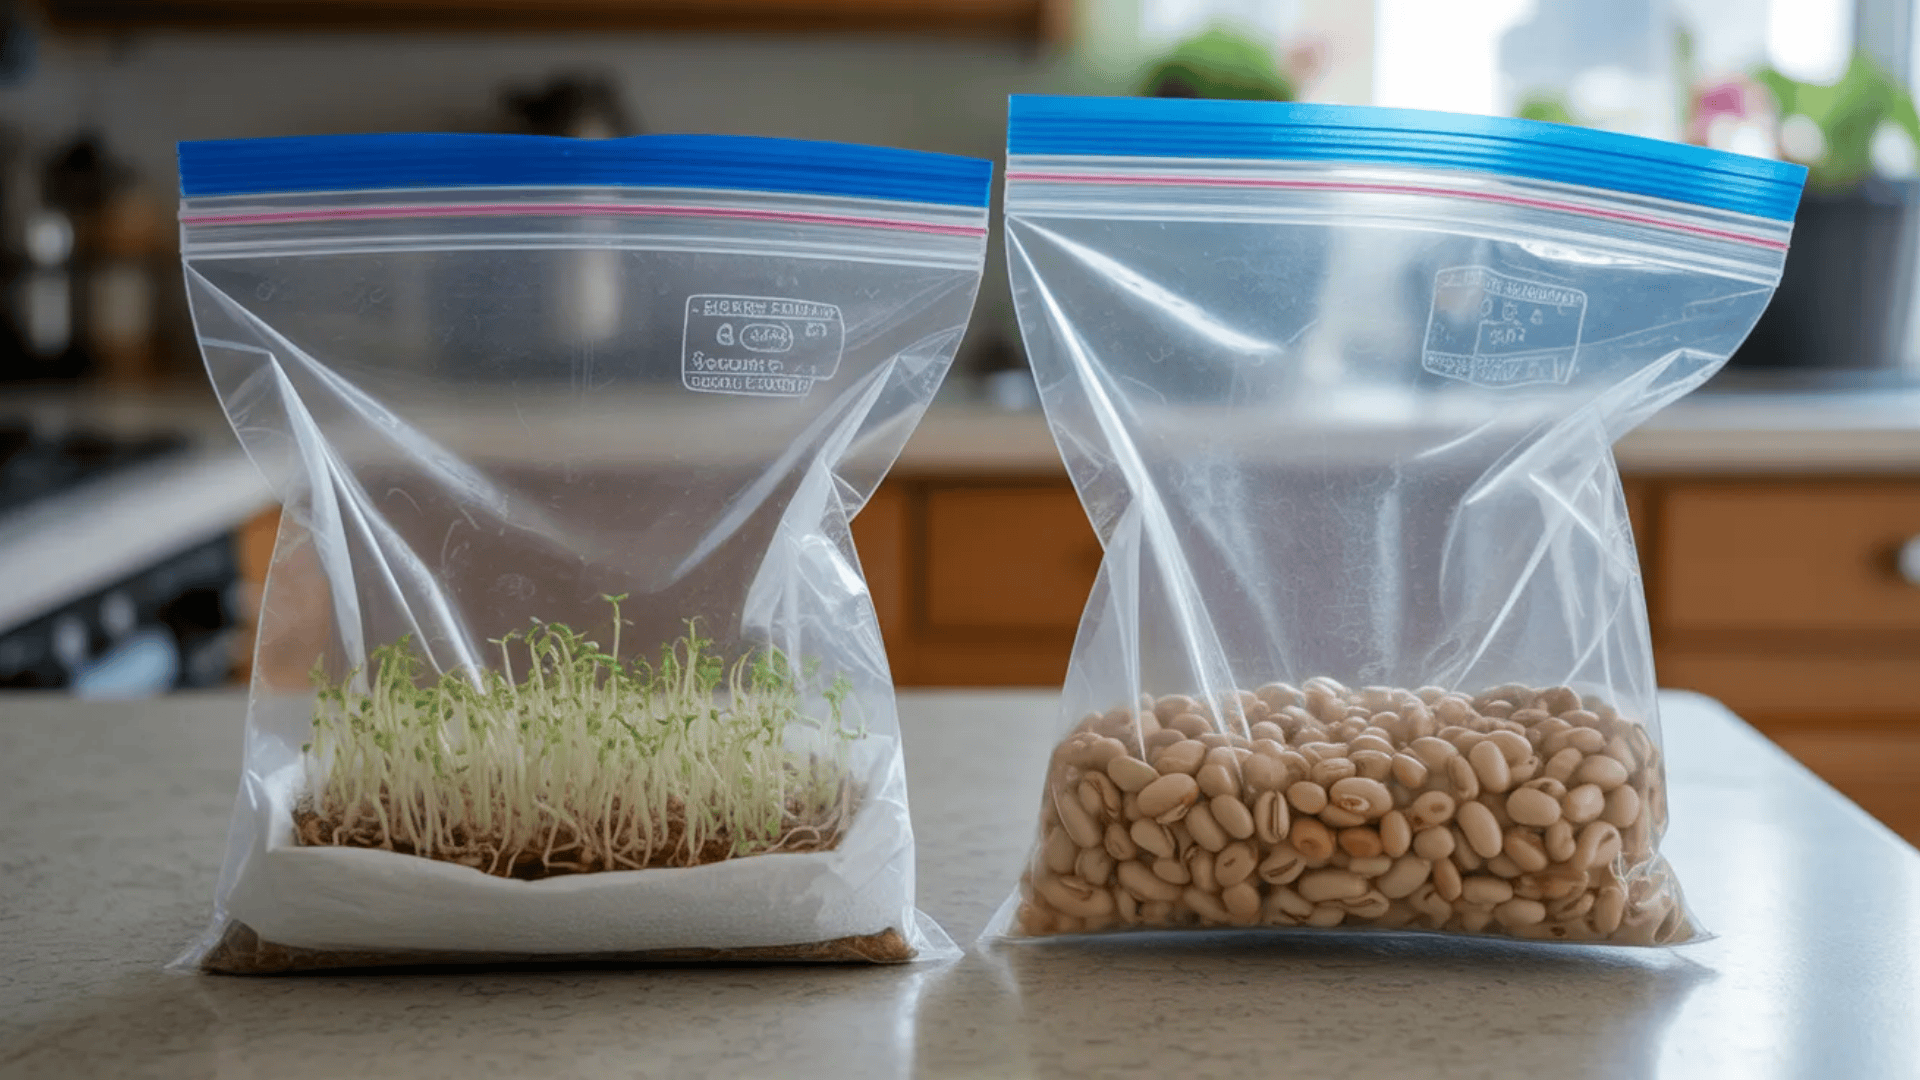
This experiment tests what seeds need to grow. Kids compare different growing conditions.
Materials Needed:
- Bean seeds
- Paper towels
- Ziplock bags
- Water
- Tape
- Marker
Steps:
- Label four bags: water only, dark place, no water, and normal.
- Place wet paper towels and seeds in three bags.
- Place a dry paper towel and seeds in the no-water bag.
- Tape bags to a window, except the dark bag.
- Put the dark bag in a cupboard.
- Check daily for one week.
What happens: The normal bag sprouts fastest and healthiest. Seeds in the dark grow tall and pale because they search for light. Seeds without water don’t sprout at all. This shows that seeds need water, warmth, and light to grow properly.
26. Plant Growth Light Experiment
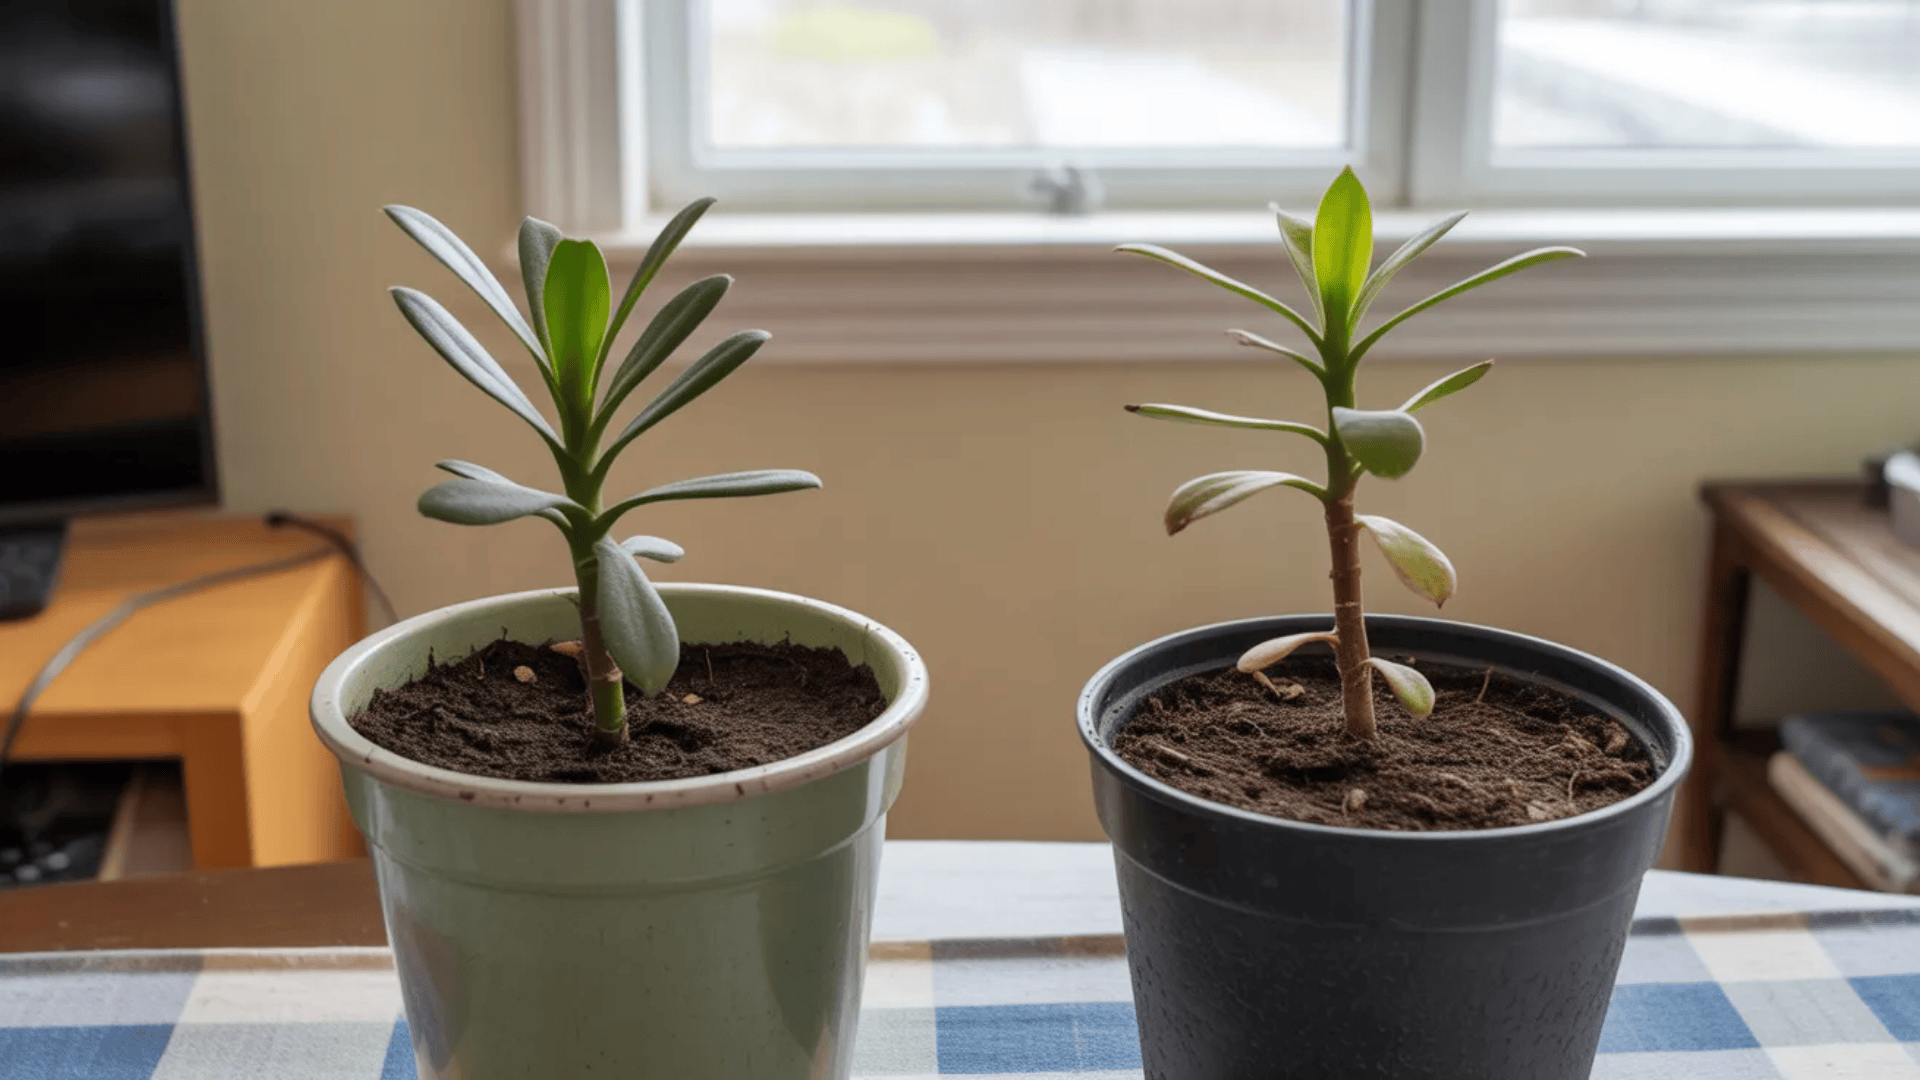
This activity shows how light affects plant growth. Plants grow toward their light source.
Materials Needed:
- Two small plants or seedlings
- Two identical pots
- Potting soil
- Water
- Sunny spot and dark closet
Steps:
- Plant seeds or seedlings in both pots.
- Water both plants equally.
- Place one pot in a sunny window.
- Put the other pot in a dark closet.
- Water both regularly for two weeks.
- Compare their growth.
What happens: The plant in sunlight grows green, strong, and healthy. The plant in darkness grows tall and pale or dies. Plants need light for photosynthesis. Without light, they cannot make food. The dark plant stretches, looking for light, but stays weak.
27. Germ Spread With Pepper and Soap
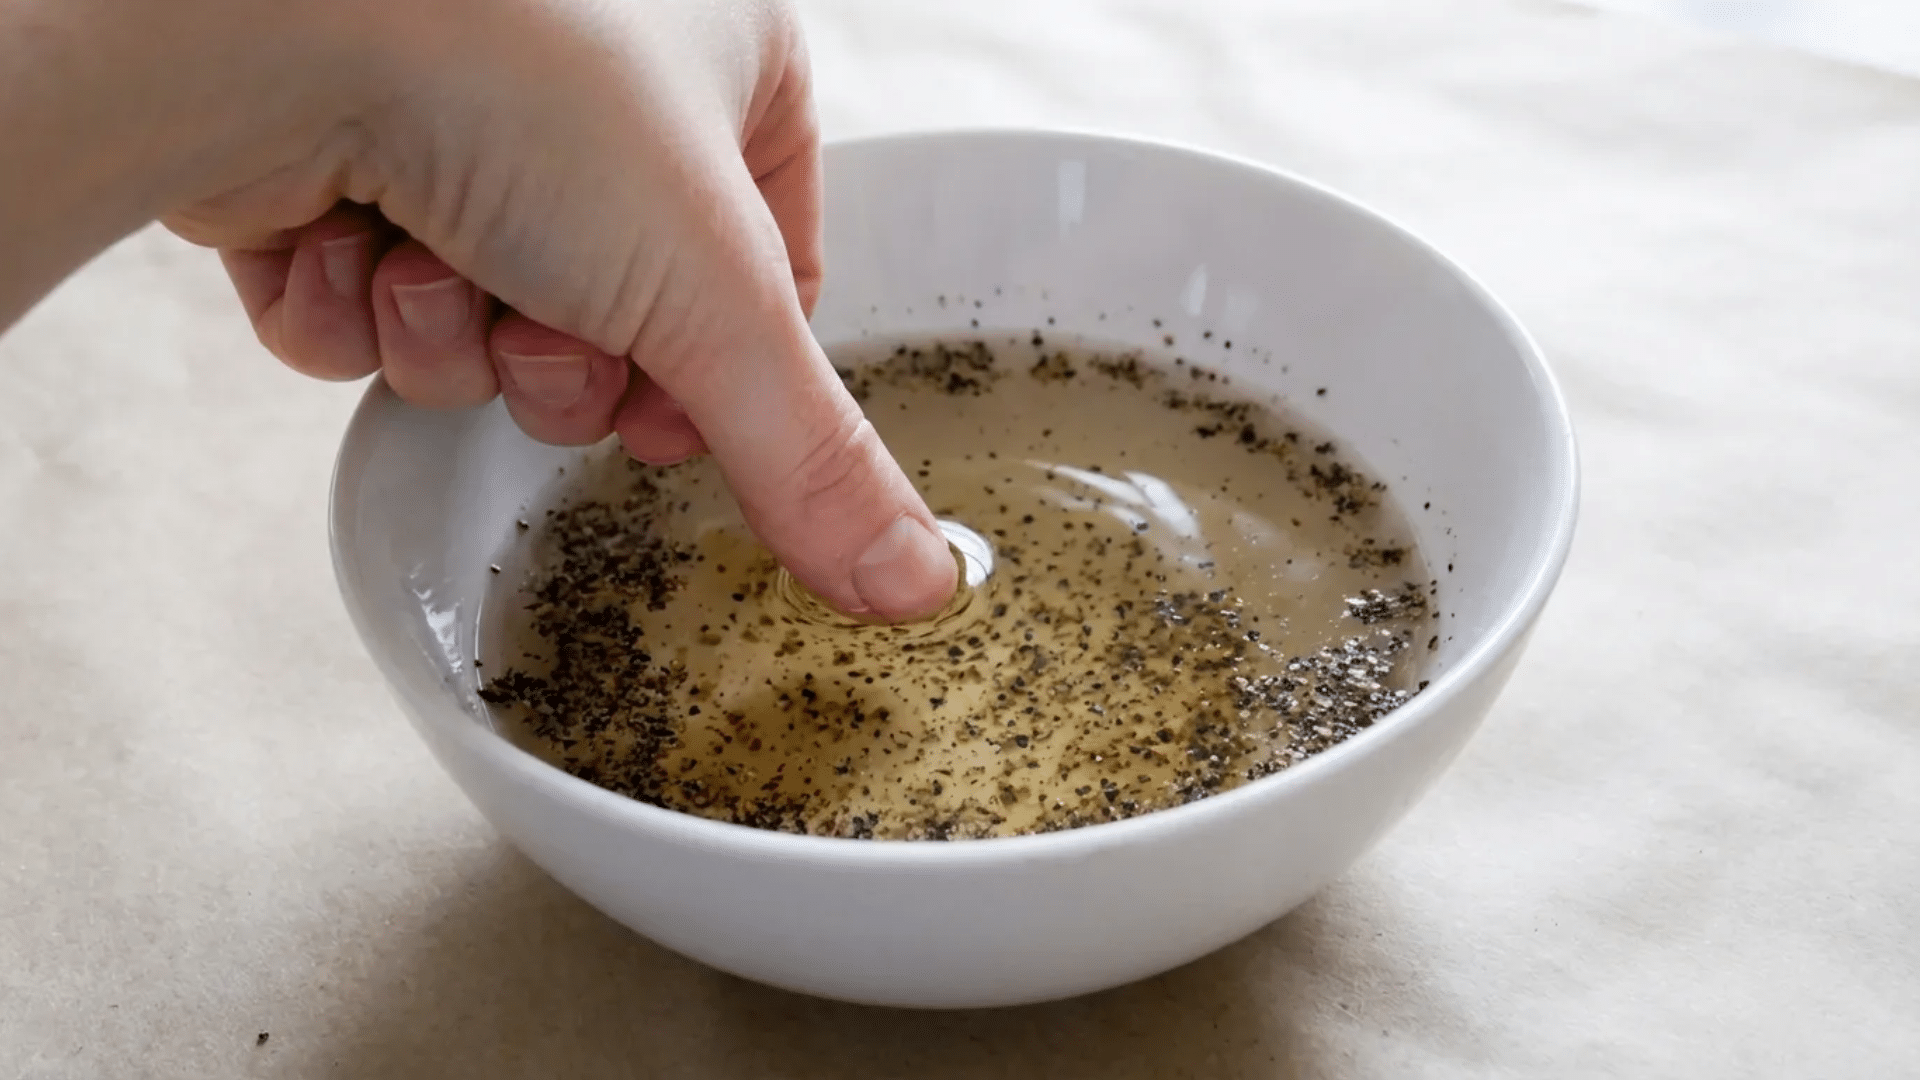
This experiment demonstrates how soap stops germs from spreading. Kids see why handwashing matters.
Materials Needed:
- Plate or shallow bowl
- Water
- Ground black pepper
- Dish soap
- Cotton swab or finger
Steps:
- Fill the plate with water.
- Sprinkle pepper across the water surface.
- Dip your finger in the water (nothing happens).
- Put dish soap on your finger.
- Touch the soapy finger to the water center.
- Watch pepper shoot to the edges.
What happens: The pepper represents germs on your hands. Soap breaks the surface tension of water. When soap touches the water, it pushes everything away from the center. This shows how soap pushes germs off your skin during handwashing.
28. Paper Chromatography Color Test
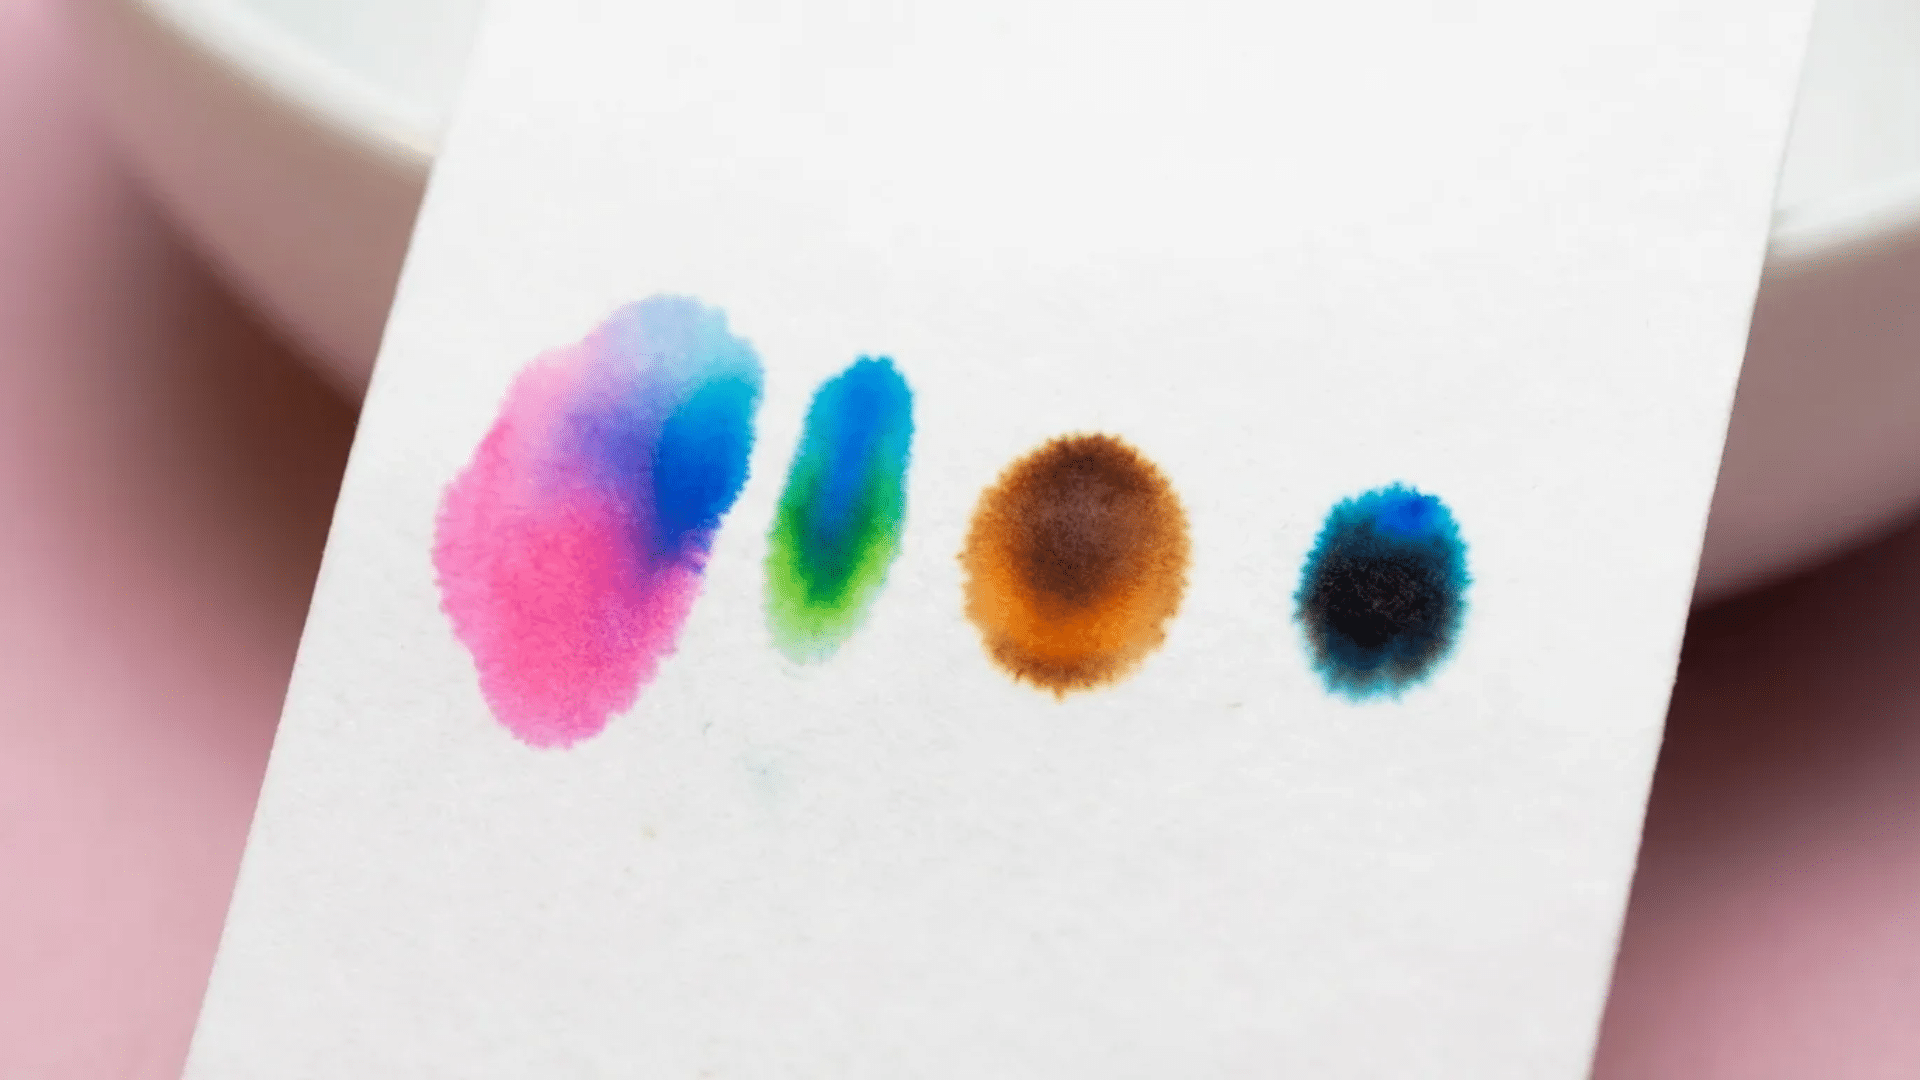
This activity separates ink into different colors. Kids see what colors mix to make black.
Materials Needed:
- Coffee filters or paper towels
- Washable markers (different colors)
- Cups of water
- Scissors
- Pencil
Steps:
- Cut coffee filters into strips.
- Draw a thick line with a marker near the bottom of each strip.
- Hang the strip so only the bottom edge touches water.
- Use a pencil across the cup top to hold the strip.
- Watch colors climb up the paper.
- Let dry and observe separated colors.
What happens: Water moves up the paper and carries ink with it. Different-colored molecules travel at different speeds. Black ink separates into blue, red, and yellow. Green separates into blue and yellow. This process is called chromatography. Scientists use it to identify substances.
29. Popsicle Stick Bridge Strength Test
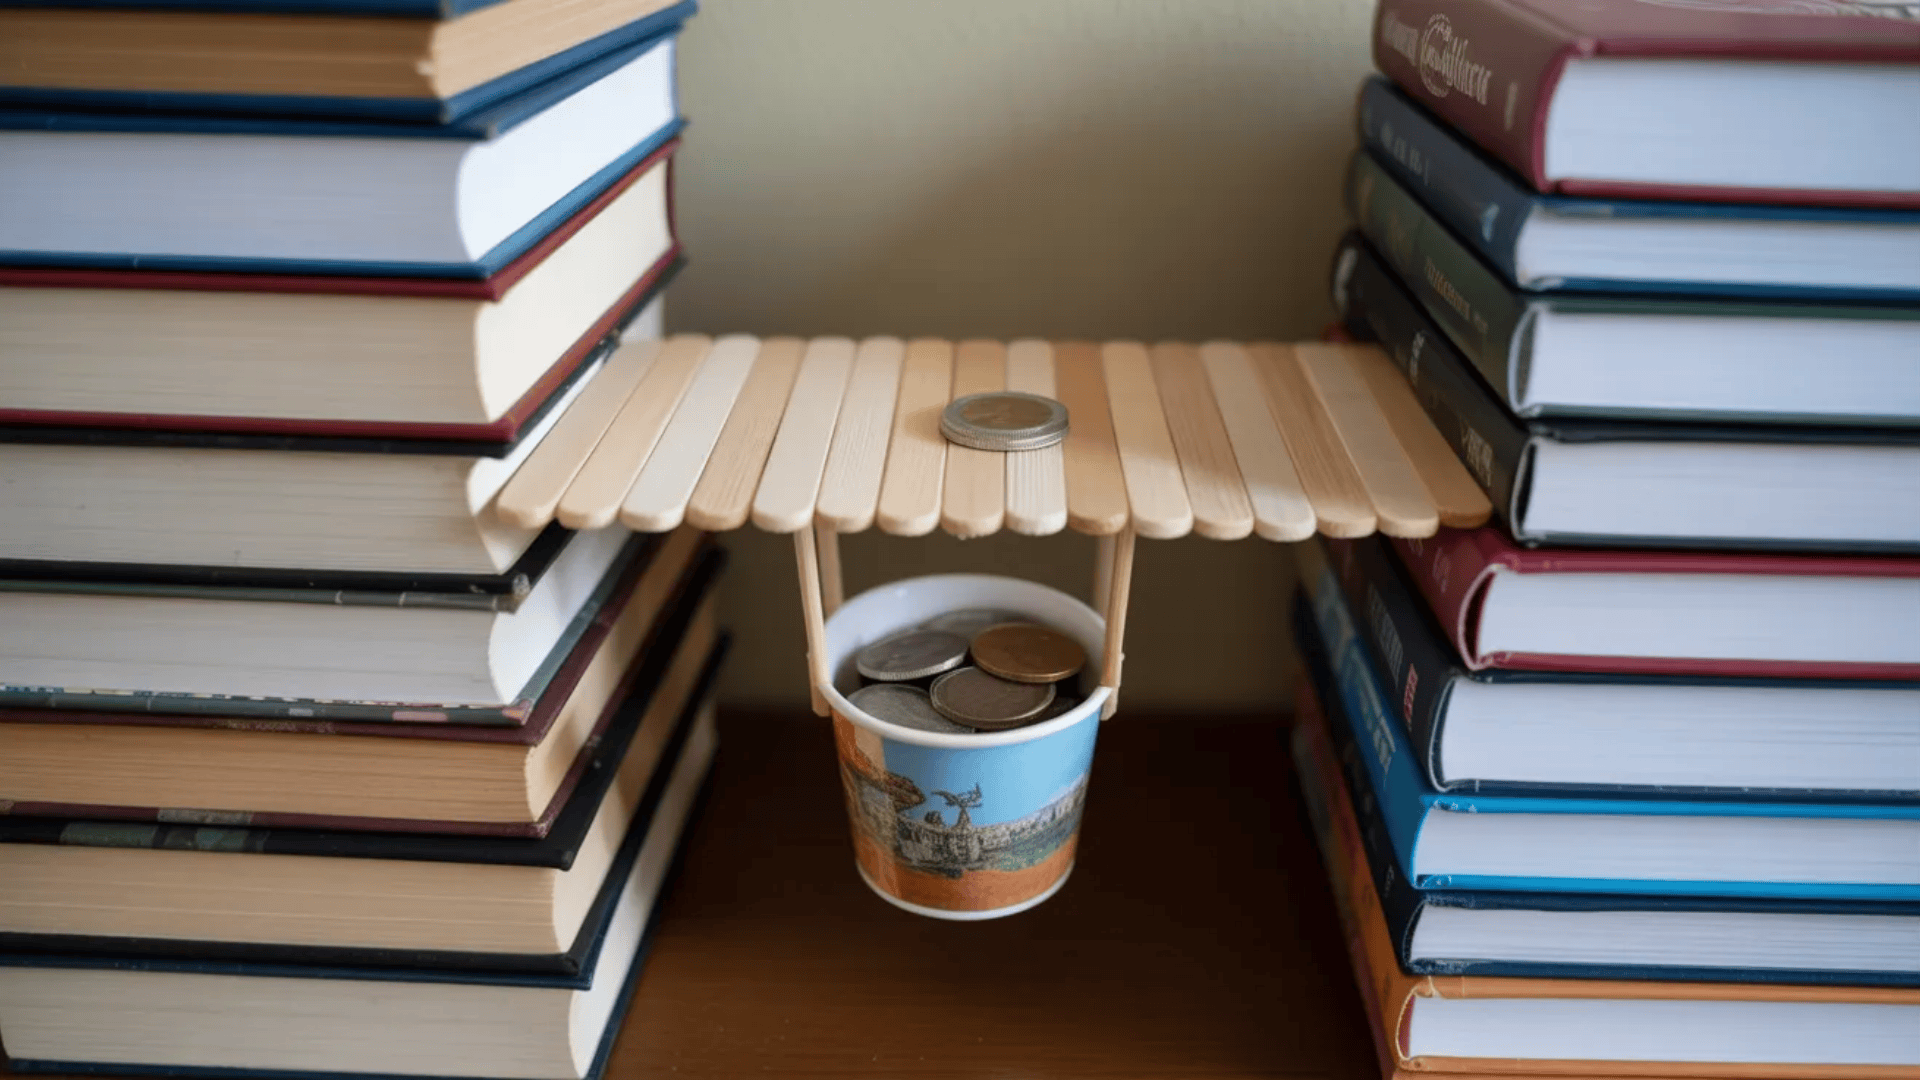
This experiment teaches engineering and weight distribution. Different designs hold different amounts.
Materials Needed:
- Popsicle sticks
- White glue or hot glue
- Books or blocks for supports
- Small weights or coins
- Cup
Steps:
- Build a simple bridge with popsicle sticks and glue.
- Let the glue dry completely.
- Place books on both sides as supports.
- Rest the bridge between the books.
- Hang a cup from the bridge center.
- Add coins until the bridge breaks.
What happens: Triangle shapes make the strongest bridges. They distribute weight evenly across all sides. Flat bridges break easily under weight. Kids can test different designs to see which holds the most coins. Real bridges use similar engineering principles.
30. Spaghetti Tower Engineering Challenge
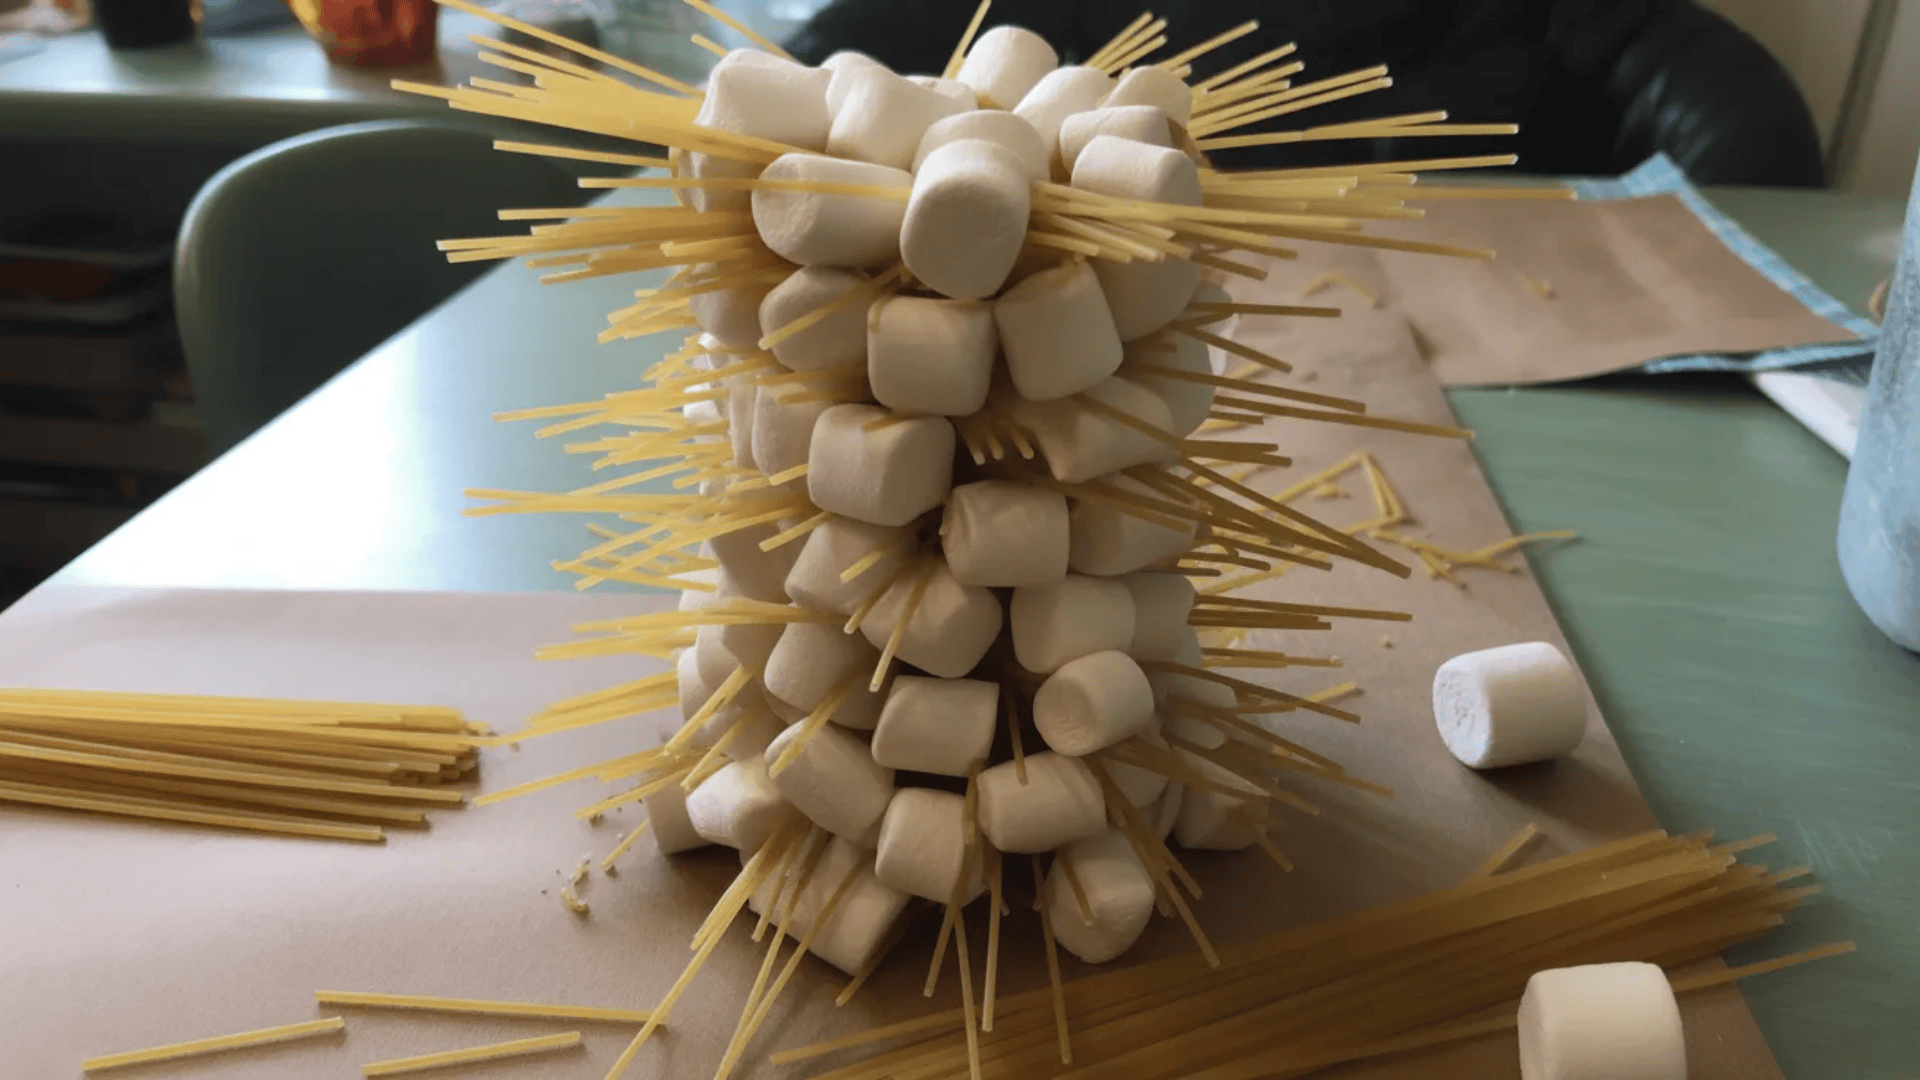
This activity demonstrates structural stability. Building tall requires a strong base.
Materials Needed:
- Uncooked spaghetti
- Mini marshmallows
- Ruler or tape measure
- Timer
Steps:
- Give kids 20 spaghetti pieces and 20 marshmallows.
- Set a timer for 15 minutes.
- Challenge them to build the tallest tower.
- Marshmallows connect spaghetti pieces.
- The tower must stand on its own.
- Measure the final height.
What happens: Wide bases make towers more stable. Triangles create stronger structures than squares. Towers that are too thin fall over easily. The spaghetti can snap under too much weight. Kids learn that engineering requires planning, testing, and adjusting designs.
31. DIY Periscope Experiment
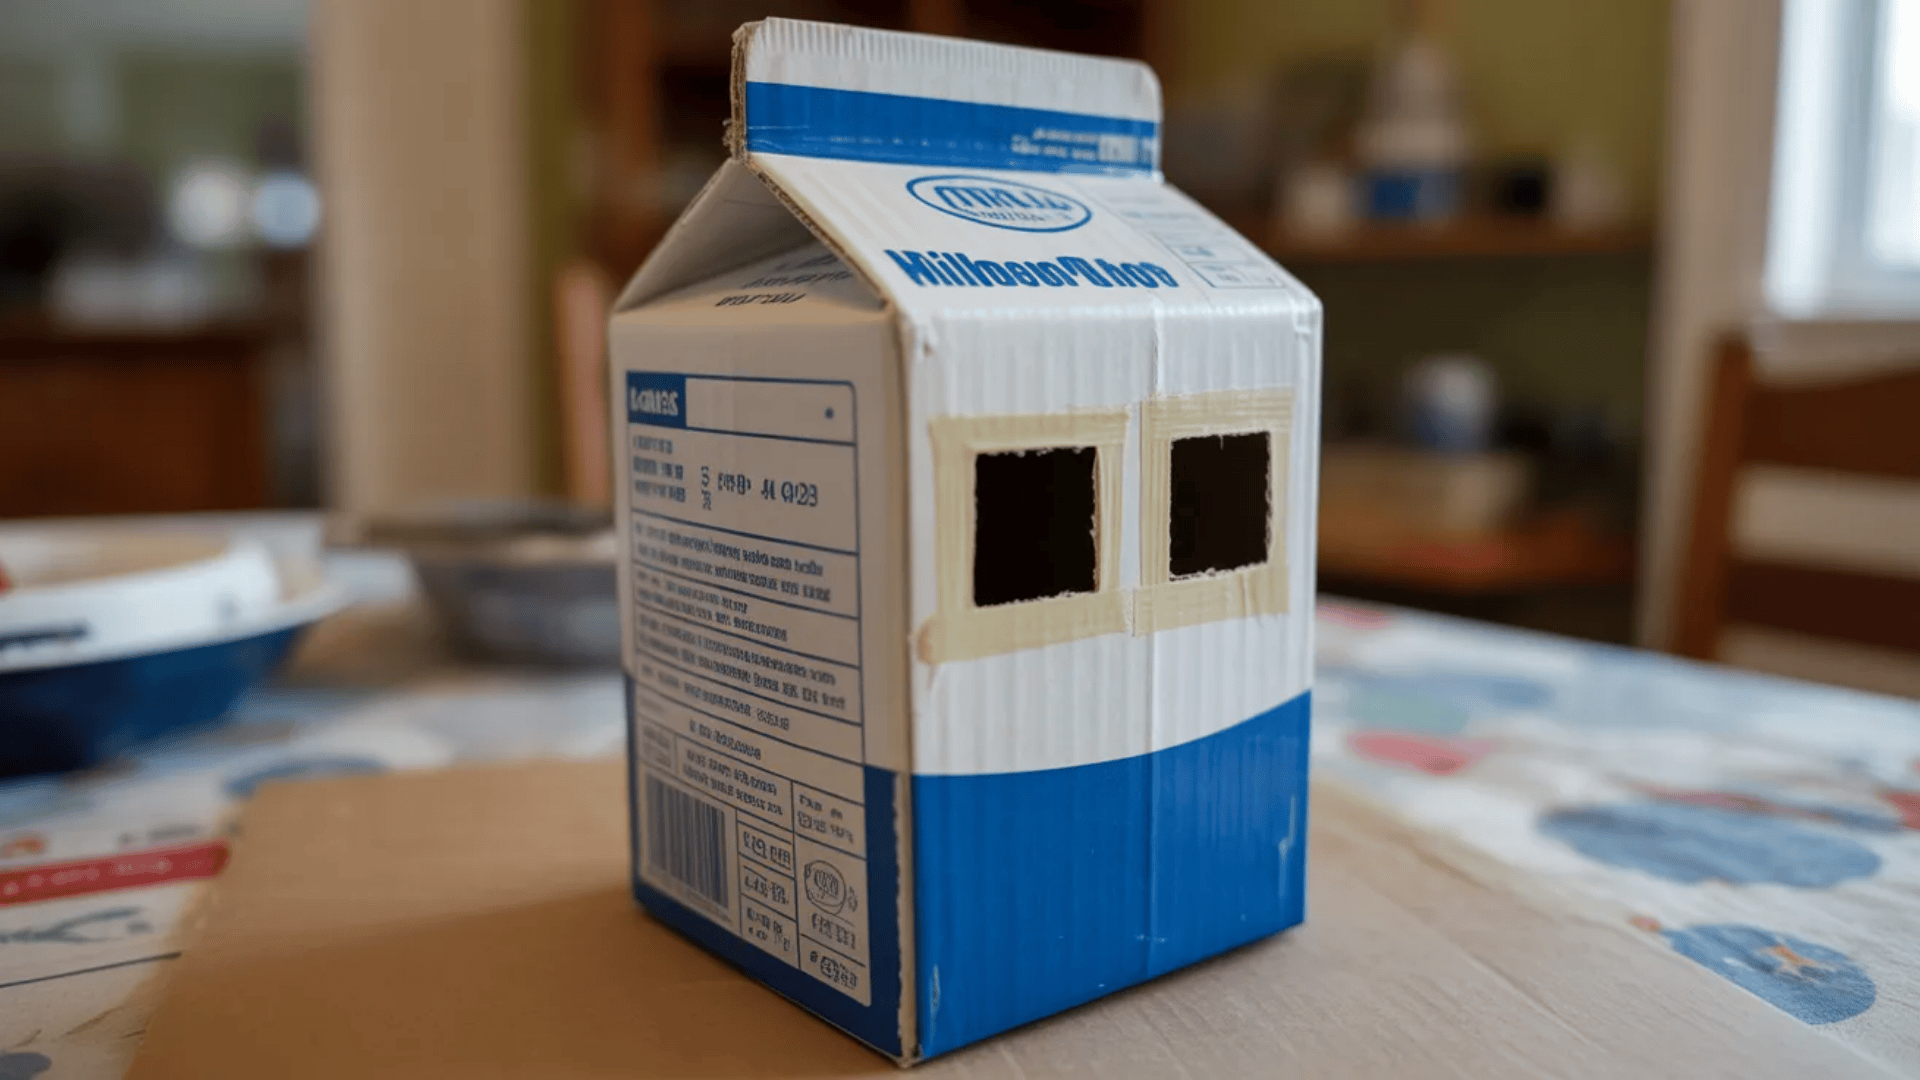
This activity demonstrates how mirrors reflect light. Kids can see around corners.
Materials Needed:
- Empty milk carton or tall box
- Two small mirrors
- Scissors or craft knife
- Tape
- Ruler
Steps:
- Cut two square holes on opposite sides of the carton.
- Position one hole at the top front and one at the bottom back.
- Tape one mirror at a 45-degree angle above the bottom hole.
- Tape the second mirror at a 45-degree angle below the top hole.
- Look through the bottom hole.
- The top hole shows what’s above you.
What happens: Light enters the top hole and hits the upper mirror. The mirror bounces light down to the lower mirror. The lower mirror reflects the image to your eye. This is how submarines see above water while staying hidden. The mirrors must angle correctly to work.
32. Oil Spill Clean-Up Challenge
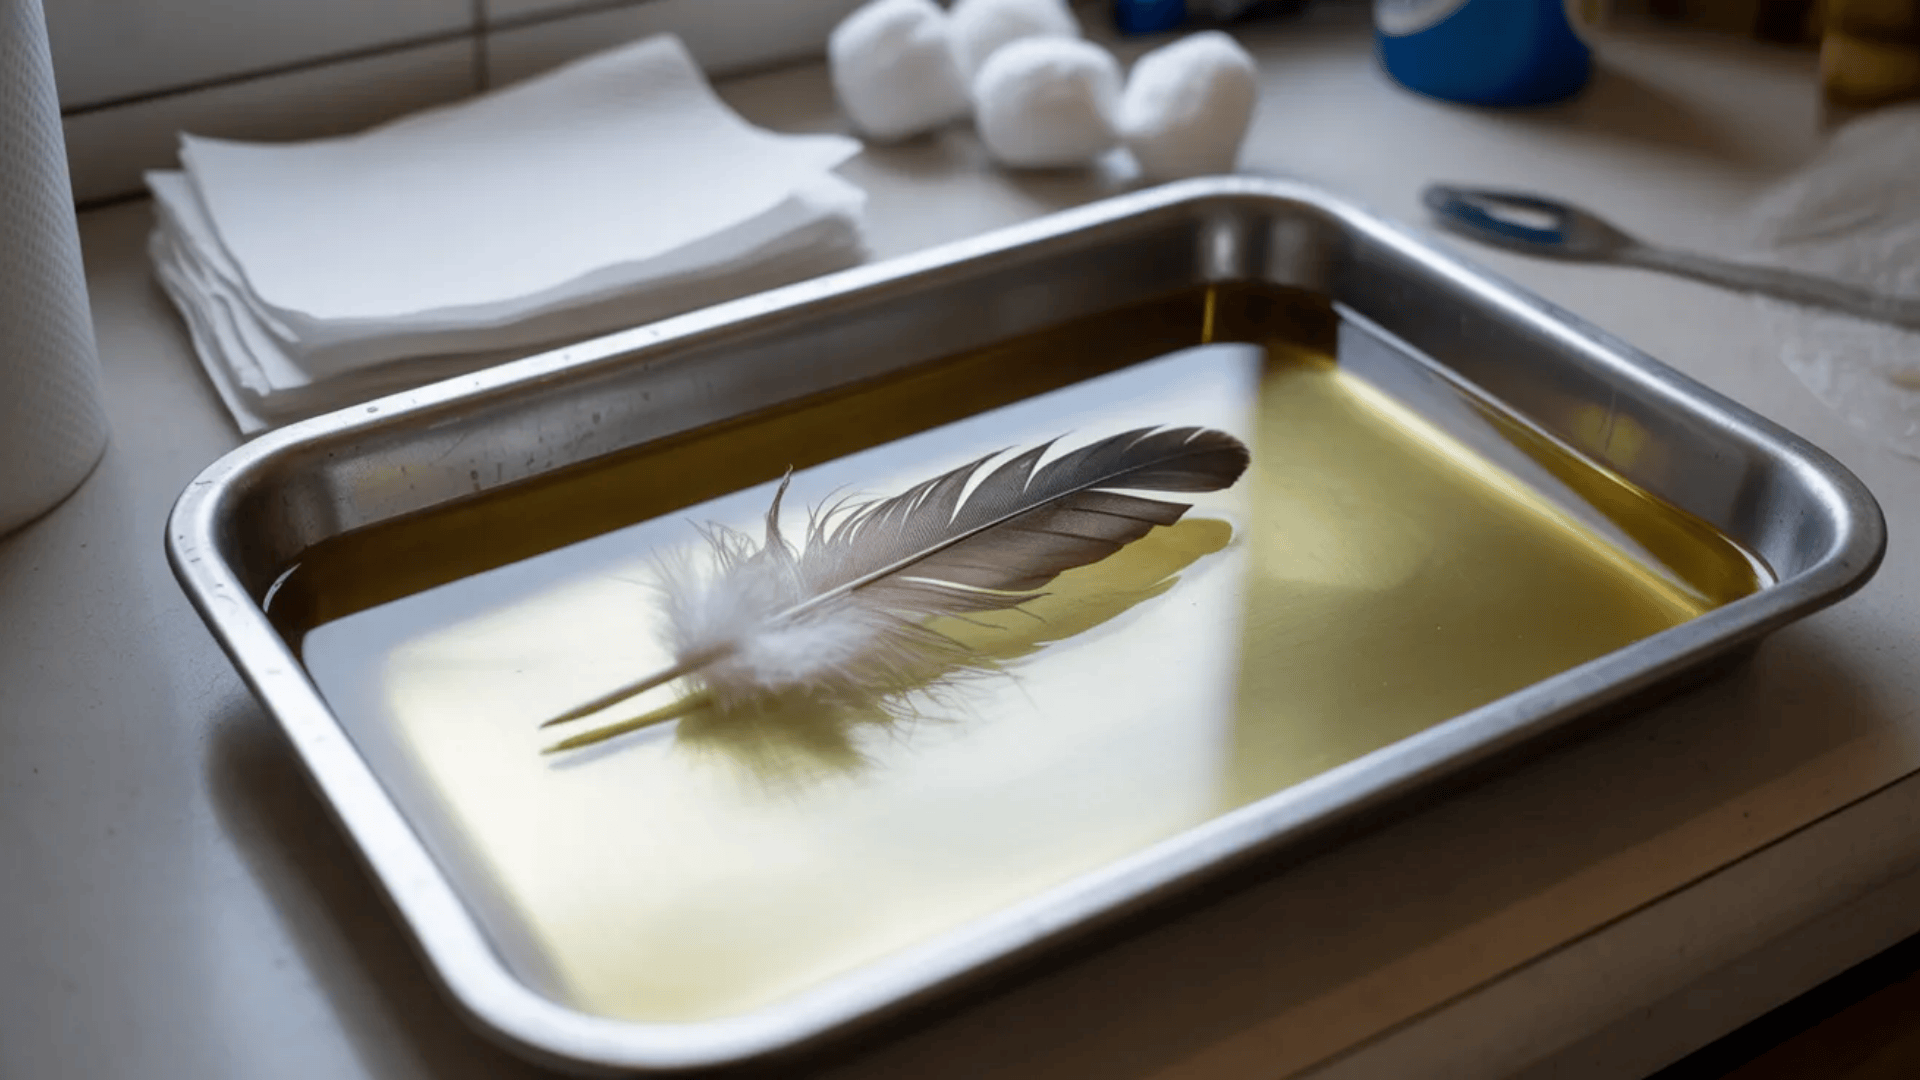
This experiment shows why oil spills harm the environment. Kids test different cleaning methods.
Materials Needed:
- Large tray or pan
- Water
- Vegetable oil
- Food coloring
- Feather
- Cotton balls, paper towels, dish soap, spoon
Steps:
- Fill the tray halfway with water.
- Mix food coloring with oil to see it better.
- Pour oil onto the water’s surface.
- Dip the feather in the oil to see damage.
- Try removing oil with different tools.
- Compare which method works best.
What happens: Oil floats on water and doesn’t mix. When the feather touches oil, it clumps and gets heavy. This shows how birds suffer in real oil spills. Dish soap breaks up oil best. Paper towels absorb some oil. Cotton balls soak it up, too. No method removes all the oil completely.
33. DIY Erosion Model
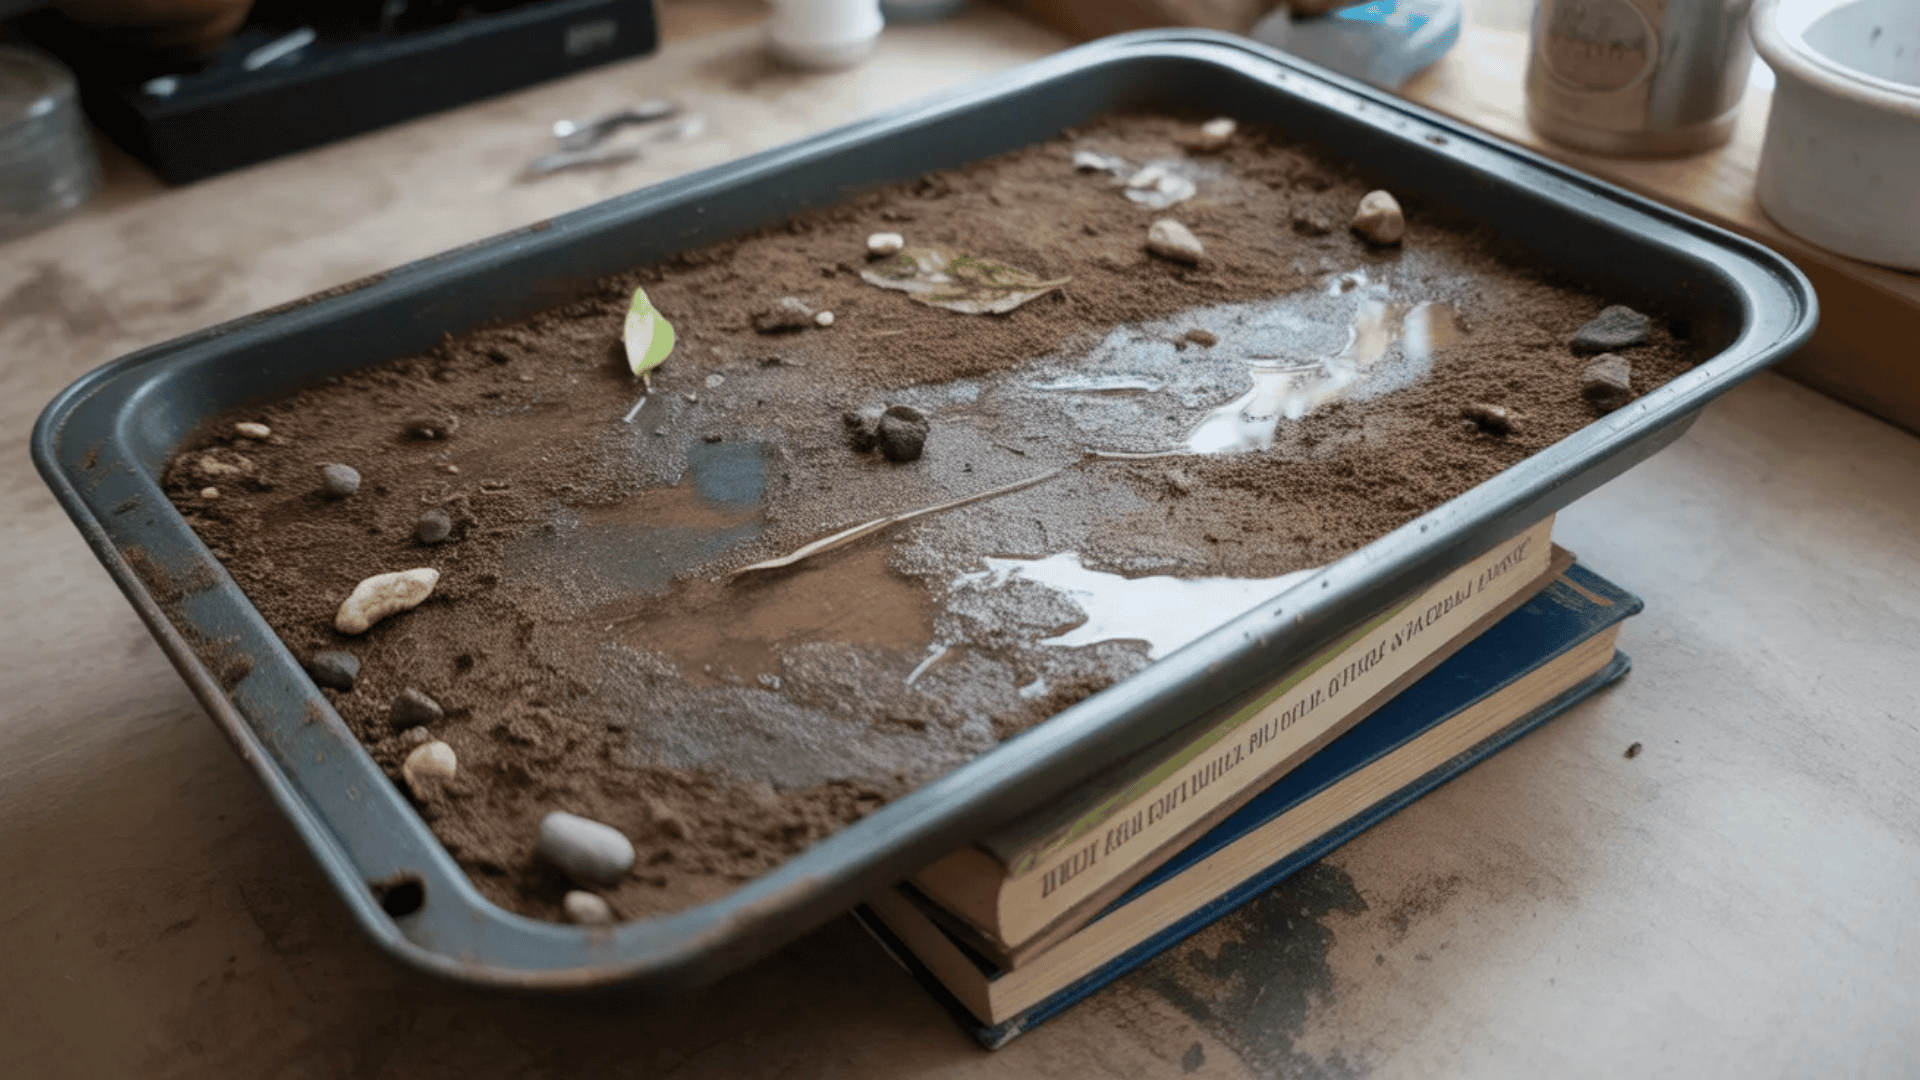
This activity demonstrates how water changes land over time. Rain and rivers reshape Earth.
Materials Needed:
- Baking pan or tray
- Dirt or sand
- Small rocks
- Grass or leaves
- Spray bottle with water
- Books to tilt the pan
Steps:
- Fill the pan with dirt and pack it into a hill shape.
- Make one side plain dirt.
- Add rocks to another section.
- Put grass or leaves on a third area.
- Prop one end of the pan up with books.
- Spray water on the hill and watch what happens.
What happens: Water washes away the plain dirt quickly. Rocks slow down erosion by blocking water flow. Grass and plant roots hold soil in place best. This shows why forests prevent landslides. Rain creates small rivers that carve paths through the dirt.
34. Shadow Tracing Sundial Activity
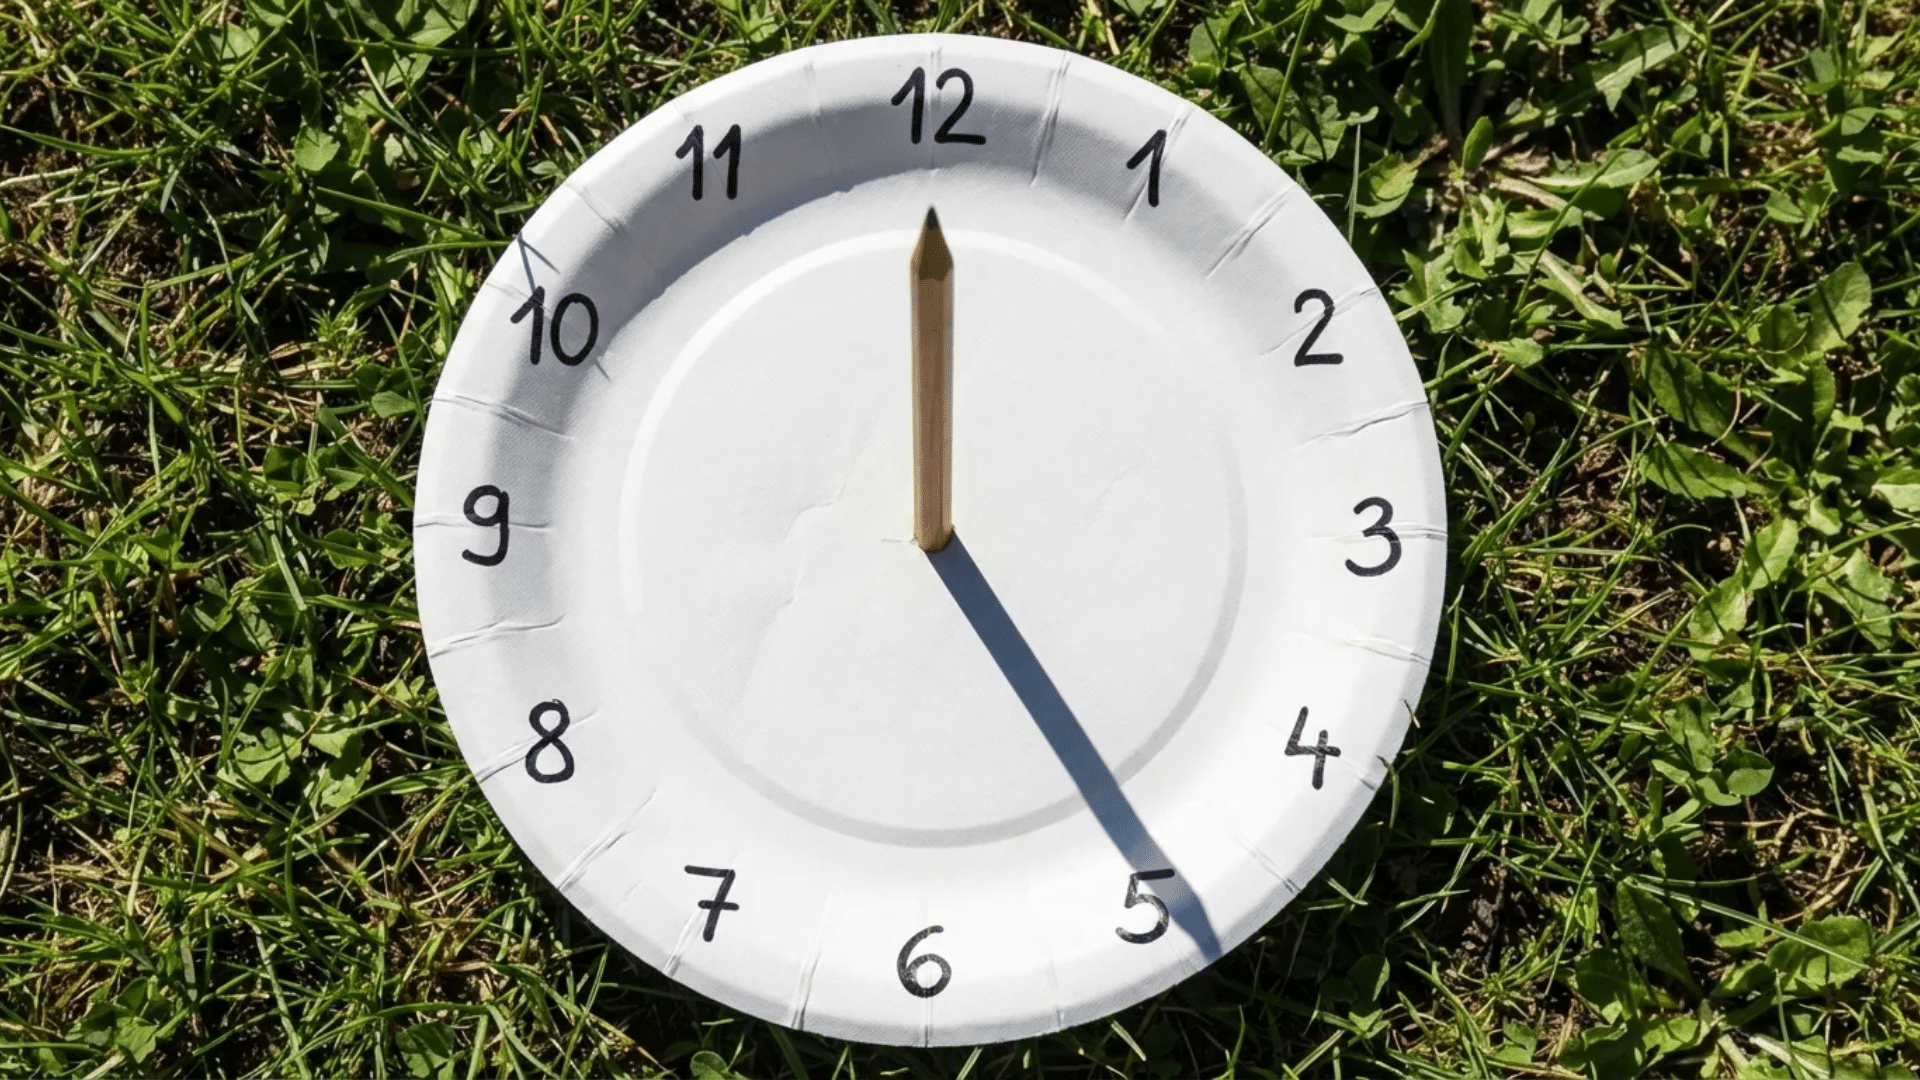
This experiment teaches how Earth’s rotation creates shadows. The sun’s position changes throughout the day.
Materials Needed:
- Large paper plate or cardboard
- Pencil or stick
- Tape
- Marker
- Sunny outdoor spot
Steps:
- Push the pencil through the plate center so it stands upright.
- Tape the plate to flat ground in full sun.
- Mark the shadow position every hour.
- Write the time next to each shadow line.
- Track shadows from morning to afternoon.
- Use your sundial the next day.
What happens: The shadow moves as the sun crosses the sky. Morning shadows point west. Afternoon shadows point east. Noon shadows are shortest. This happens because Earth rotates. Ancient people used sundials to tell time before clocks existed.
35. Static Electricity Balloon Attraction Test
This activity shows how charged objects can stick to walls. Opposite charges attract each other.
Materials Needed:
- Balloons
- Wool cloth or hair
- Wall
- Small pieces of paper
Steps:
- Blow up several balloons and tie them.
- Rub one balloon on wool or your hair for 30 seconds.
- Place the rubbed side against a wall.
- Watch it stick without falling.
- Rub another balloon and bring it near the paper scraps.
- Watch the paper jump to the balloon.
What happens: Rubbing transfers electrons to the balloon. This gives it a negative charge. The wall or paper has a positive charge. Opposite charges pull toward each other. The balloon sticks to the wall until the charge fades. Humid days make this harder because moisture conducts electricity away.
Conclusion
Science experiments for kids at home turn curiosity into real learning.
You don’t need fancy equipment or a lab. Your kitchen, bathroom, and backyard have everything you need to teach chemistry, physics, and biology.
These hands-on activities help kids understand the world around them. They ask better questions. They think critically. They remember what they learn because they experienced it.
Start with one experiment that excites your child. Let them lead with questions and observations. Make mistakes together and try again.
Science is about testing, learning, and growing. Every bubble, color change, and eruption is a chance to spark wonder.
Ready to get started? Pick an experiment from the list above and see what happens.
Share your results in the comments below.