Your kids have too much energy. They’re bouncing off walls. Asking “I’m bored” every ten minutes. And the TV is always their first choice.
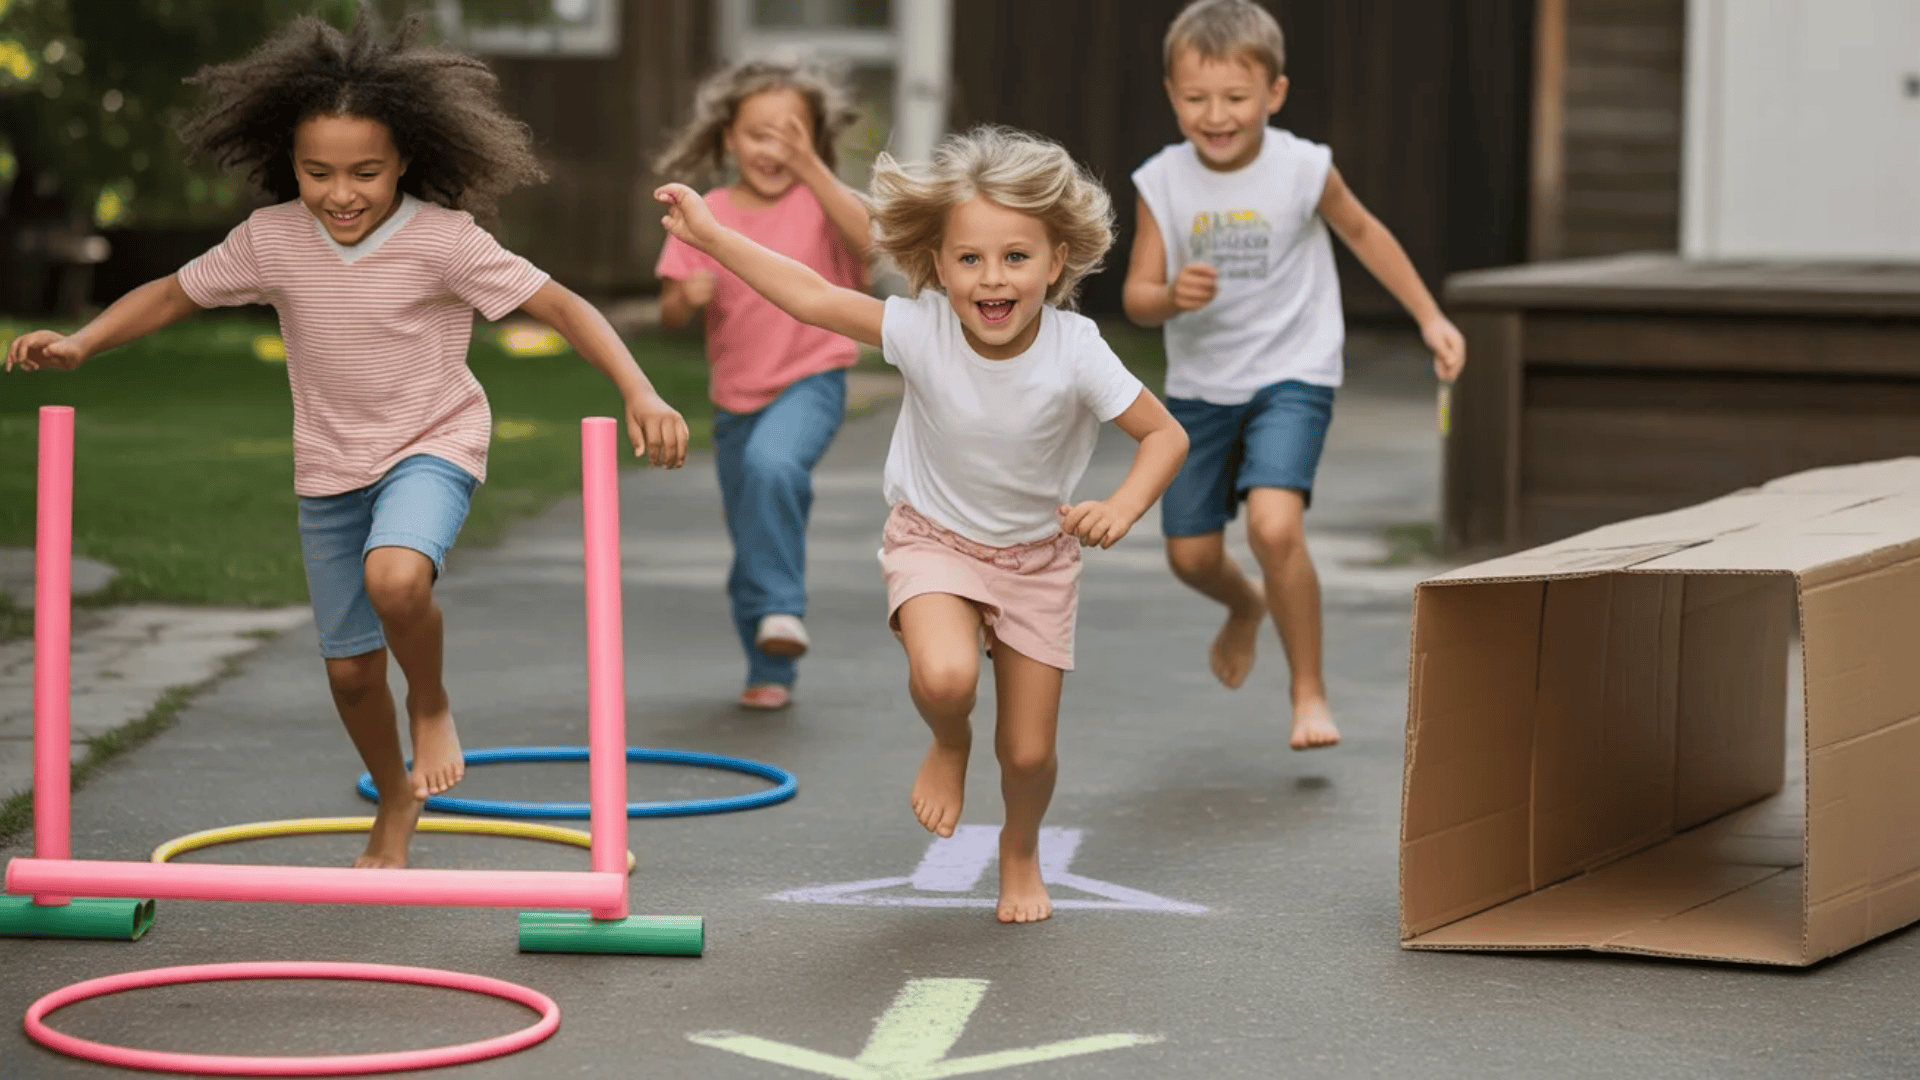
Here’s the fix. Build a DIY obstacle course for kids right in your backyard or living room.
You don’t need fancy equipment. No expensive kits. Just household items you already own. Tape. Pillows. Boxes. Pool noodles. That’s it.
This guide shows you exactly how to set it up. You’ll get station ideas you can build in minutes. Safety tips that actually make sense. And upgrades that keep kids coming back for more.
Your kids will stay active for hours. They’ll build strength and coordination. And you’ll finally hear “Can we go outside?” instead of “Can I watch TV?”
Ready? Let’s build.
Before You Start: Space, Supplies, and Safety (All in One)
Let’s handle the boring stuff first.
1. Pick Your Space
You need 15 to 20 feet of clear area. Living room for rainy days. Hallway for a straight race path. Driveway for chalk games. Backyard for maximum space. Walk through once. Move anything breakable or sharp. Done.
2. Grab These Supplies
Raid your home first. Painter’s tape. Sidewalk chalk. Pool noodles. Hula hoops. Cardboard boxes. Pillows. Jump ropes. Blankets. Plastic cones or cups.
Total cost: $0 to $15.
Pro Tip: Keep everything in one bin. Next setup takes 5 minutes instead of 30.
3. Make It Safe
Clear, sharp objects. Pad jumps over 6 inches with blankets or mats. One kid per station prevents collisions. Stay close for little ones. Give older kids space once they know the rules.
Test it yourself first. Seriously. You’ll spot what doesn’t work.
4. How Many Stations?
| Age | Stations | Course Time |
|---|---|---|
| 3-6 years | 6-8 | 2-3 minutes |
| 7-10 years | 10-12 | 4-6 minutes |
| 11+ years | 12-14 | 6-10 minutes |
Space them 5 to 8 feet apart. Kids move faster. No traffic jams.
Key Rule: Start small. Add more stations later. Taking them away feels like punishment.
Now the fun part.
DIY Obstacle Course for Kids
Pick your favorites. Skip what doesn’t fit. Mix them up. The best courses match your space and your kids’ energy levels. You don’t need all 17 stations. Choose 6 for quick setups.
Go for 12 when you have more time. Swap stations weekly to keep things fresh. Kids get bored running the same course every time.
1. Tape Zigzag Balance Walk

Stick painter’s tape to the floor in a zigzag pattern. Make it 8 to 12 feet long. Kids walk the line without stepping off. Their arms go out for balance. They focus on each step.
For younger kids, keep the line mostly straight with gentle curves. Older kids handle sharp turns and loops. Challenge them to walk backwards or sideways. Try it on one foot for the expert level.
The It Factor: Use different colored tape for different difficulty levels. Blue = easy walking. Red = one foot only. Green = backwards. Kids pick their challenge level. This keeps everyone engaged regardless of skill.
Cost: $3 for a roll of tape.
2. Pillow Hop Path

Scatter pillows and cushions on the floor 1 to 2 feet apart. Kids hop from pillow to pillow without touching the ground. The ground is lava. The floor is a shark tank. Whatever story sells it.
Space pillows are closer for little ones. Spread them farther for bigger kids. Mix different pillow sizes to create easy and hard landings. Throw pillows make smaller targets than bed pillows.
The It Factor: Call out colors as kids jump. “Blue! Red! Yellow!” They can only land on the color you shout. This turns a simple hop into a listening and reaction game. Kids love the unpredictability.
Cost: $0 (use what you have).
3. Cardboard Box Tunnel Crawl
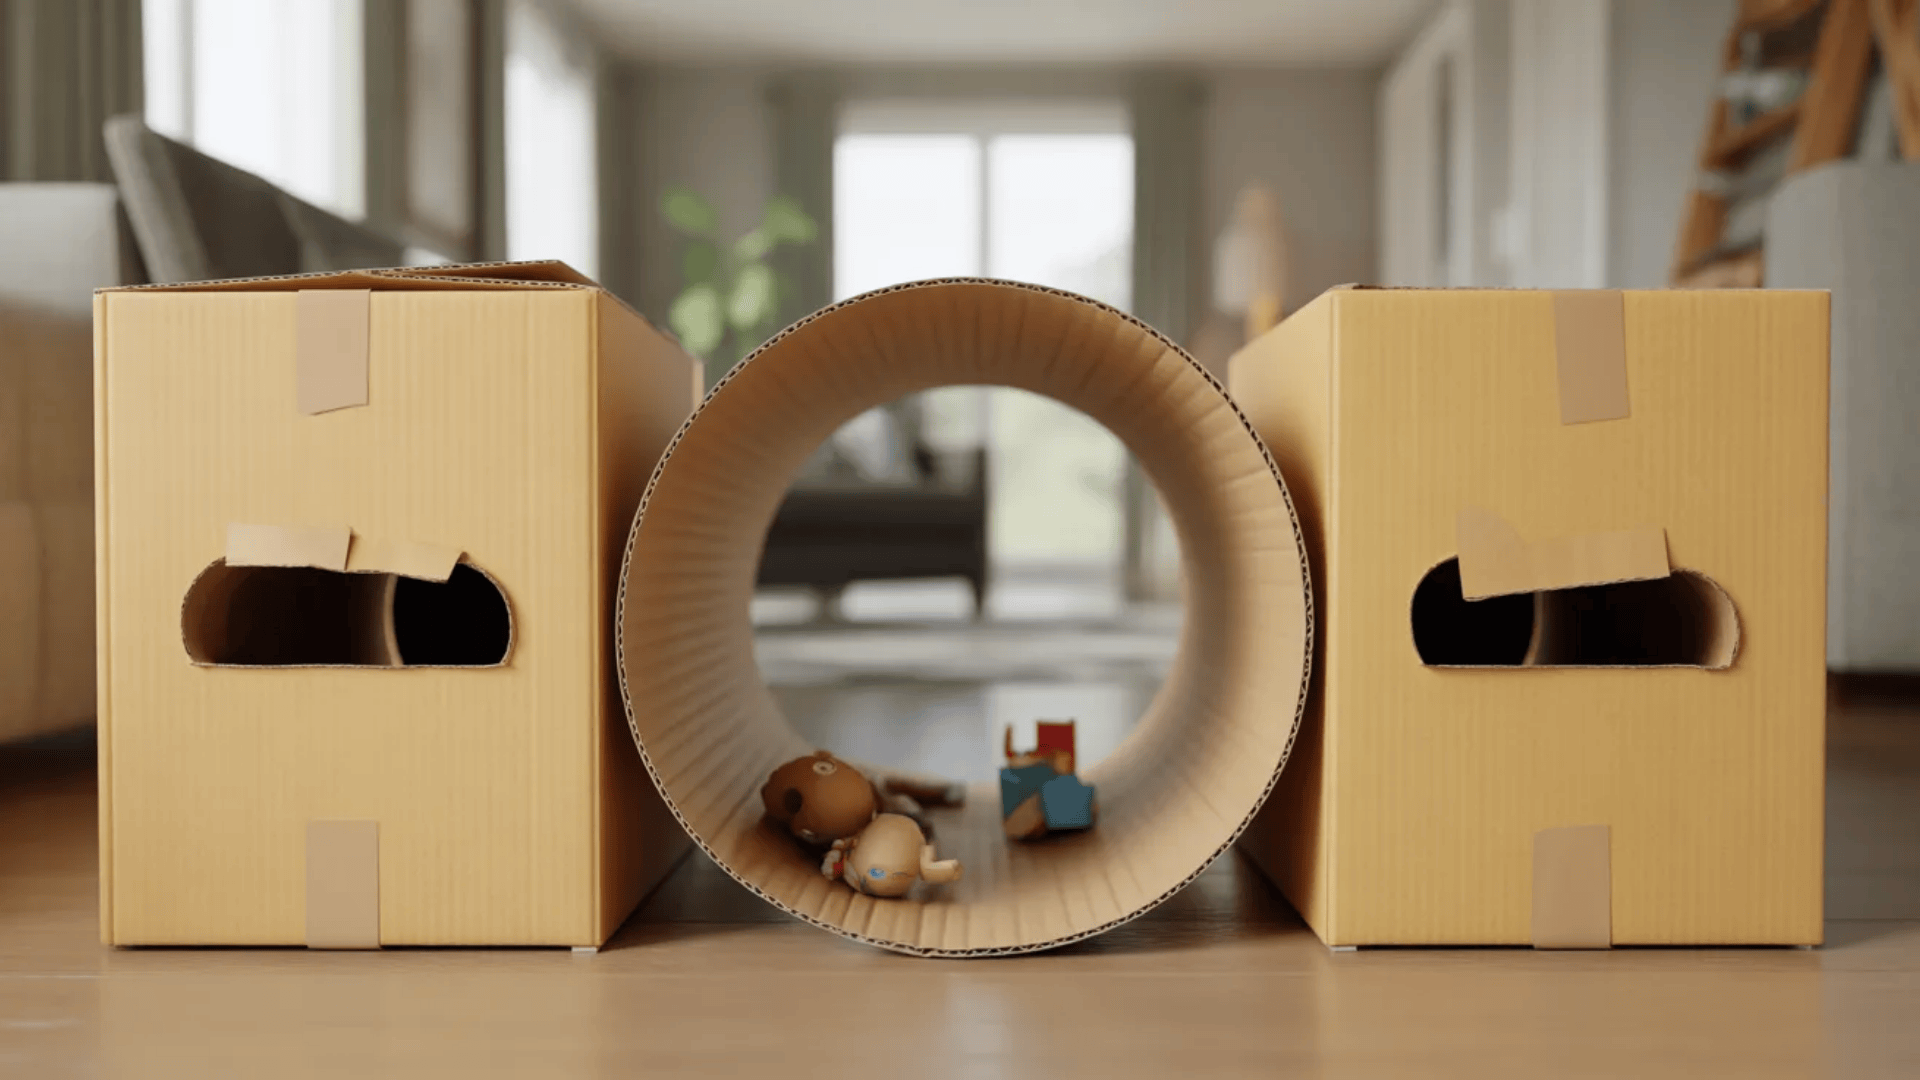
Cut both ends off large cardboard boxes. Line up 2 to 4 boxes to create a tunnel. Tape them together so they don’t shift. Kids crawl through on their bellies or hands and knees.
Use moving boxes or appliance boxes for longer tunnels. Amazon boxes work for smaller kids. Cut windows in the sides for nervous crawlers who don’t like darkness.
The It Factor: Hide small toys or treats inside the tunnel. Kids collect them as they crawl through. Or place glow sticks inside for nighttime courses. The tunnel becomes a treasure hunt instead of just a crawl. Works every time.
Cost: $0 (save boxes from deliveries).
4. Pool Noodle Hurdles
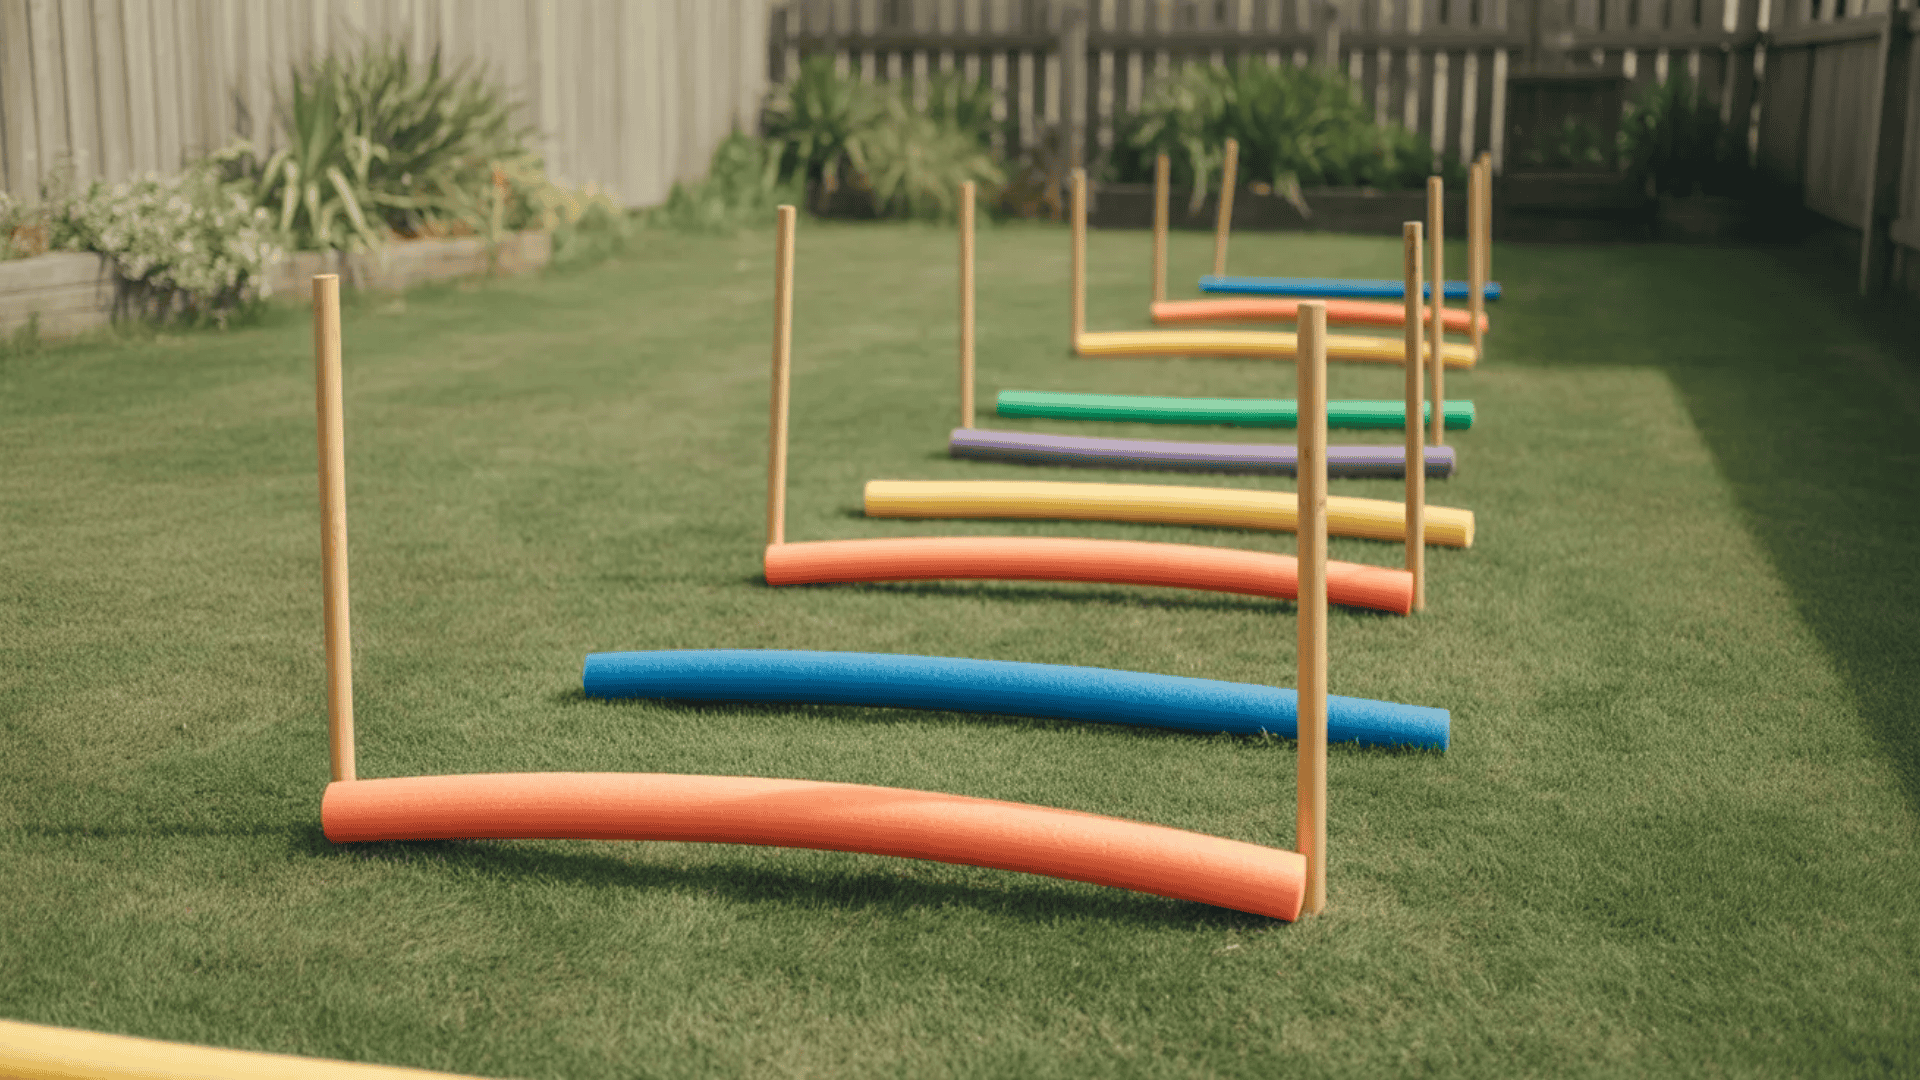
Stick pool noodles upright in the ground using tent stakes or long sticks. Space them 3 to 5 feet apart in a row. Kids jump over each noodle. If you’re indoors, prop noodles between two chairs or weighted buckets.
Set noodles at different heights. Low ones for young kids. Higher ones for athletes. Use different colored noodles for different jump styles. Red = two feet. Blue = one foot. Yellow = sideways hop.
The It Factor: Make it a limbo station instead. Hold or tie noodles horizontally between chairs. Kids go under instead of over. Halfway through, switch it up. Three jumps, then one limbo. Keeps them guessing.
Cost: $5 for pool noodles at dollar stores.
5. Hula Hoop Hopscotch Rings
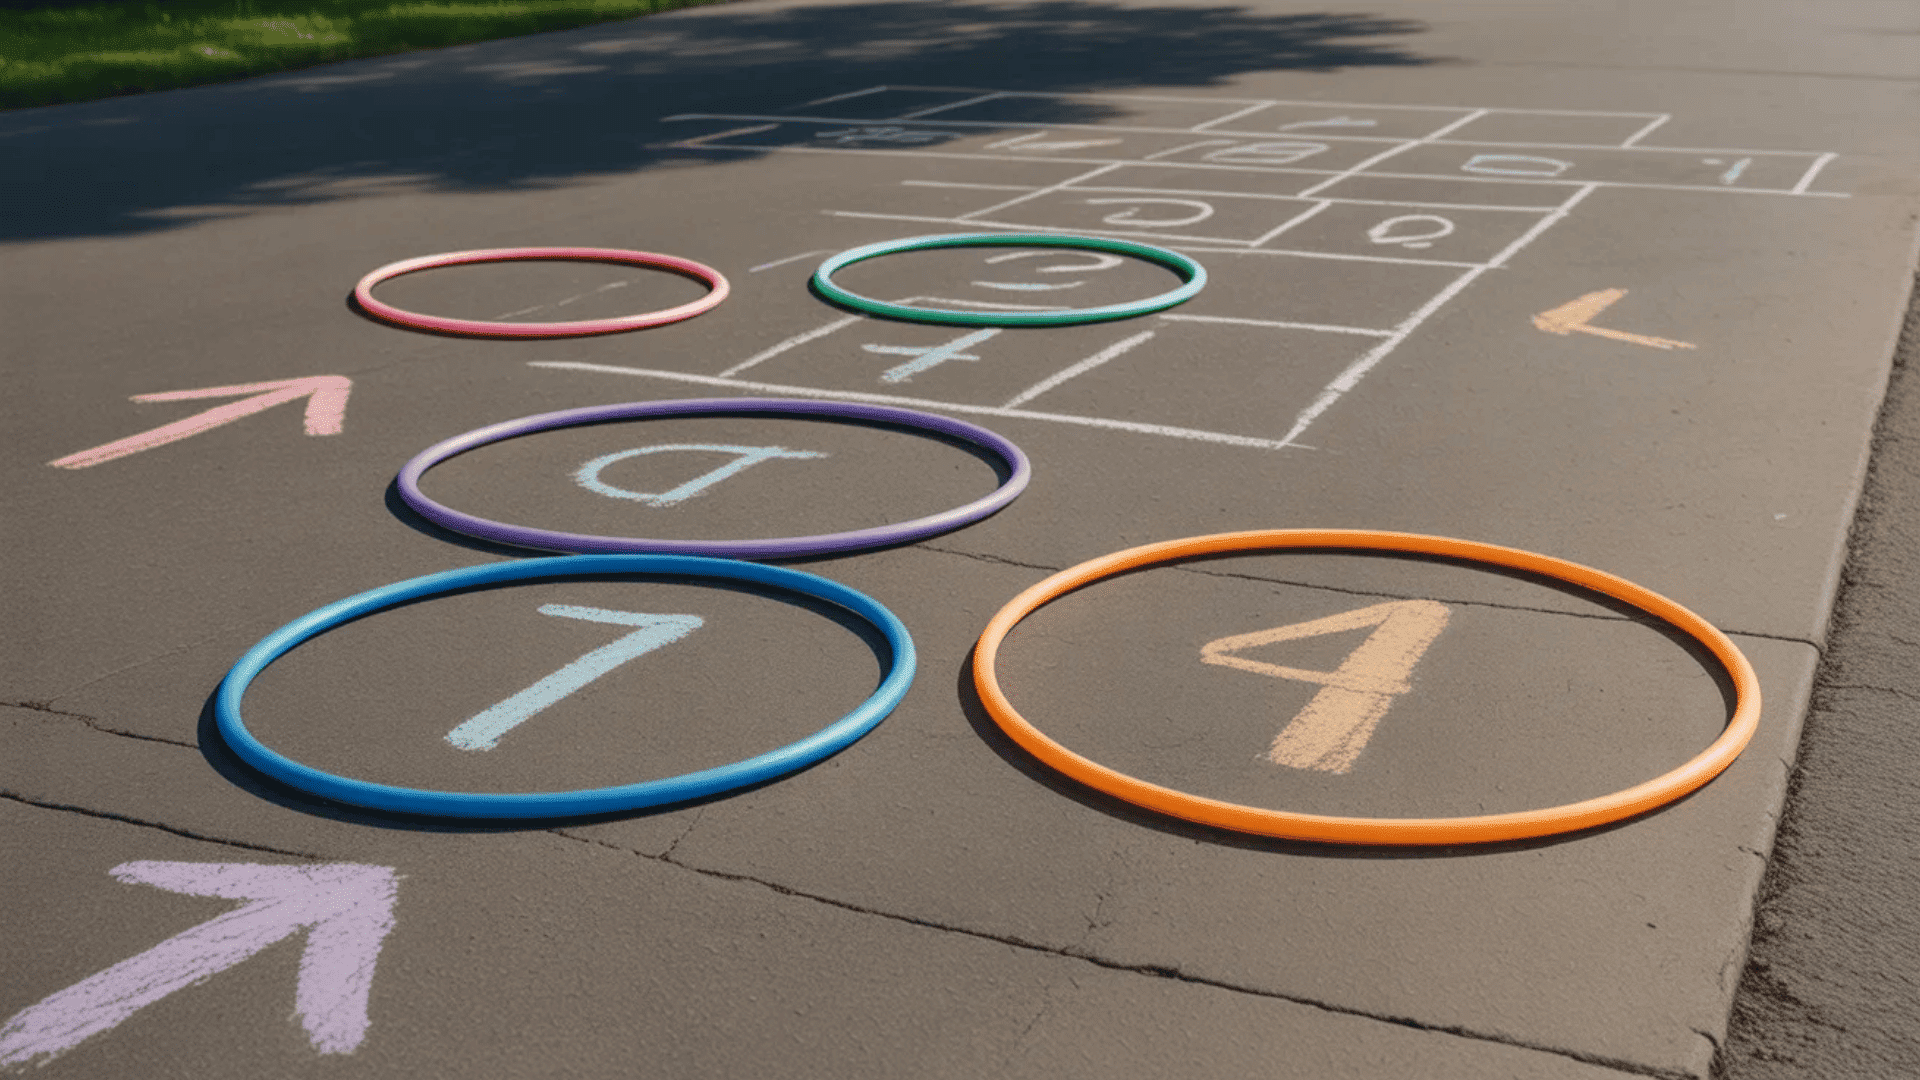
Lay hula hoops flat on the ground in a pattern. Single hoops for one-foot landings. Two hoops side-by-side for two-foot jumps. Kids hop through the pattern like hopscotch.
Create straight lines for beginners. Make zigzag patterns for intermediate kids. Try circles or figure-eights for advanced hoppers. Use 4 to 8 hoops, depending on space.
The It Factor: Number each hoop with chalk or paper. Kids hop in order from 1 to 8. Then backwards from 8 to 1. Or call out random numbers, and they jump to that hoop. This adds math practice without them realizing it.
Cost: $8 for a pack of hoops.
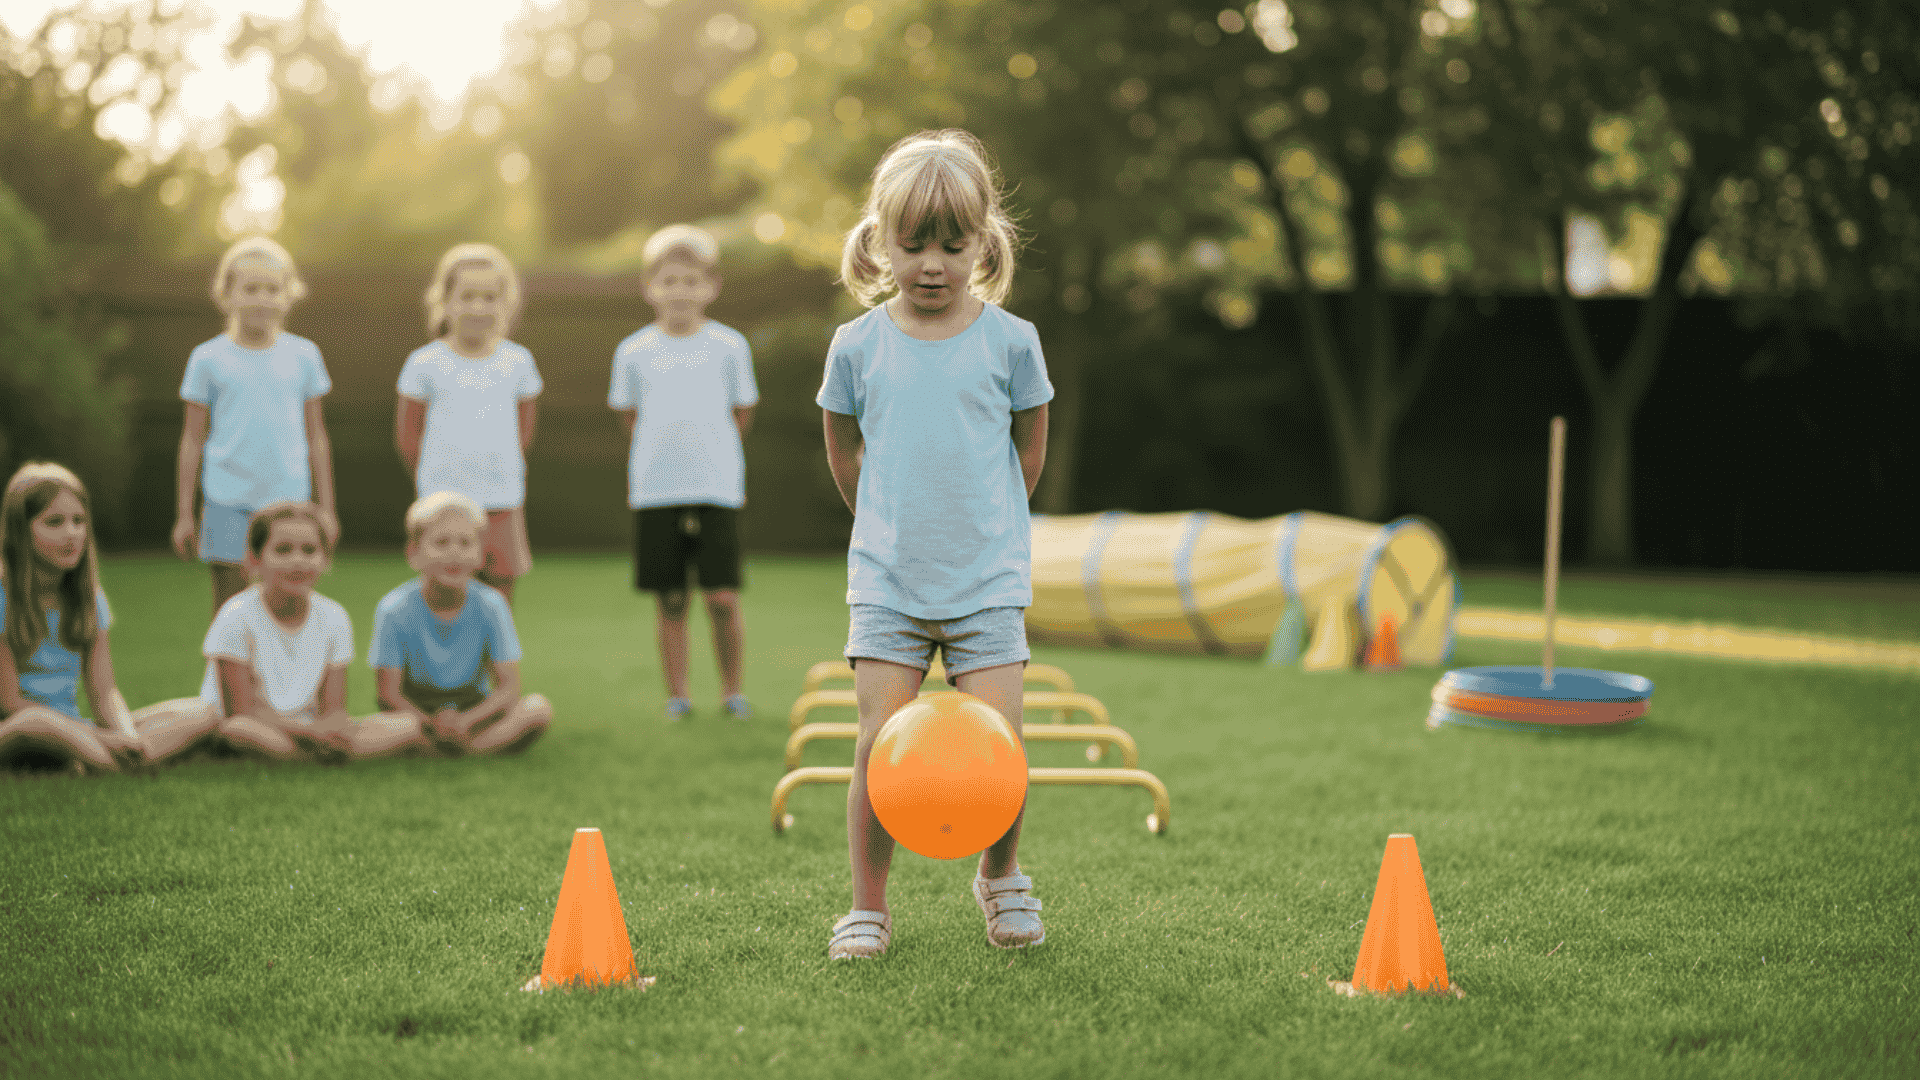
6. Cone Weave Sprint

Set up traffic cones or plastic cups in a straight line. Space them 2 to 3 feet apart. Kids weave in and out as fast as possible. This builds agility and footwork.
Use 5 to 8 markers for a good weaving challenge. Plastic cups work if you don’t have cones. Fill them with sand so they don’t tip over. Even water bottles work in a pinch.
The It Factor: Make every other cone a different color. Kids only touch blue cones on the way down. Only red cones on the way back. Or have them dribble a ball while weaving. Basketball. Soccer. Tennis ball. Whatever you have works.
Cost: $10 for cones or $0 for cups.
7. Jump Rope Station

Lay a jump rope on the ground as a line to jump over. Or have kids do 10 actual jump rope jumps before moving on. Both work. One tests broad jumping. The other tests coordination and counting.
For younger kids, make the rope their starting line for a standing long jump. See how far they can leap. For older kids, challenge them to jump rope while moving forward to the next station.
The It Factor: Tie the rope between two trees or chairs at knee height. Kids jump over it like a hurdle. Raise it higher each round. Or lower it for limbo style. One rope. Four different challenges. Maximum use from minimum supplies.
Cost: $5 for a jump rope.
8. Animal Walk Lane (Bear, Crab, Frog)
Mark a 10-foot lane with tape or chalk. Kids pick an animal and move like that animal. Bear crawl on hands and feet. Crab walk backwards on hands and feet with belly up. Frog jumps in a squat.
Assign one animal per round. Or let kids choose their favorite. Add more animals: penguin waddle, snake slither, kangaroo hop, seal drag. The sillier the better.
The It Factor: Make it a guessing game. You act out the animal. They copy you. Or they pick an animal secretly, and others guess which one they are. This turns exercise into imagination play. Kids forget they’re working out.
Cost: $0.
9. Laundry Basket Toss Gate

Place a laundry basket 5 to 8 feet away. Give kids 3 to 5 soft balls, bean bags, or rolled-up socks. They toss them into the basket. Get at least 2 to pass this station.
Move the basket closer for little kids. Farther for big kids. Use smaller targets like buckets for extra challenge. Award bonus points for hitting specific colored baskets if you have multiple.
The It Factor: Place the basket behind a chair. Kids toss over the obstacle. Or put the basket on a low table. They toss upward. Or mark point values on the ground with chalk. Landing on the 10-point spot means they toss from farther back. Risk and reward.
Cost: $0 (use what you have).
10. Chair Slalom

Line up 3 to 5 chairs in a row. Space them 3 feet apart. Kids weave around the chairs. First one direction. Then back the other way. This improves turning and spatial awareness.
Use dining chairs, folding chairs, or even stools. Make sure they’re stable and won’t tip. For outdoor courses, use buckets or garden stools instead.
The It Factor: Have kids go around chairs while walking backwards. Or make them balance a bean bag on their head while weaving. Drop it, and they start over. Or crawl under the chairs instead of around them. Same setup. Three difficulty options.
Cost: $0 (use your chairs).
11. Balloon Balance Carry
Kids carry a balloon from point A to point B without using their hands. Balance it on their head. Trap it between their knees. Hold it under their chin. Any method works as long as hands stay behind their back.
Mark the start and end with cones or tape. Make the distance 10 to 15 feet. If the balloon drops, they start over. This teaches body control and patience.
The It Factor: Use a feather instead of a balloon. They blow it to keep it in the air while walking. Or use a plastic egg on a spoon. Or a small stuffed animal balanced on their head. Same concept. Different objects. Keeps it fresh.
Cost: $3 for balloons.
12. String Web Challenge

Tie a string or yarn between two chairs or trees. Crisscross it to create a web pattern. Leave gaps big enough for kids to crawl through. They navigate without touching the string. If they touch it, they start over.
Use 15 to 20 feet of string. Space the gaps based on age. Bigger holes for young kids. Tighter spaces for older kids. Add jingle bells to the string so you hear when someone touches it.
The It Factor: Turn off the lights and use glow-in-the-dark string or add glow sticks. The web glows. Kids crawl through in darkness. Or make it a spy mission. They’re avoiding laser beams. A story makes everything more exciting.
Cost: $2 for a string.
13. Number Target Toss (Paper Plates)

Write numbers on paper plates with a marker. 1, 5, 10, 20. Tape them to the ground or fence. Kids toss bean bags at the plates. Each number equals points. High score wins.
Place higher numbers farther away or make them smaller targets. This adds strategy. Do you go for the easy 1 or risk it for the 20? Give kids 5 tosses total.
The It Factor: Make it educational. Write math problems on plates instead of numbers. Kids solve the problem, then toss at that answer plate. Or use letters. Spell their name by hitting the right letters in order. Learning disguised as play.
Cost: $2 for paper plates.
14. Blanket River Long Jump

Lay a blanket flat on the ground. This is the river. Kids stand at one edge and jump across without landing on the blanket. They leap over the water. Make the blanket 3 to 5 feet wide.
Use beach towels for younger kids. Big comforters for older kids. Or fold the blanket to adjust the width. Mark the landing zone with tape so they know where to aim.
The It Factor: Add stepping stones in the middle. Small pillows or paper plates on the blanket. Kids can land on these if the jump is too far. Or make it a two-part jump. Land on the stone. Then jump again to the other side. Options prevent frustration.
Cost: $0 (use blankets you have).
15. Scooter Board or Towel Pull

Kids sit on a scooter board or a towel. They use their hands to pull themselves forward 10 to 15 feet. This builds arm strength. On smooth floors, towels slide easily. On carpet, use actual scooter boards.
Have kids lie on their stomachs and army crawl while on the board. Or sit and scoot using just their feet. Three ways to move. One simple station.
The It Factor: Give them a rope to pull themselves along. Tie it between two trees or tape it on the ground. They hand-over-hand pull to move forward. Or have a parent slowly pull the rope while the kid holds on. Feels like waterskiing on land.
Cost: $15 for scooter board or $0 for towels.
16. Nature Step Stones (Logs, Rocks, Chalk Circles)

Use what nature provides. Tree stumps make great stepping platforms. Large rocks become balance stones. No natural items? Draw circles with sidewalk chalk. Kids step from stone to stone without touching the ground in between.
Space stones 1 to 2 feet apart. Closer for little kids. Wider gaps for athletes. Mix different heights if using real logs or rocks. Flat chalk circles all work the same.
The It Factor: Make it a memory game. Color each stone or circle differently. Call out the pattern: “Blue, red, yellow, green.” Kids step in that exact order. Get it wrong, and they start over. Or blindfold them, and you call out directions. “Left stone. Forward. Right stone.”
Cost: $0 for nature items or $3 for chalk.
17. Finish Line Dash + Victory Pose

Mark the finish line with bright tape, a flag, or a ribbon stretched between chairs. Kids sprint to it as fast as possible. When they cross, they strike their best victory pose. Arms up. Power stance. Whatever feels like winning.
Make the final dash 15 to 20 feet. This lets them really run. Time for each kid, if you want. Or just celebrate everyone who finishes. Ring a bell. Play victory music. Make it feel special.
The It Factor: Take photos of their victory poses. Print them and hang them on the fridge. Or create a winner’s podium with cardboard boxes. First place stands on the tallest. Everyone gets a turn being first. Or hand out homemade medals made from cardboard and ribbon. The ceremony matters as much as the course.
Cost: $0 to $5.
Make It More Exciting (The “It Factor” Upgrades)
Your course is built. Kids love it. But after three runs, they’re asking “what else?”
Here’s how to turn a good course into one they can’t stop talking about.
1. Timer Mode: Race Against the Clock
Add a timer and everything changes. Use your phone’s stopwatch. A kitchen timer. A sand timer for little kids.
Run the course once for practice. Then time the real attempt. Kids race their own best time. Not their sibling’s. Their own. Write times on a whiteboard. They see improvement over the days. A kid who finishes in 4 minutes today wants to hit 3:45 tomorrow.
2. Mission Cards: Add a Story
Turn the course into an actual mission. Write simple instructions on index cards.
“Rescue the teddy bear from the tunnel.” “Deliver this secret message without dropping it.” “Collect 5 hidden toy cars.” “You’re a mail carrier – pick up letters at stations 1, 3, and 5.”
Same course. New story. Feels completely different.
Pro Tip: Let kids write mission cards for each other. They’re more invested when they build the game.
3. Glow Obstacle Course: Play After Dark
Crack glow sticks. Tape them to cones, hoops, and hurdles. Turn off the lights. Everything feels different.
Use neon chalk to mark paths. Give kids flashlights as their “power beam.” Or glow stick bracelets to mark where they step. Only try this with courses kids already know well. Darkness plus new obstacles equals trouble.
4. Music Challenge: Move When It Plays
Play music while the kids run. Music stops. They freeze. Stay frozen until it starts again.
Or try station switching. Each song change means the next station. Kids don’t control the pace. Music does. Fast songs mean hurry. Slow songs mean careful.
Parent hack: Use songs they love. They’ll run 20 times just to hear the favorites.
5. Score Tokens: Collect As You Go
Place tokens at each station. Poker chips. Buttons. Stickers. Stamps on their hand.
| Token Type | Why It Works | Cost |
|---|---|---|
| Stickers | Kids love them, see progress | $2 |
| Stamps on hand | No lost pieces, visible all day | $5 |
| Poker chips | Count at the end, reusable | $3 |
| Clothespins | Clip to the shirt as they go | $2 |
At the finish, they trade tokens for prizes. Five equals a popsicle. Ten equals picking dinner. Twenty equals staying up 15 minutes late.
Points make kids finish every station. No more skipping hard ones.
Mix these upgrades. Glow sticks plus missions. Timer plus music. Tokens plus story cards. Each combination feels brand new.
Your backyard just became the most popular spot in the neighborhood.
Conclusion
You just learned how to build a DIY obstacle course for kids using items you already own. Tape, pillows, boxes, and pool noodles become challenges your kids will run repeatedly.
Start small. See what works. Add more next week. The best courses grow over time. Pick a few stations today. Build bigger tomorrow.
Choose obstacles that match your space and your kids’ ages. Mix balance challenges with jumping stations. Keep traffic flowing and kids moving.
Want to make it unforgettable? Try a mission card challenge this weekend. Or wait until dark and break out the glow sticks.
Now stop reading and start building. Your kids are waiting.
Which station will you set up first? Drop a comment below and tell us your favorite obstacle idea.